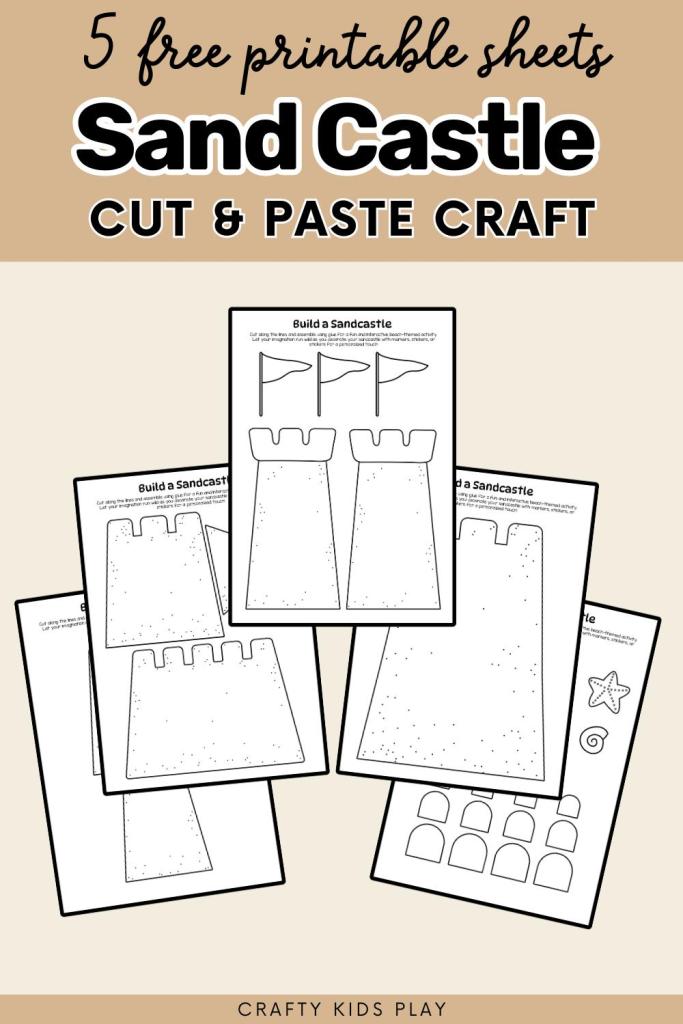
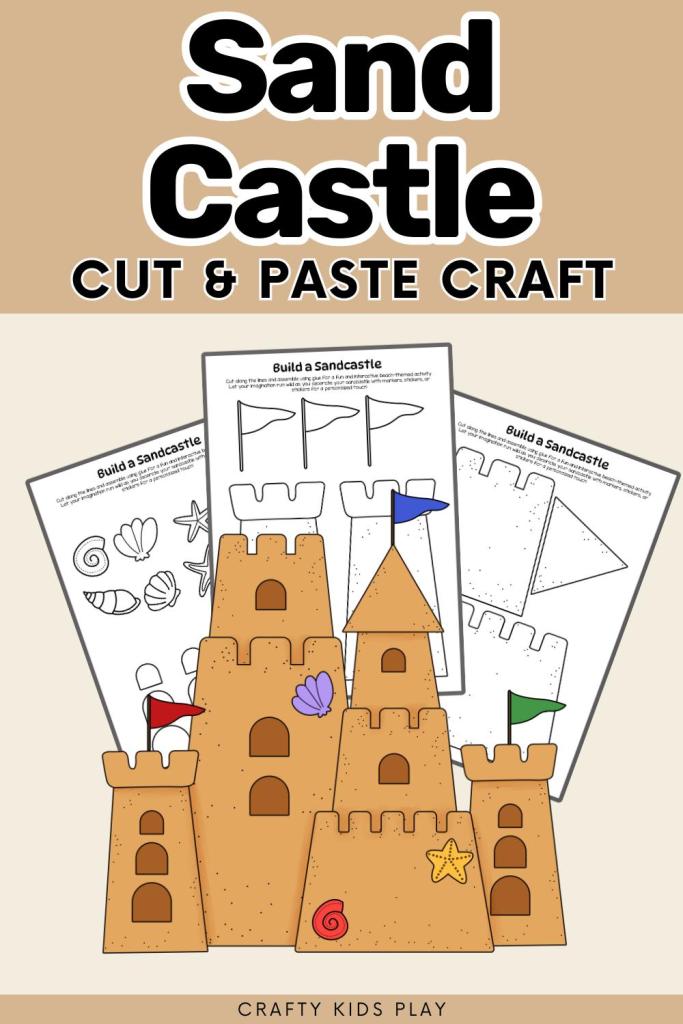
Looking for some summertime fun without the mess of sand? Or do your kids want to build their own sandcastle, but you don’t live near the beach? Use our free printable sandcastle template to make an awesome beach craft with your kids.
With just a few simple materials and our easy-to-follow instructions, you and your kids can create an awesome beach craft. Let’s get started!
Table of Contents
Benefits Of This Printable Sand Castle Paper Craft
Materials Needed
How To Use This Sand Castle Cut and Paste Craft
Free Sand Castle Cut and Paste Craft Download
Final Thoughts
Benefits Of This Printable Sand Castle Paper Craft
Fine Motor Skills Development:
This printable sand castle paper craft encourages children to use their hands and fingers in precise movements, aiding in developing fine motor skills. As they cut, fold, and glue the pieces together, they practice their coordination and dexterity.
Creativity and Self-Expression:
With this craft template, children have the opportunity to unleash their creativity and express themselves through art. They can customize their sand castle with different colors, patterns, and embellishments, allowing them to explore their imagination and develop their own unique designs.
Focus and Concentration:
Engaging in a hands-on activity like this sand castle paper craft requires children to concentrate and pay attention to detail. As they follow the instructions and manipulate the paper pieces, they practice focusing their attention on the task at hand, improving their ability to stay focused for extended periods.
Bonding and Connection:
Crafting together can be a wonderful bonding experience for families or groups of friends. This printable sand castle paper craft provides an opportunity for children and adults to come together, collaborate, and share quality time with the people they care about.
Materials Needed
Free printable sand castle templates
Markers, colored pencils or wax crayons
Printer and paper
Scissors
Glue stick
How To Use This Sand Castle Cut and Paste Craft
Step 1)
Print off all of the Sand Castle Craft sheets from the free printable templates in this article and gather your supplies.
Step 2)
Color the sand castles with wax crayons, markers or pencil crayons.
Step 3)
Cut out the sand castle template pieces.
Step 4)
Glue the sand castle pieces together to make your own masterpiece.
Free Sand Castle Cut and Paste Craft Download
Use the button below the next image to download your own copy of these Sand Castle templates.
These free printable templates are for your own personal use only, not for commercial use or for resale.
Sand-Castle-CraftsDownload
Final Thoughts
This sandcastle craft offers a fun way to enhance any beach-themed learning you’re doing with your kids and it’s a great activity for a beach party! Its simplicity makes it accessible for children of various ages. Older kids should be able to manage completely on their own while younger kids should use safety scissors with adult supervision.
4th of July Playdough Mats (10 Free Printable Sheets)
April 28, 2024
No Comments
Use these 10 free printable Fourth of July Playdough Mats for some fine motor skills…
Read More
Mermaid Paper Plate Puppet Craft (Free Template)
April 18, 2024
No Comments
Use our free printable template and make your own paper plate craft with a popsicle…
Read More
30+ Fun Summer Handprint Crafts for Kids
March 21, 2024
No Comments
Check out these amazing and fun summer handprint crafts for kids to keep you busy…
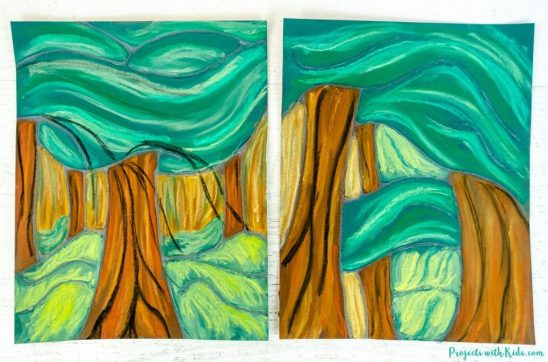
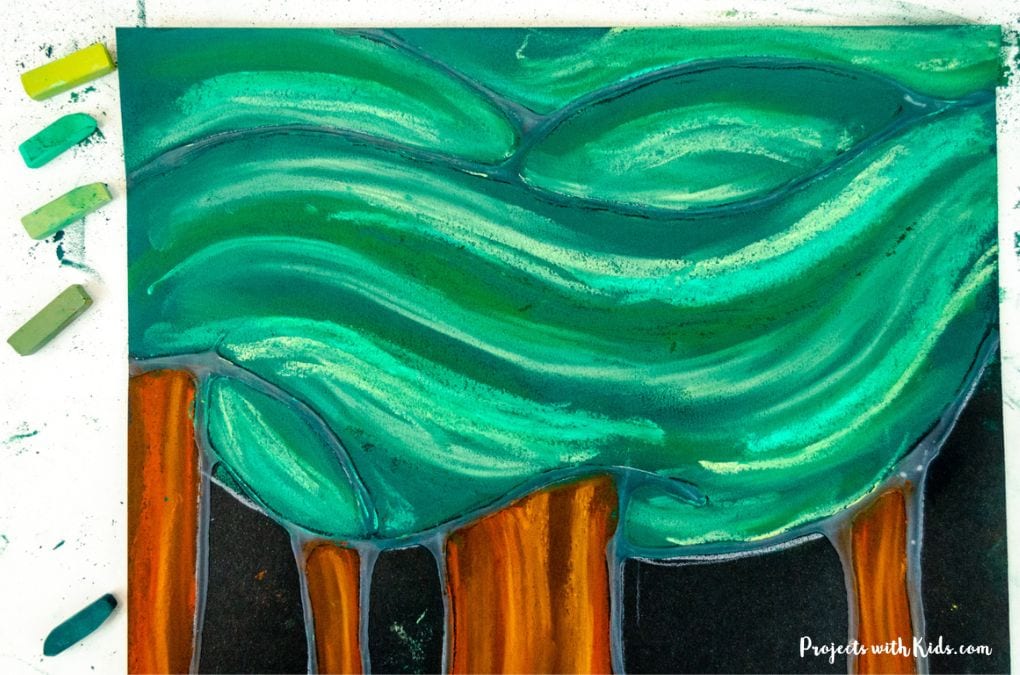
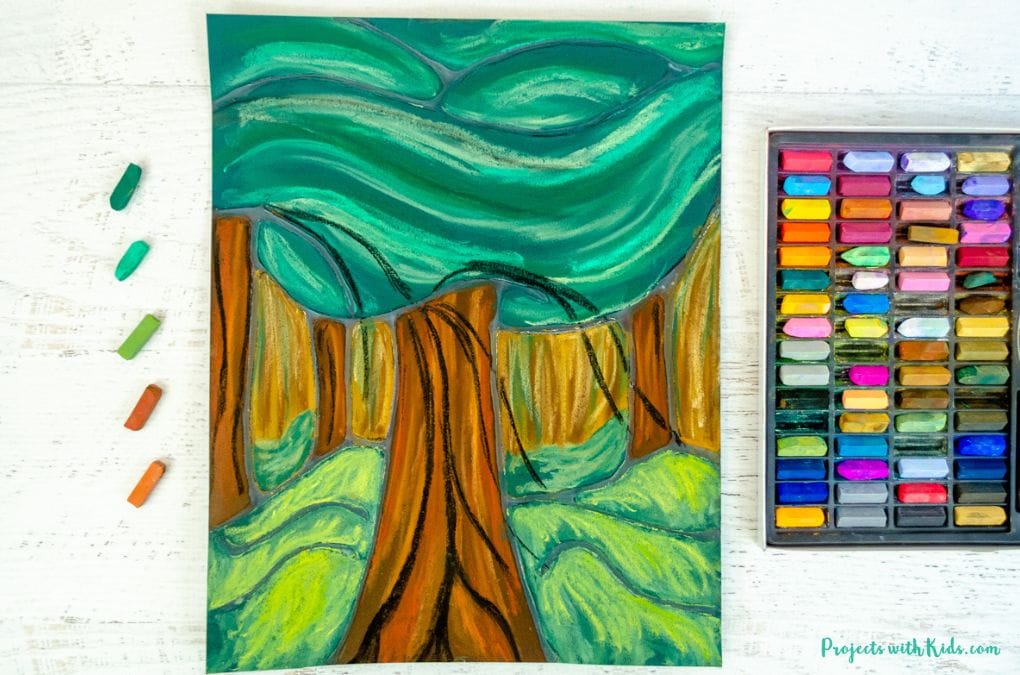
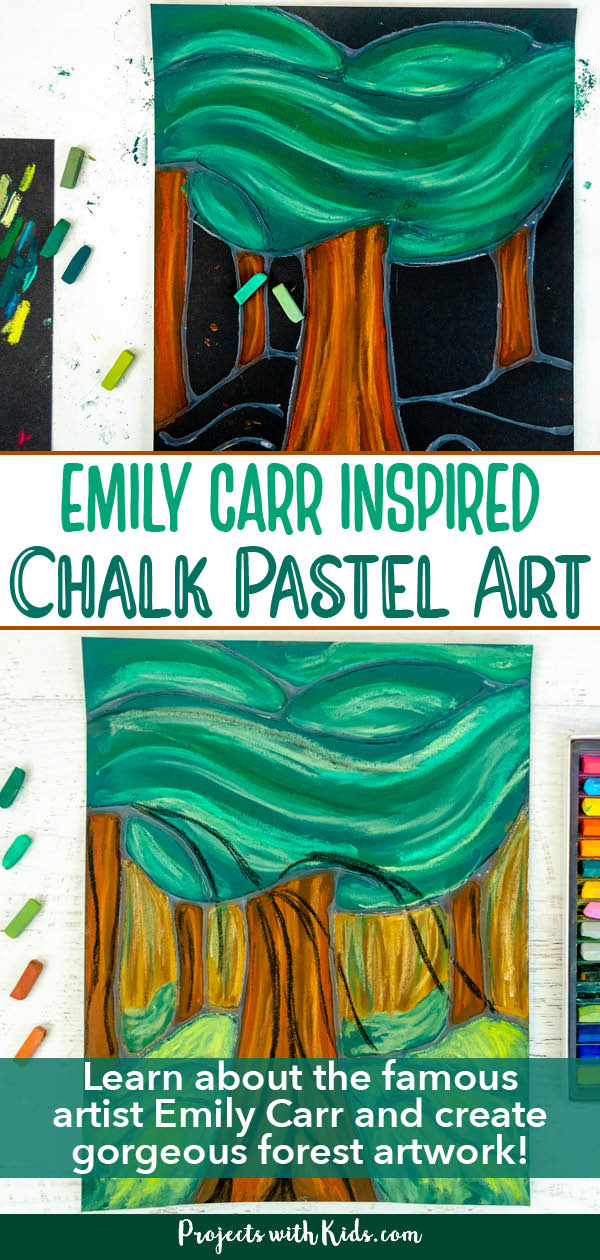
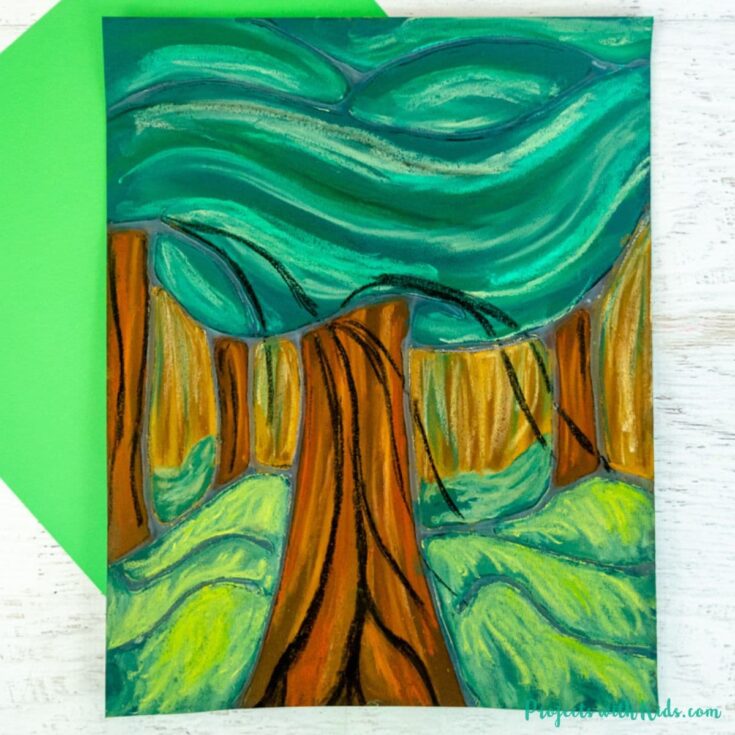
Learn about the famous Canadian artist Emily Carr and create a gorgeous Emily Carr inspired art project! Use bold chalk pastels on black paper to create a vibrant forest scene.
Using white glue and chalk pastels together is a fun technique that kids love! The glue acts as a resist to the pastels and also gives the project some dimension and texture.
Chalk pastels are so fun for kids to explore! Take a look at my collection of chalk pastel art for more creative ideas kids will love.
For more famous artist project ideas take a look at this Georgia O’Keeffe poppy art that also uses a chalk pastel and glue resist technique! Try action art and learn about Jackson Pollock with this four-season splatter painting art.
Learn about Emily Carr
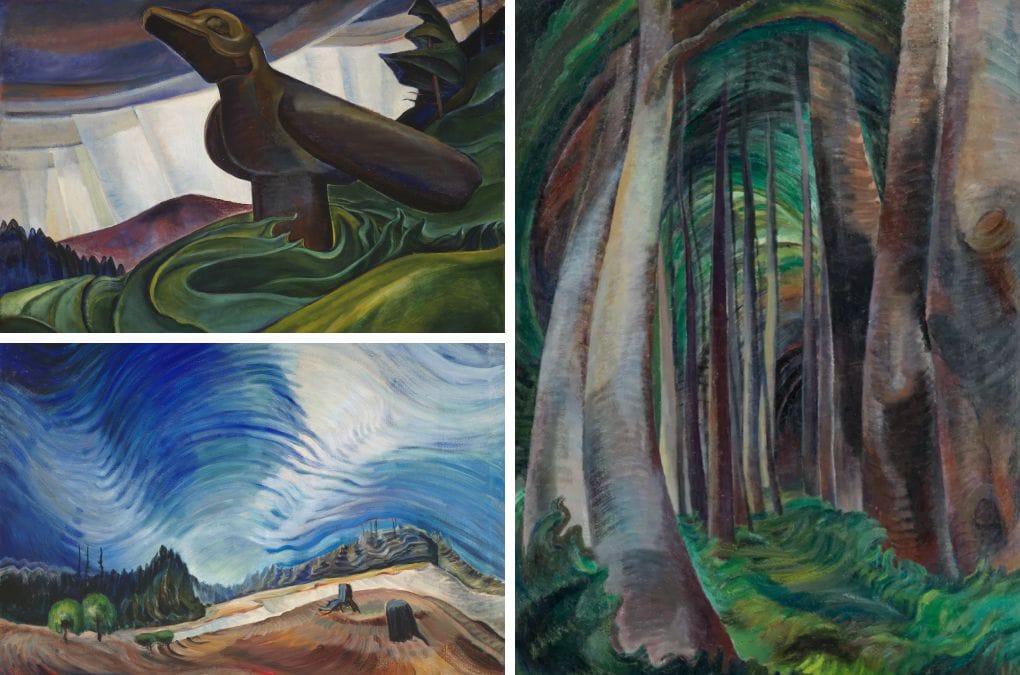
Emily Carr was a wonderful artist from western Canada who was inspired to paint pictures of the beautiful forests and landscapes around her. She painted tall trees, vibrant forests, and even totem poles!
Emily loved using bright colors like greens, blues, and earthy browns in her paintings.
When Emily painted, she didn’t just copy what she saw exactly. Instead, she used her imagination to make the scenes more lively and interesting. Sometimes, she made the trees and forests look like they were dancing or moving in the wind!
Helpful Links About Emily Carr
Here is a great site for kids to learn all about Emily Carr’s life and art on Kiddle!
This page on WikiArt shows pictures of some of her amazing artwork.
Here is a short YouTube video from the CBC on Emily Carr and her paintings.
Books About Emily Carr
This post contains affiliate links. As an Amazon Associate, I earn from qualifying purchases. If you would like more information please review my privacy & disclosure policy.
There are so many great books kids can look at to learn about Emily Carr and her life and art!
Emily Carr: At the Edge of the World is a great book for kids to learn about Emily Carr’s life and art! Some illustrations depict different scenes from her life and beautiful color pictures of her paintings! We have this book and love it!
Four Pictures by Emily Carr depicts her life through four of her paintings in a graphic novel style! This is a great book for older kids and tweens.
The Art Room: Drawing and Painting with Emily Carr is written in a story-poem format, talks about Emily Carr’s life and art, and has beautiful illustrations. This is a great book for younger kids!
Create your own Emily Carr inspired art project
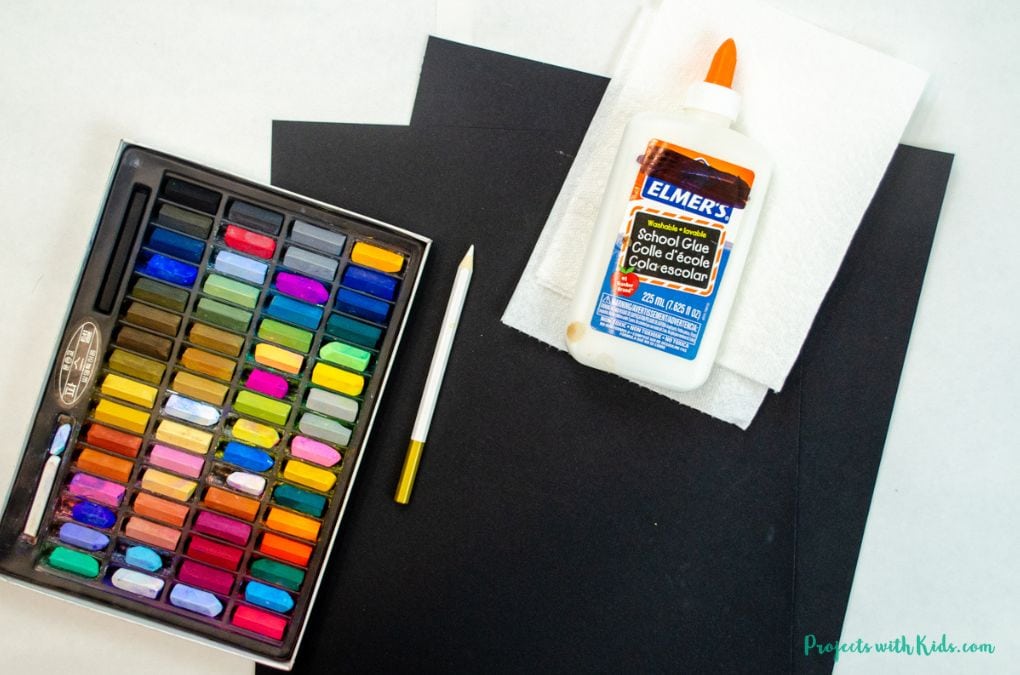
Supplies
Chalk pastels
Black drawing paper
White glue
Pencil and eraser
White pencil crayon
Paper towels
TIPS FOR WORKING WITH CHALK PASTELS
Chalk pastels can be messy (but so fun!). There are a few things you can do to help keep some of the mess contained:
Put newspaper down on desks or tables.
Put your project on a tray or a shallow cardboard box which will keep most of the mess inside the tray.
You can try doing your project outside.
Have lots of paper towels handy.
Once you are done with your project (or even halfway through if it gets really dusty), take it outside to gently blow or shake off the excess dust.
If you are using chalk pastels in the classroom and the kids are ready to take their artwork home, simply place the art between some newspaper to keep it from smudging and for easy transport.
Instructions for your chalk pastel art project
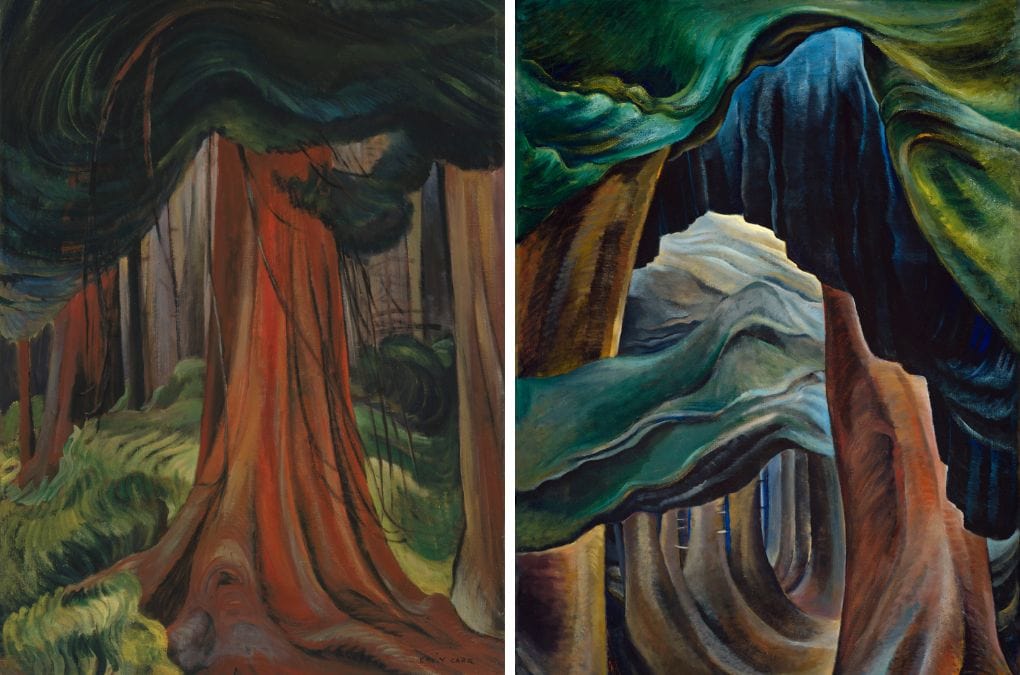
1. For this project have kids look at some of Emily Carr’s forest paintings. The paintings that were the inspiration for the tutorial below are “Red Cedar”, 1931, and “Forest, British Columbia”, 1931-32.
Emily Carr painted many forests and trees. Have kids take a look at these paintings and choose one as their inspiration to make their artwork, or follow along with my photos below.
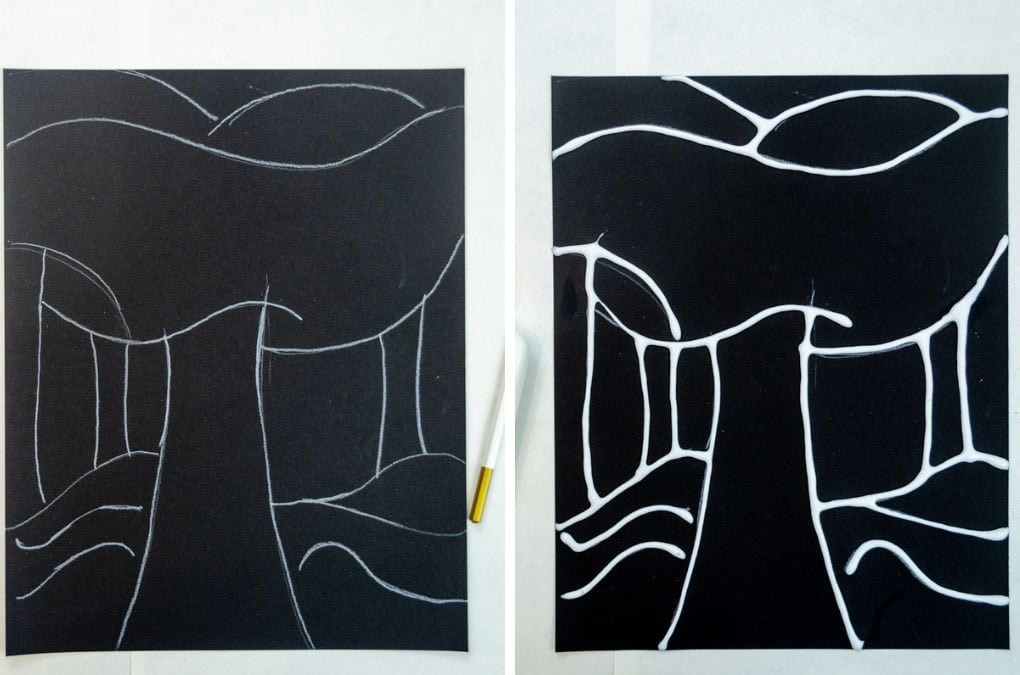
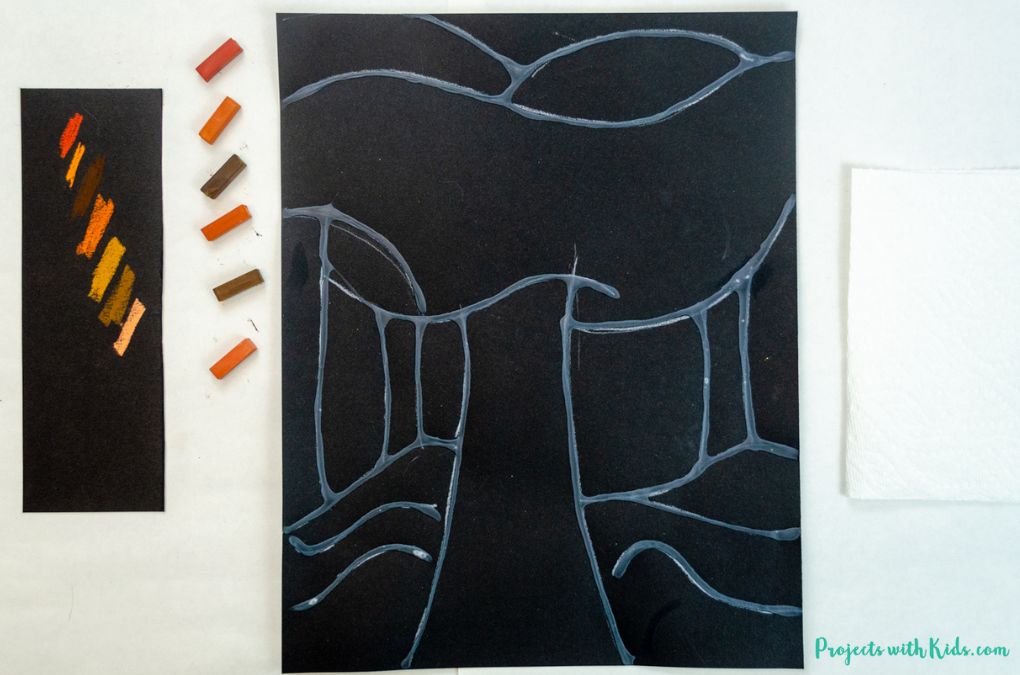
Start with black paper. I used black drawing paper, you could try and use black construction paper but make sure to do a test first to see how it holds the glue and pastels.
Use a pencil to lightly draw in the trees and grass, using simple shapes. Once kids are happy with how their drawing looks, they can trace over it with a white pencil crayon to make it easier to see.
2. Once you have finished your drawing, carefully outline your pencil lines with white glue. The glue will act as a barrier to the chalk pastels and help to keep all the segments separate.
Let this completely dry on a flat surface, I usually like to let everything dry overnight.
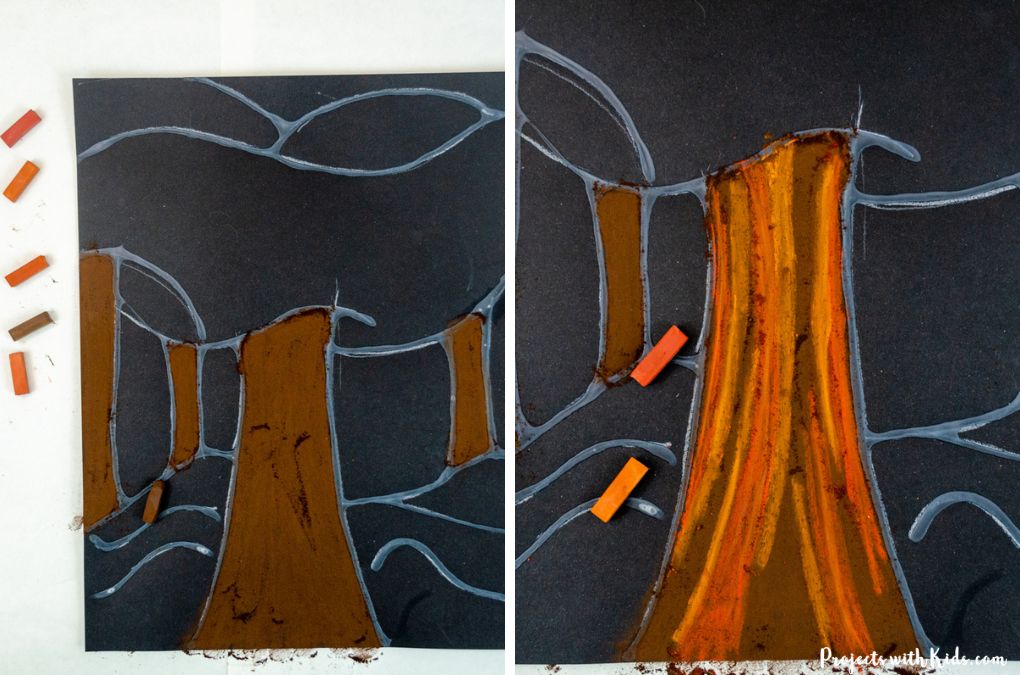
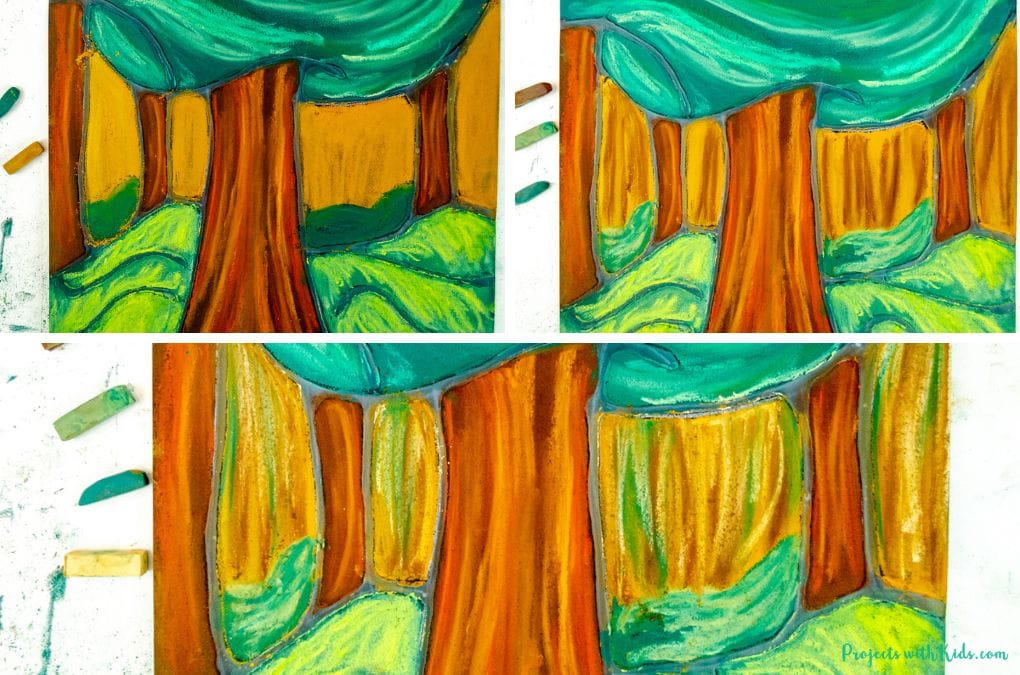
3. Choose the chalk pastel colors for the tree trunks. You want to choose at least three colors: dark, medium, and light. There are quite a few reddish tones to the tree trunks, so have kids think about the colors and shades they choose.
Start with the darkest brown color and color in all the tree trunks.
Layer the other two colors on top, being careful not to cover up all the dark brown. Look at the way the colors on the tree trunks are painted in Emily Carr’s paintings, she uses curved lines and different shades for each one.
For more details on different pastel techniques that kids can try, take a look at these 5 essential chalk pastel techniques for beginners.
Continue layering on the different colors of brown for the tree trunks. Try using your index finger to gently blend some of the colors together creating a soft texture.
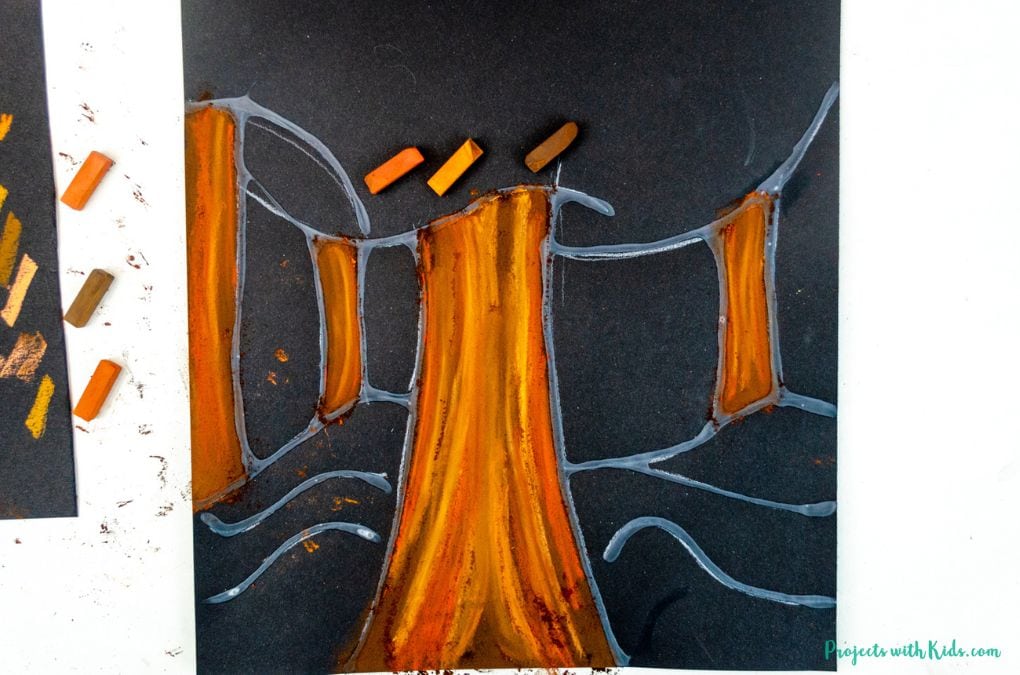
Taking the lightest color and drawing a few simple lines to highlight the tree trunks will really add depth and make them stand out.
Once kids are happy with how the tree trunks look, it’s time to move on to the branches.
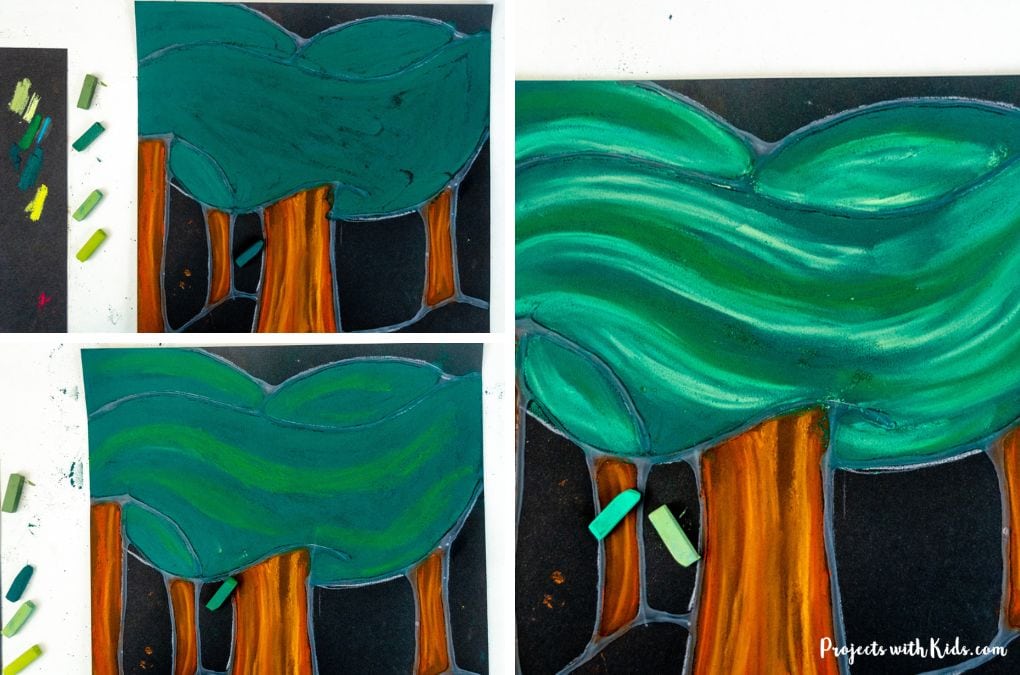
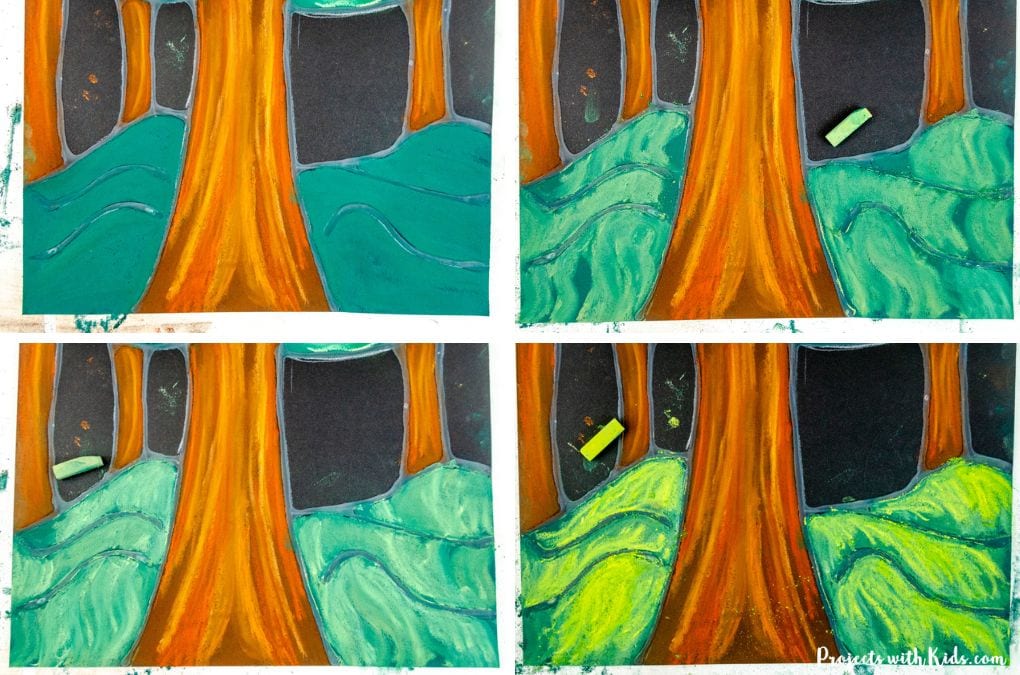
4. Choose the shades of green for the tree branches. Depending on how many shades of green are available, kids can choose three to five shades. Again, you want darker shades, medium tones, and at least one very light shade of green for highlights.
Start by coloring in all the areas with branches a dark green. Use the medium shades to layer on top. If you look at Emily Carr’s paintings, she uses sweeping brushstrokes in the branches to suggest movement and give a sense of energy.
Have kids think about drawing and layering on their colors in the same way, sweeping strokes with chalk pastels to show movement.
Continue to draw and layer on the different shades of green, using your index finger to gently blend some of the colors together.
Draw some highlights on the branches with the lightest green color to finish off the branches.
5. Start the grass the same way you did the branches. Draw the grass area in with the darkest green, layering lighter shades on top.
In Emily Carr’s paintings “Red Cedar” and “Forest, British Columbia”, you can see the different types of brushstrokes she used for the grass area. They look wavey like they are swaying in the breeze.
Have kids think about drawing the chalk pastels in this way, to create a wavy pattern. This will help to distinguish the branches from the grass and add more texture to their artwork.
Continue drawing in the grass area, layering and blending the chalk pastels together. For the lightest color, leave some areas un-blended.
You can see in my example photos I used a yellow/green color for the grass highlights.
6. To fill in the background, use a medium/light brown color to color everything in. Draw and blend shades of brown and green on top to create a soft background that doesn’t stand out too much.
You want the trees and grass in the foreground to be the focus of the artwork.
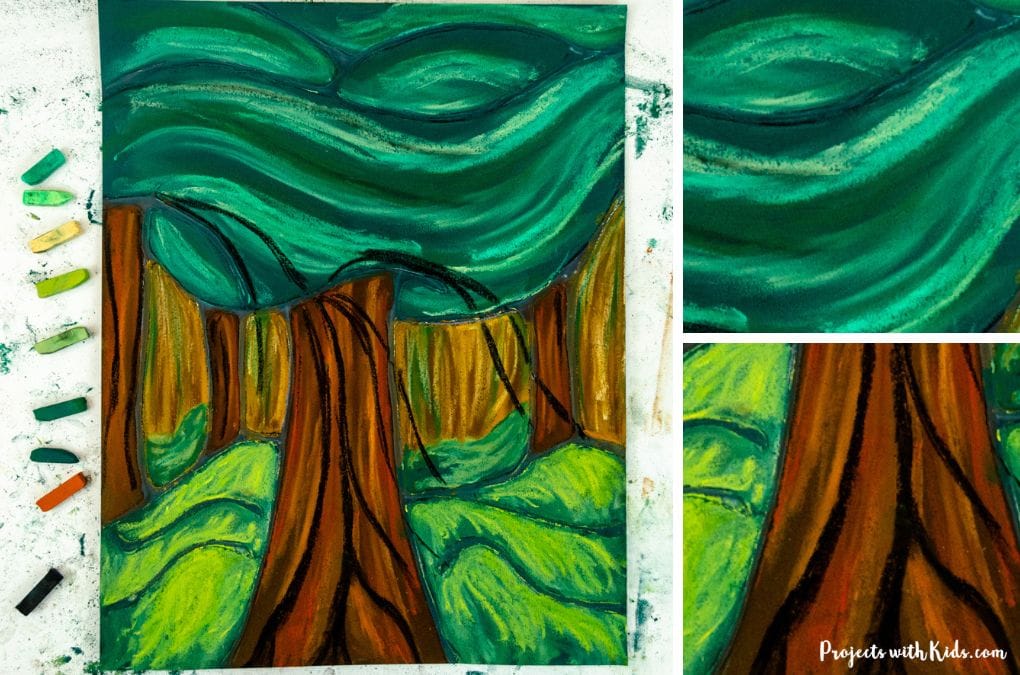
7. For the final touch, take a black chalk pastel and draw in some line details. As you can see from my example and Emily Carr’s paintings, a few detail lines are added using a very dark or black color.
For this step, less is more, think about drawing in only a few lines with black chalk pastel to highlight the tree trunks. Refer to Emily Carr’s painting for inspiration on this.
This step is optional and some kids may wish to skip it, which is completely fine.
8. If there is any extra dust on your artwork, carefully take it outside and blow and gently shake the dust off.
This Emily Carr inspired art project is a great way for kids to explore drawing, layering, and blending with chalk pastels. Kids will be inspired by an amazing Canadian artist who painted landscapes in a different way to express her feelings and show movement and energy in her art!
More famous artist inspired art projects kids will love
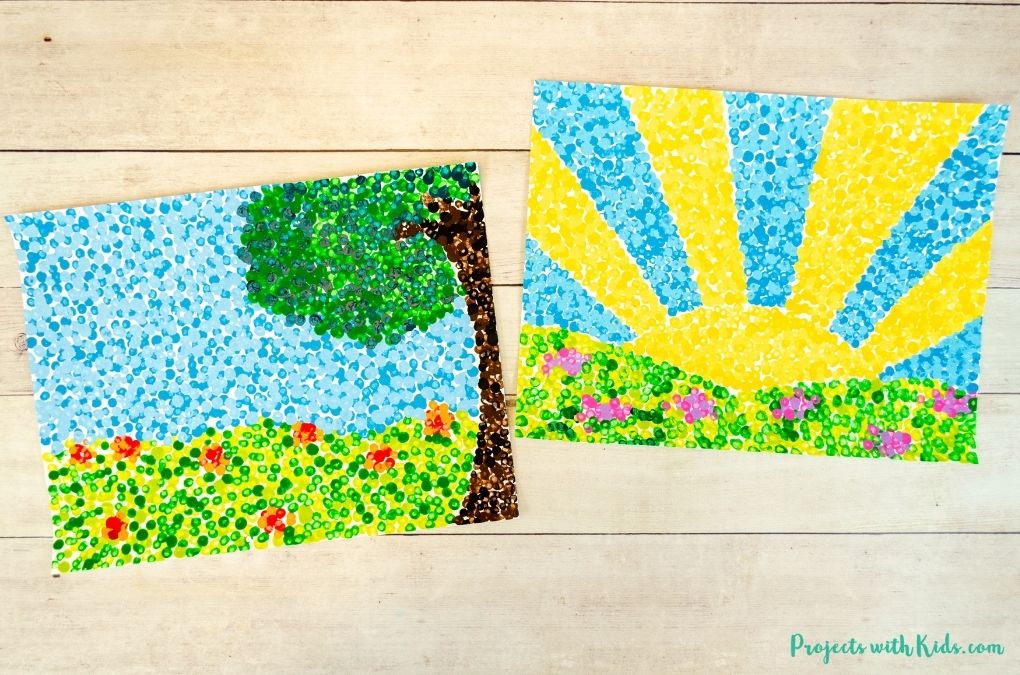
Simple Pointillism for Kids Art Project
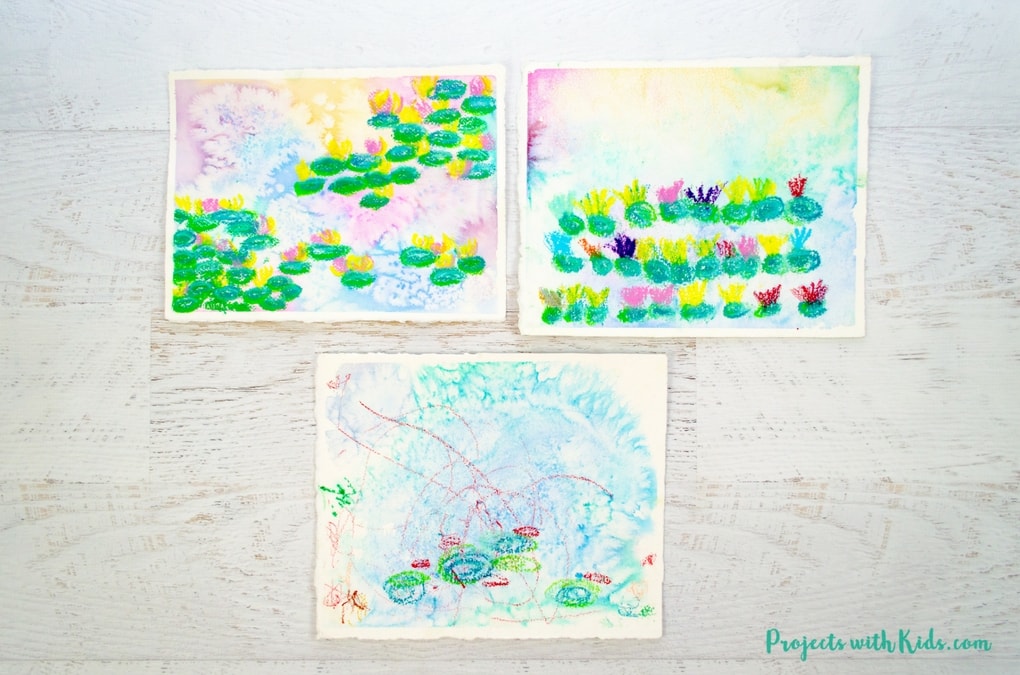
Monet Water Lilies Art Project
Follow me on Pinterest for more creative project ideas!
Pin this art project for later
Yield: 1 Emily Carr inspired chalk pastel art project
CREATE AN EMILY CARR INSPIRED ART PROJECT WITH CHALK PASTELS
Print
Use vibrant chalk pastels on black paper to make this gorgeous Emily Carr inspired art project with an easy glue resist technique.
Prep Time 10 minutes
Active Time 1 hour30 minutes
Total Time 1 hour40 minutes
Difficulty Medium
Materials
Chalk pastels
Black drawing paper
White glue
Pencil and eraser
White pencil crayon
Paper towels
Instructions
Choose inspiration: Look at Emily Carr’s forest paintings like “Red Cedar, 1931” and “Forest, British Columbia, 1931-32” for ideas.
Prepare materials: Use black drawing paper. Lightly sketch trees and grass shapes with a pencil. Trace over with a white pencil crayon to make it clearer.
Outline with glue: Carefully trace over your pencil lines with white glue. Let it dry completely, preferably overnight.
Color tree trunks: Use dark, medium, and light brown chalk pastels. Start with dark brown, then layer with the other shades. Blend gently with your finger for texture.
Color tree branches: Choose dark, medium, and light green chalk pastels. Apply similar sweeping strokes like Emily Carr’s paintings to show movement. Blend colors as you go.
Draw grass: Use dark green chalk pastel for the base, then layer lighter shades on top. Create a wavy pattern for texture.
Background: Use medium/light brown chalk pastel to fill in the background softly. Blend with greens to keep focus on trees and grass.
Final details: Optionally, add a few black chalk pastel lines for detail on tree trunks. Less is more; refer to Emily Carr’s style for inspiration.
Blow off excess dust: Remove any extra dust by gently blowing or shaking outside.
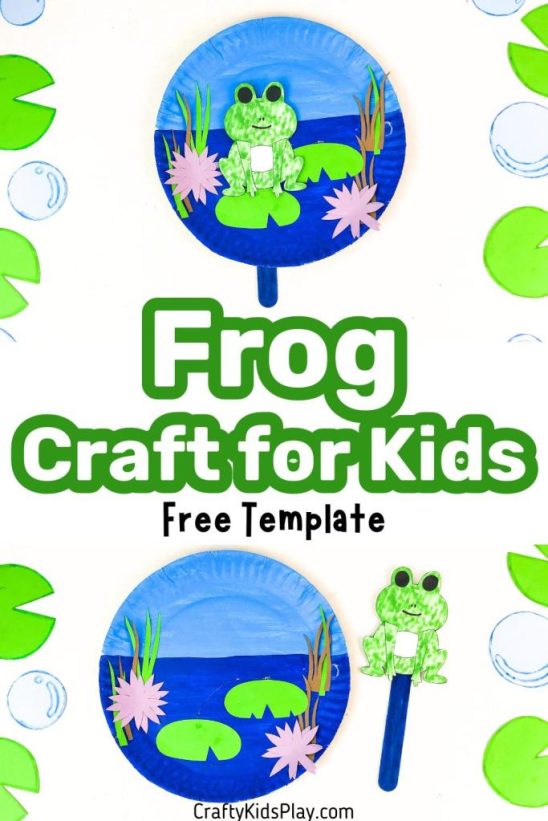
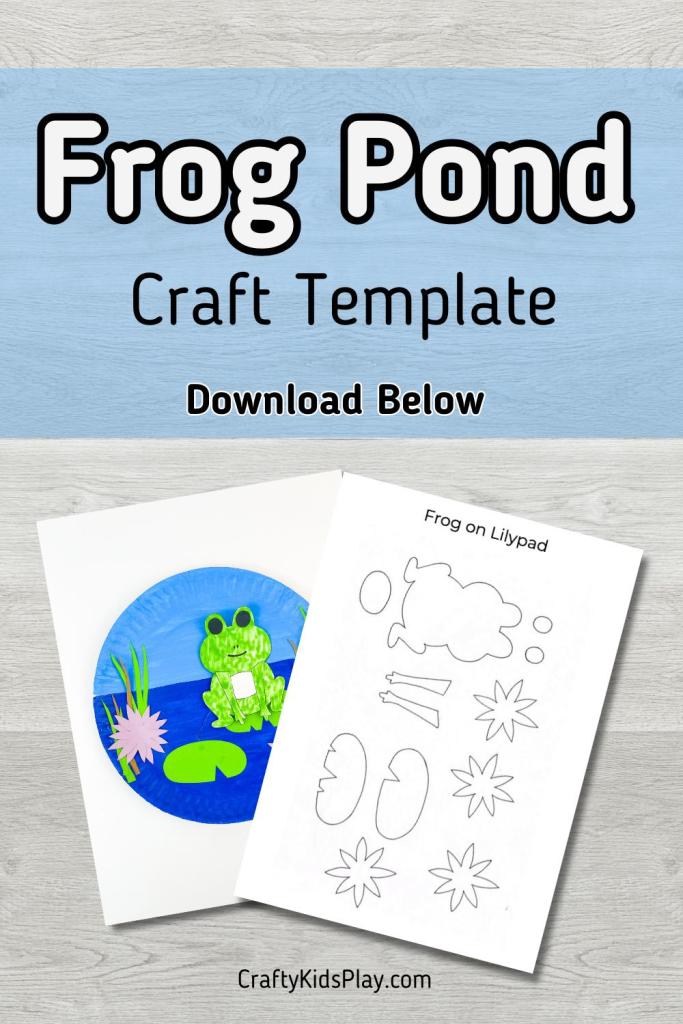
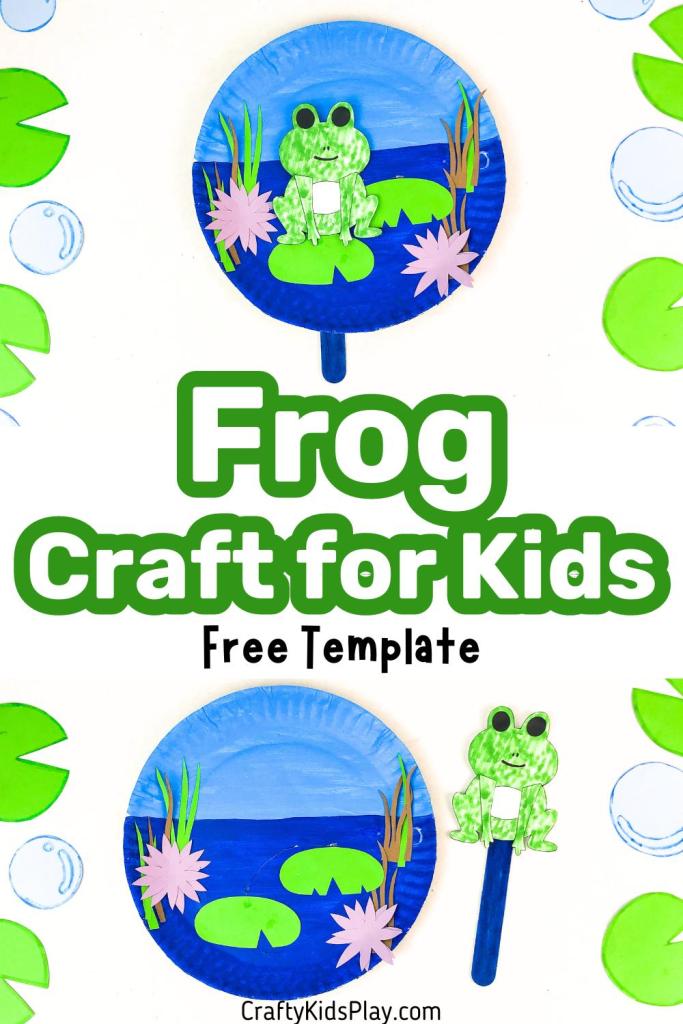
Jump into the world of creative learning with your little ones by exploring the wonders of pond life through craft! Making your own frog crafts is a great way to help kids learn more about pond life and different ecosystems!
Using our printable template makes this craft even easier for kids! Let’s dive in and get started.
Table Of Contents:
Materials
Instructions
Frog & Lily Pad Template Download
Tips & Troubleshooting
Variation Ideas
Benefits of This Frog & Lily Pad Craft For Kids
Final Thoughts
Materials:
Construction paper
Paper plate
Markers
Popsicle stick
Scissors
Glue
Paint (blue and white)
Paintbrush
Instructions:
Step 1)
Gather your supplies and paint a paper plate blue. Light blue on top like the sky, and dark blue on the bottom like the pond.
Step 2)
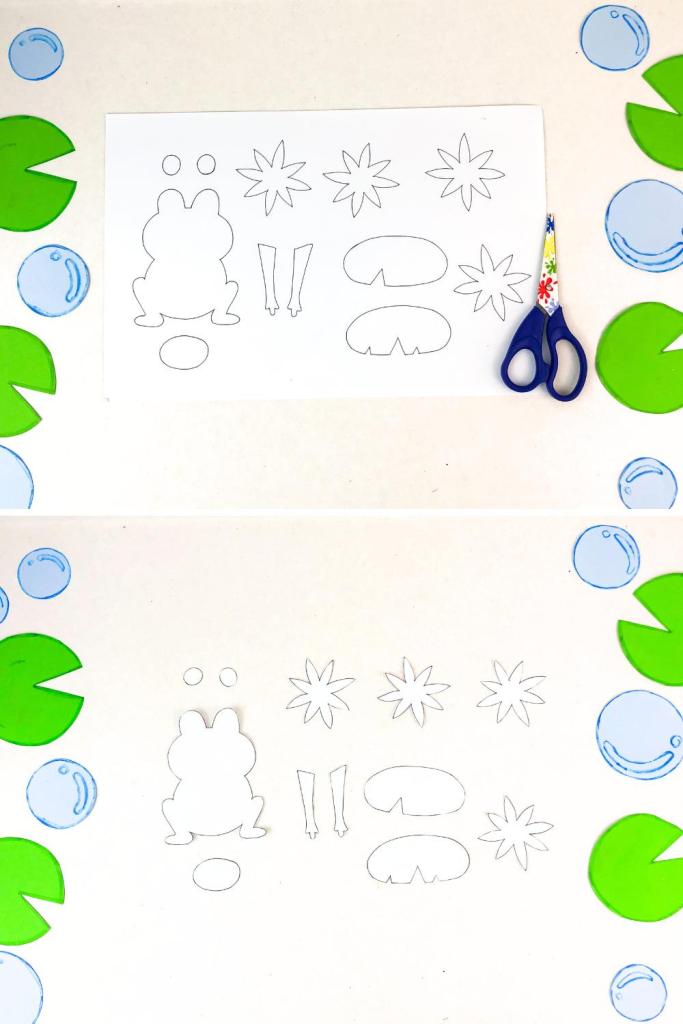
Print out and cut the free craft template included in this article.
Step 3)
Trace the template pieces onto black, pink, brown and green paper then cut the construction paper out. Younger kids may need help with this task.
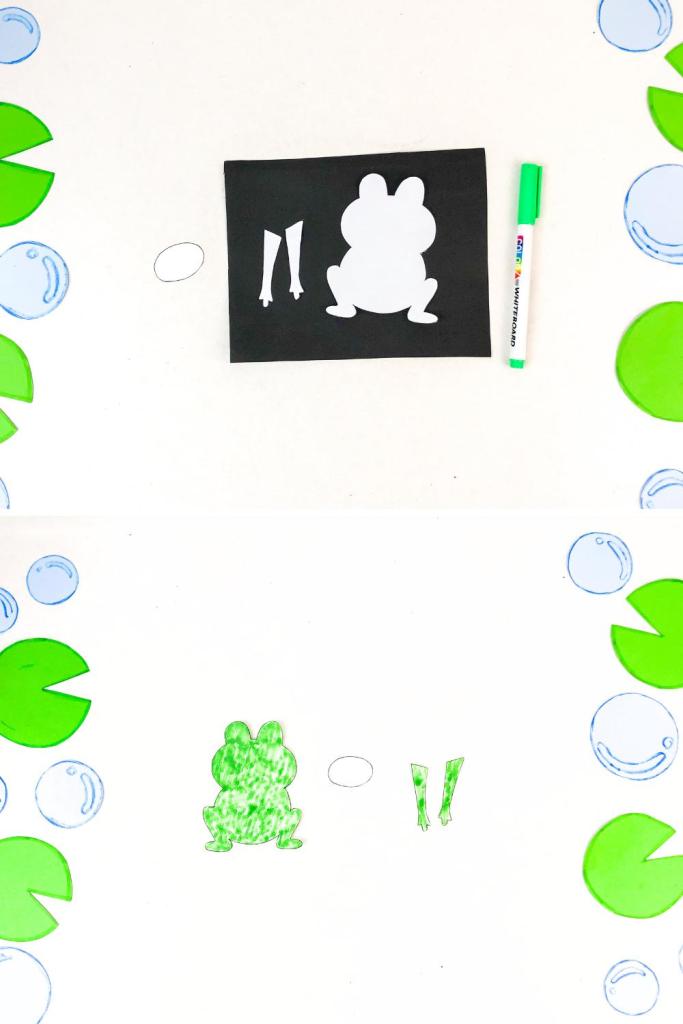
Step 4)
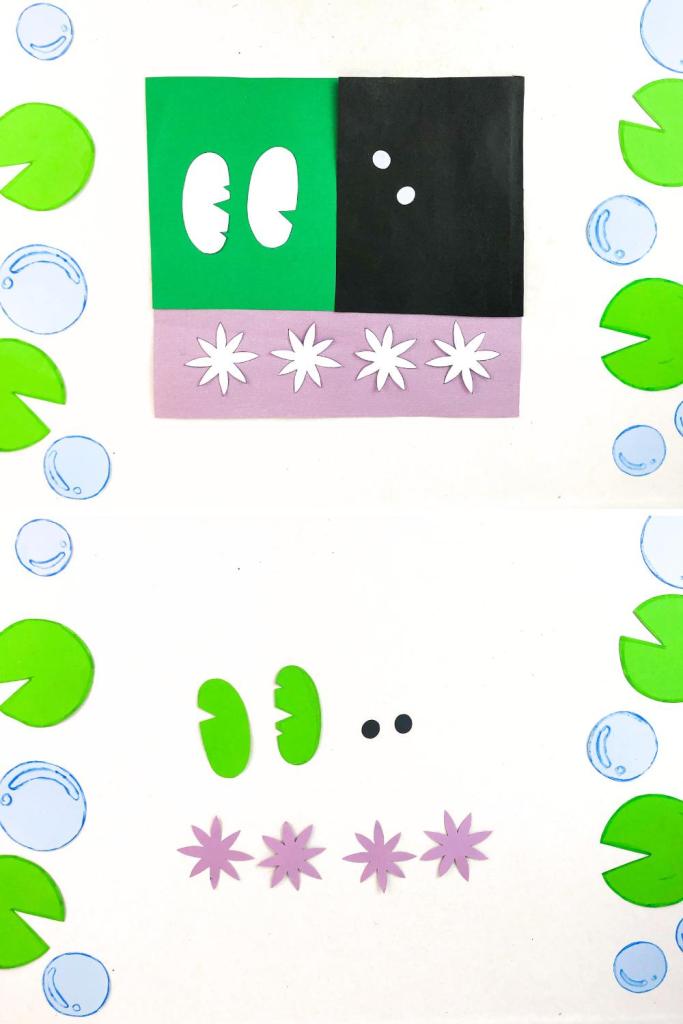
You can either color-in the frog body and arms green with markers, or you can trace the frog template onto green construction paper if you prefer.
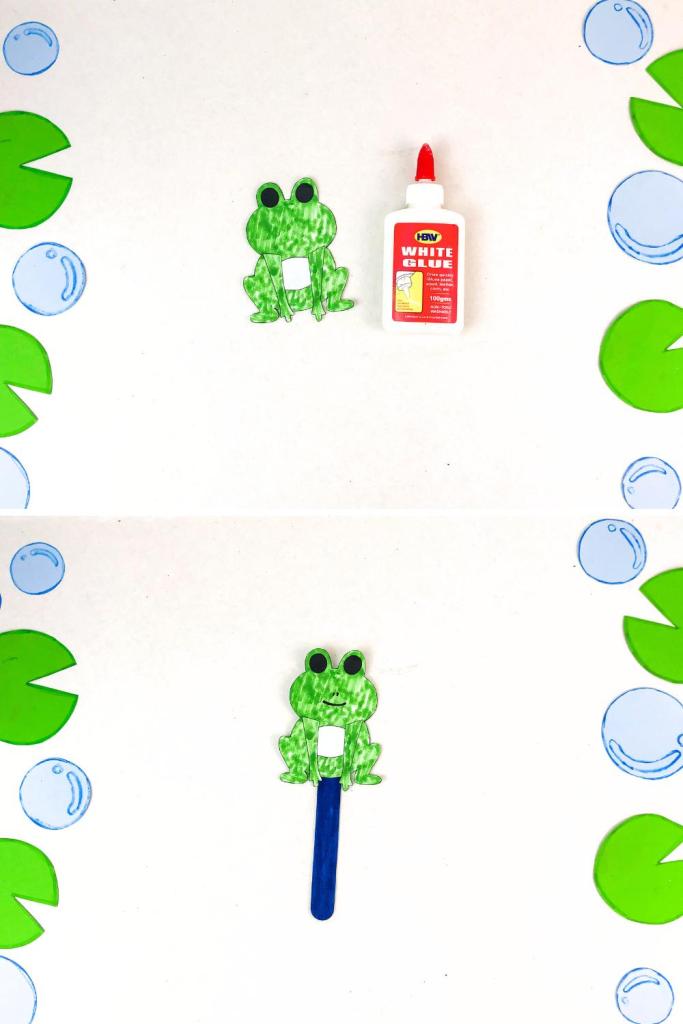
Step 5)
Glue a white oval to the frog’s belly, then glue the frog arms on next. Glue two black circles to make the frog eyes at the top of the frog and draw a small black line for the mouth and two dots for the nose. Glue the finished frog to a popsicle stick.
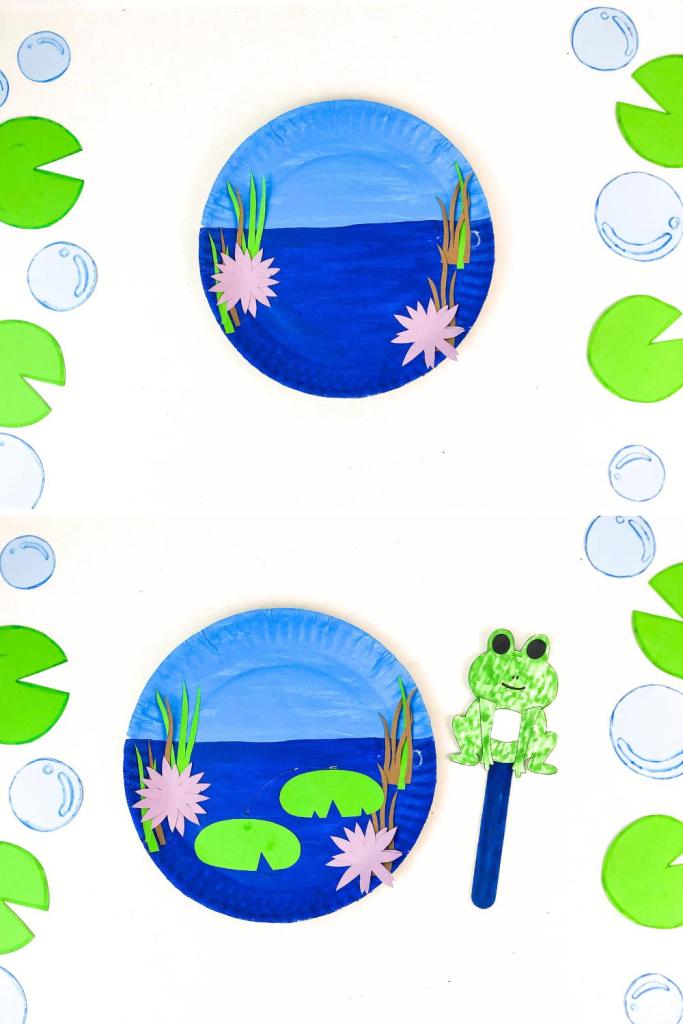
Step 6)
Cut some small green and brown strips to look like plants and reeds coming out of the pond water; glue them to the dark blue part of the paper plate.
Step 7)
Get an adult to help cut a slit in the paper plate with a knife or scissors. Then use your remaining template pieces like the pink flowers and green lily pads and glue them to your paper plate.
If you glue the lily pads at the start and end point of your slit, it will look like the frog is hopping between them.
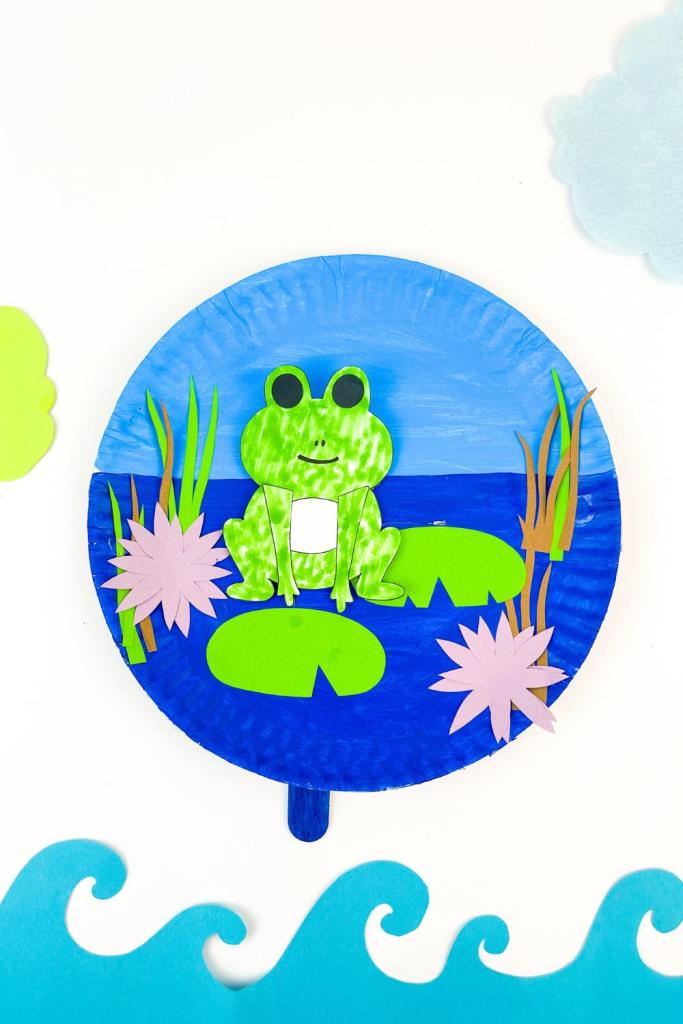
Step 8)
Insert the popsicle stick frog puppet into the slit in your plate and move it to make the froggy jump!
Frog & Lily Pad Template Download
Use the download button after this next image to grab your own free printable template for this craft.
Make sure you use single-page print with this printable pdf file because you’ll need to cut out the template pieces, so it can’t be double-sided. You can print it on regular white paper or card stock.
This template is for your own personal use only, not for commercial use or for resale purposes.
frog-craft-templateDownload
Tips & Troubleshooting
Colored Popsicle Sticks:
You can use a regular popsicle stick, or paint your popsicle stick dark blue when you’re painting the pond so that it matches better.
Use Washable Paint:
When working with children, opt for washable paints to make clean-up easier. Have wet wipes or damp cloths on hand for quick paint cleanup.
Preparation is Key:
Lay out all your materials and tools before starting the craft to ensure a smooth process. This includes having a protected surface for painting and easy access to scissors and glue.
For your youngest crafters, you may need to cut out template pieces ahead of time to make this craft easier for their little hands.
Variation Ideas
Educational Twist:
Introduce an educational element by labeling different parts of the scene (e.g., parts of a flower, types of animals) or incorporating facts about pond ecosystems and wildlife. If you’re studying the life cycle of a frog, you could also turn this into a frog life cycle craft and add frog eggs and tadpoles to the pond.
3D Elements:
To make this craft easier and skip some of the template pieces, you could use puffy stickers and add fish and flowers to your pond scene. You could also add cotton ball clouds to the sky.
Benefits of This Frog & Lily Pad Craft For Kids
Fine Motor Skills Development:
Cutting, tracing, and gluing the template pieces onto the paper plate requires precise hand movements, which is great practice for your young children to enhance their fine motor skills. These skills are crucial for tasks like writing, tying shoelaces, and buttoning clothes as they get older.
Creativity and Imagination:
As your child paints the paper plate to resemble a pond and adds details like plants and flowers, they exercise their imagination and creativity. Encouraging them to come up with their own ideas for the scene can help them with their creative thinking.
Following Instructions:
Following step-by-step instructions to complete this fun craft teaches children the importance of sequential thinking and following directions. This skill is valuable both in academic settings and in everyday life.
Spatial Awareness:
Cutting out template pieces and arranging them on the paper plate requires spatial awareness and understanding of how objects fit together in a given space.
Pretend Play and Storytelling:
Once the craft is completed, your child can engage in imaginative play by using the frog puppet to act out stories or scenarios in their pond scene. Pretend play fosters language development, social skills, and emotional intelligence.
Final Thoughts
Creating a frog pond scene is not only a fun craft project but also a valuable learning experience. It’s a fun way for older kids to learn more about the pond ecosystem or frog life cycle.
Hands-on crafting allows children to deepen their understanding of nature while unleashing their creativity!
Stick around Crafty Kids Play for more fun sensory activities, free printables and awesome craft projects.
Easy Paper Plate Hatching Chick Craft (Free Template)
Read More
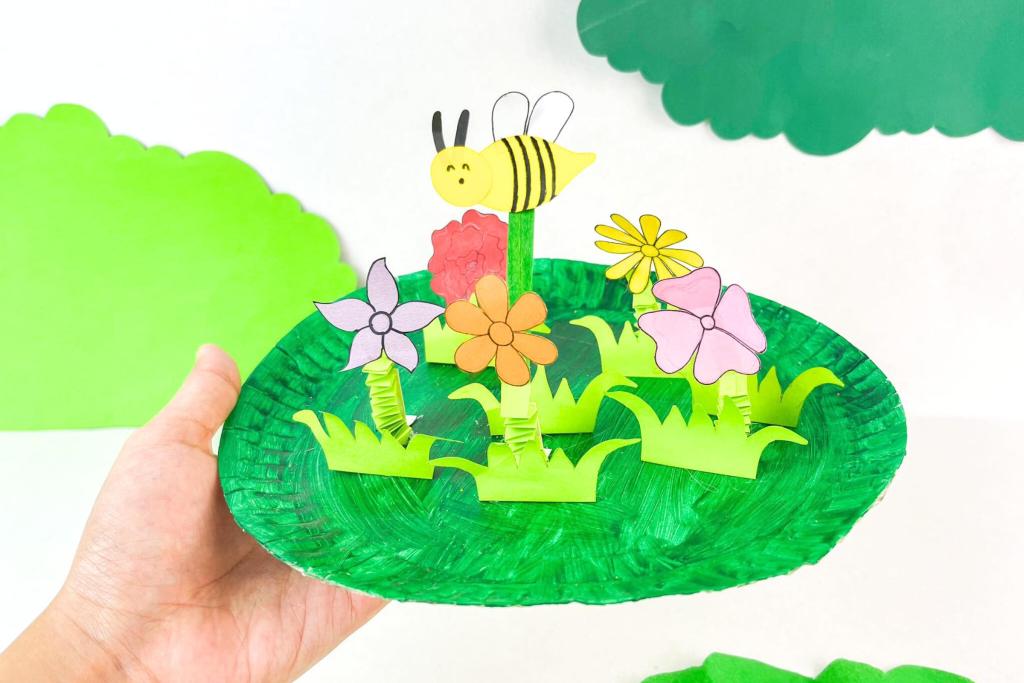
Paper Plate Flower Garden & Bee Craft (Free Template)
Read More
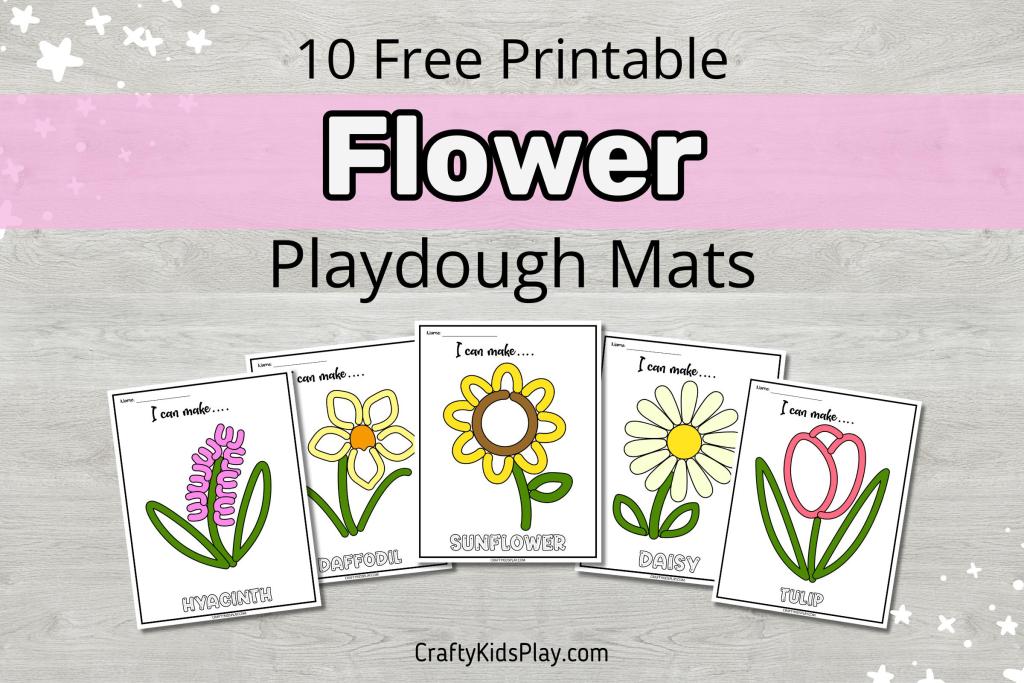
Flower Playdough Mats (10 Free Printable Sheets)
Read More
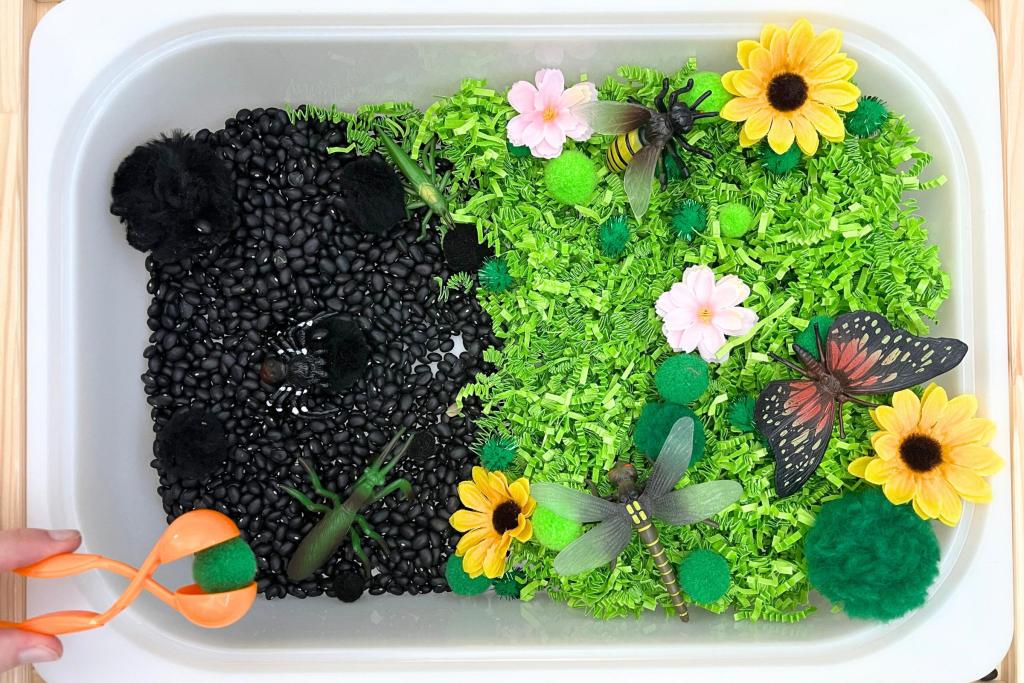
Bugs Sensory Bin & Free Insect Extension Activities
Read More
Spring Popsicle Stick Patterns (15 Free Cards)
Read More
Four Seasons Paper Plate Spinner Craft (Free Template)
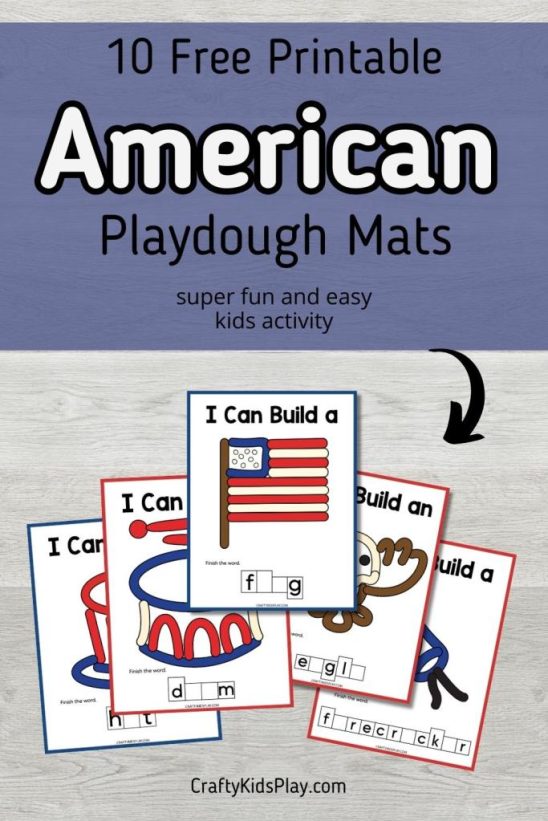
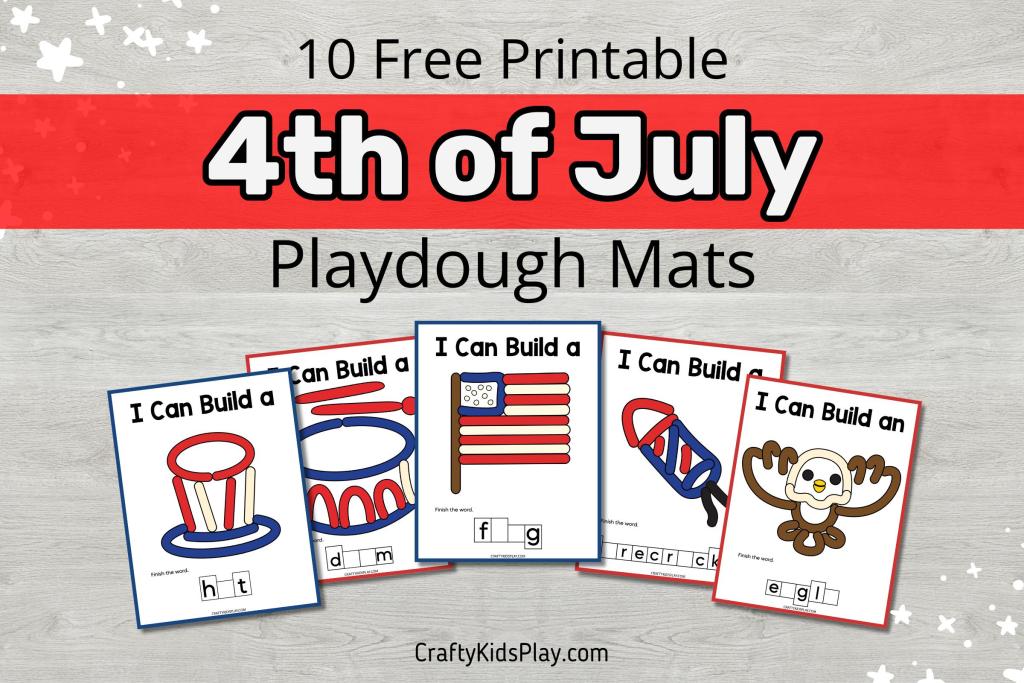
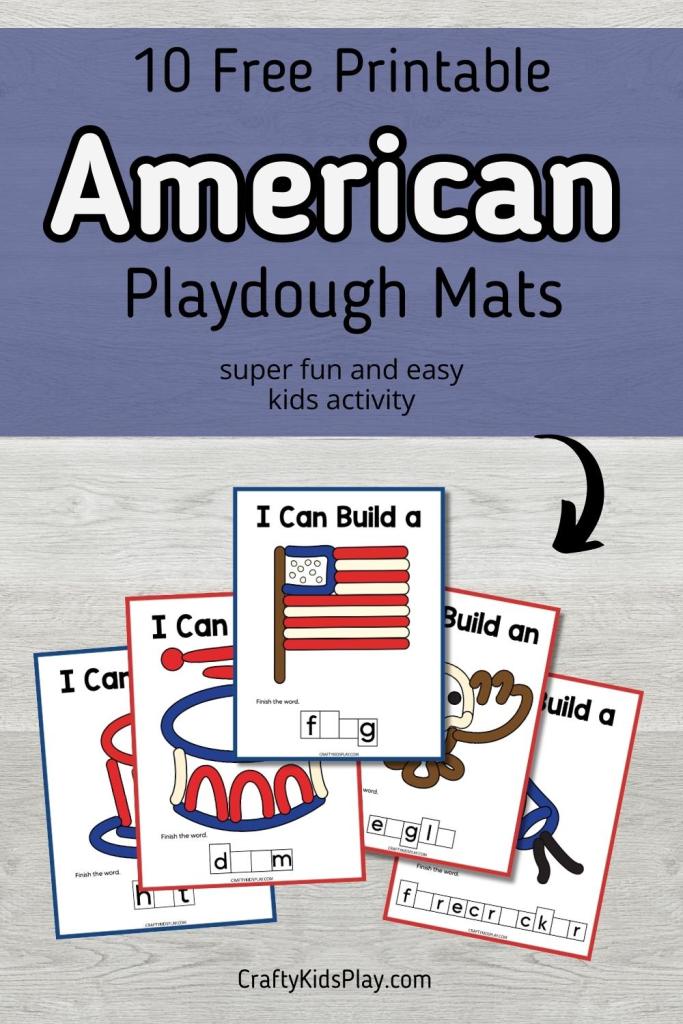
Gearing up for a fun summer holiday? Here at Crafty Kids Play, we love playdough activities for all the seasons of the year! Grab a set of these free printable 4th of July playdough mats and get ready to have so much fun with your young children.
These mats aren’t just great for the Fourth of July, you can use them for other American patriotic holidays like Memorial Day, Flag Day, and Patriot Day.
Let’s grab some playdough, pick up a themed mat, and get ready for some patriotic fun!
Table of Contents
Benefits Of These 4th of July Playdough Mats
How To Use These 4th of July Playdough Mats
Materials Needed
Free 4th of July Playdough Mats Download
Final Thoughts On 4th of July Playdough Mats
Benefits Of These 4th of July Playdough Mats
Sensory Play:
Playing with playdough is a great way to enjoy some sensory play, which is important for children’s development. The texture of the dough, combined with the actions of kneading and pressing, engages their senses and can be calming for many kids.
Develops Fine Motor Skills:
Squishing, rolling, patting, and sculpting playdough is a fun way to help kids develop those crucial fine motor skills in their little hands. These are the same skills they’ll use for writing, tying shoes, and other important tasks that require hand muscles. Plus, it’s super fun!
Boosts Creativity:
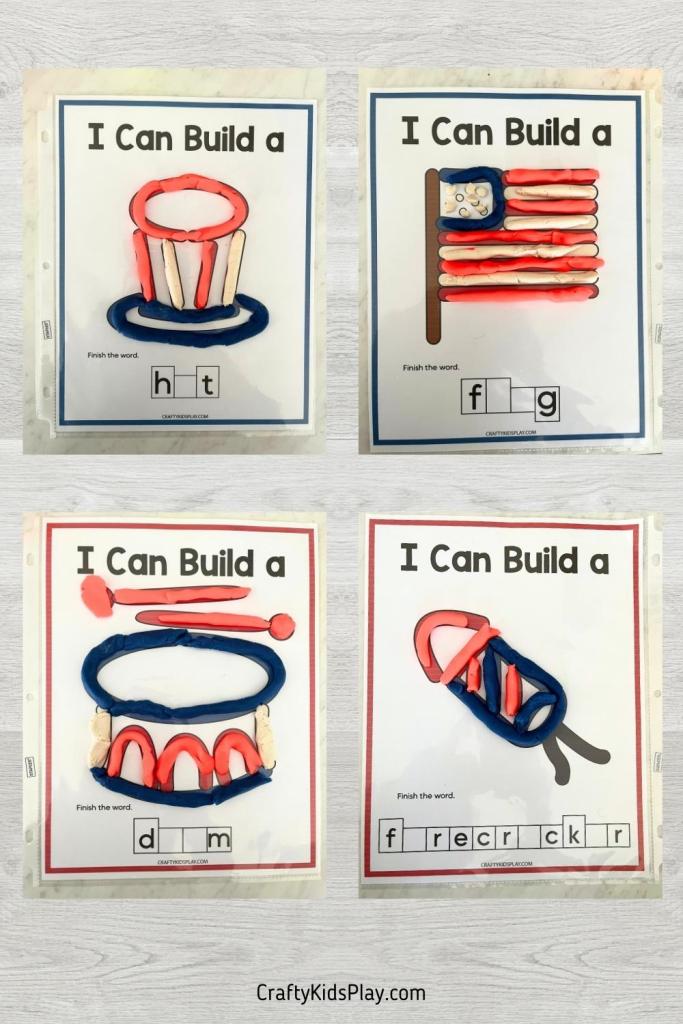
Our playdough mats have themes like firecrackers, flags, and eagles, giving the kiddos a starting point to mold and shape their playdough. Kids have a great time, and making these different shapes helps spark their imagination as they figure out how to make a firecracker look sparkly or a flag wave with just their fingers and a lump of dough.
Educational Opportunities:
Depending on the age of your kiddo, while playing, you can chat about the significance of the 4th of July, teaching them a bit of history and why we celebrate Independence Day. Using these fun playdough mats is the perfect way to do some learning with younger children but in a very chill, hands-on way.
How To Use These 4th of July Playdough Mats
Step 1) Download
Download your free 4th of July play dough mats from the free file in this article.
Step 2) Print
Print the 4th of July playdough mats at home with your printer or at your local print shop on white card stock.
Step 3) Protect
If you’d like to reuse them, protect the sheets with a plastic sheet protector or laminator. If you don’t have protective sheets, you can put them inside a large Ziploc bag and play on top of the plastic.
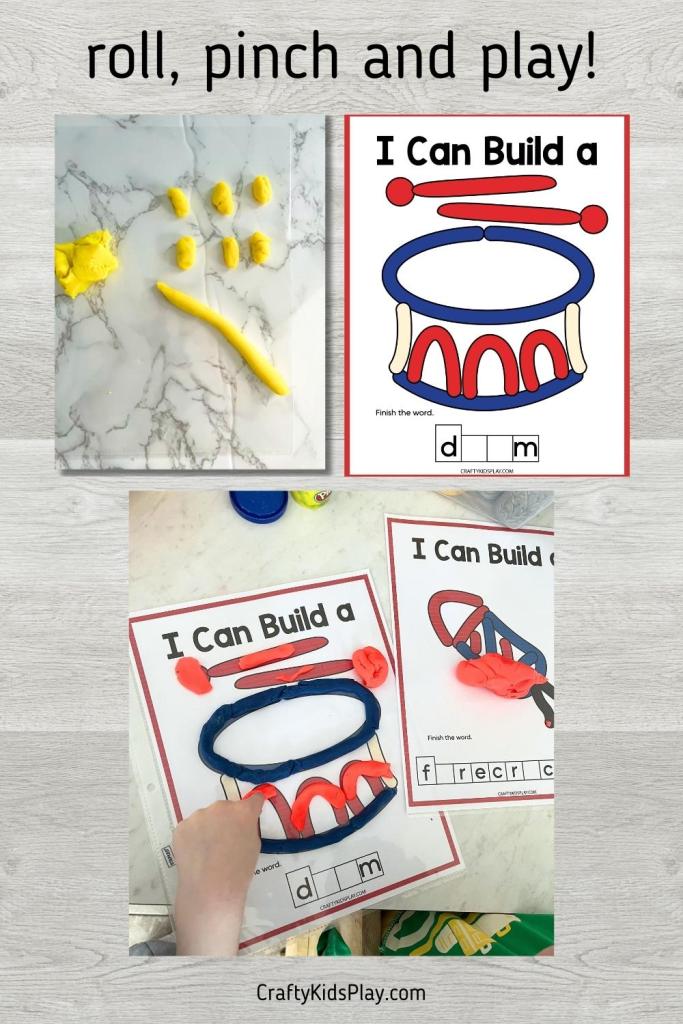
Step 4) Play
Squish, roll and stick your playdough to the playdough mats as you play. Your child could choose to roll ‘snakes’ or long strands of playdough and then fill the outlines of the holiday shapes. This is a great activity and the perfect addition to your festivities.
Materials Needed
Free Printable Fourth of July Playdough Mats
Clear Page Protectors (or laminator)
Printer (or local print shop)
Playdough
Free 4th of July Playdough Mats Download
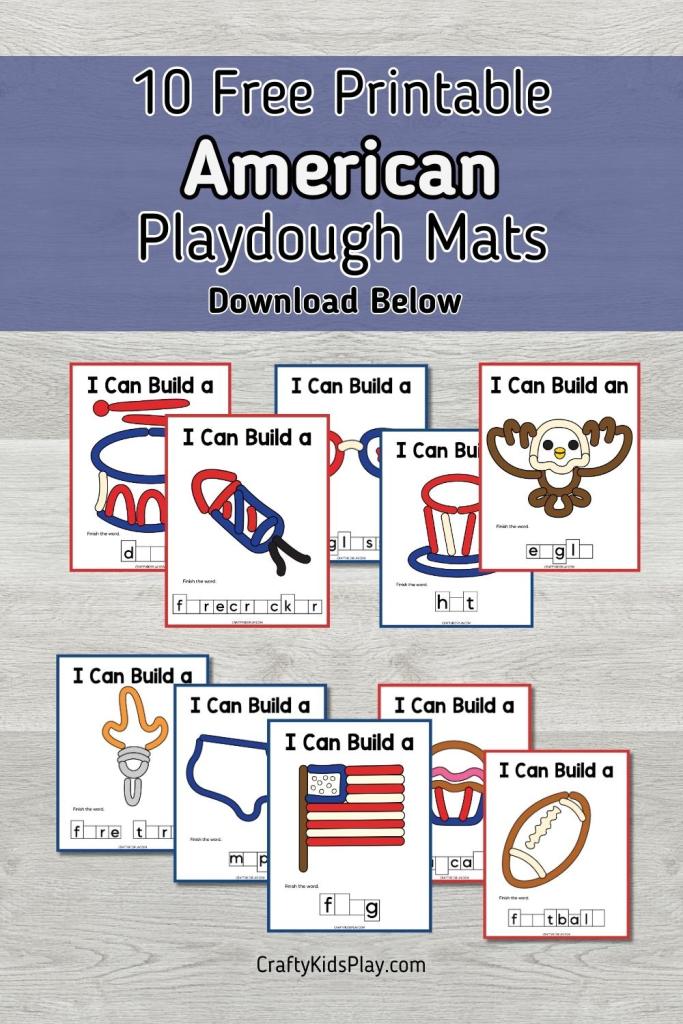
Ready for creative play? To get your own free printable playdough mats, use the download button beneath the image below for your free PDF files. This set comes with both black and white only or full color printable pages for you to choose from in 10 different designs.
These free playdough mats are digital products that are for your own personal use only, not for resale or commercial usage.
4th-of-July-Playdough-MatsDownload
Final Thoughts On 4th of July Playdough Mats
So, there you have it! 4th of July playdough mats are more than just a fun activity; they’re a fantastic way to blend playtime with learning and creativity.
Stick around Crafty Kids Play for more fun play dough mats, free printables and crafts for kids of all ages!
4th of July Playdough Mats (10 Free Printable Sheets)
Slime has caught on in a big way, seemingly overnight. All of a sudden, every kid is playing with slime, loads of places are selling it, and it’s definitely here to stay.
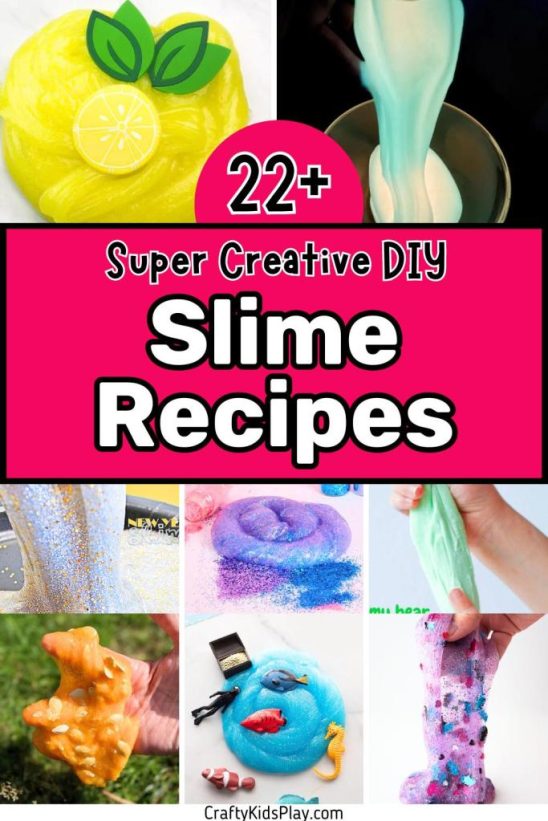
While store-bought slime is fine, it can be more than just a toy. Due to its versatility, it’s possible to turn it into a learning experience. Making homemade slime offers up so much variety, as well. These 22 slime recipes will have kids sliming the day away! Every image in this article has a caption that includes a link to the article where you can find the recipe, let’s get started!
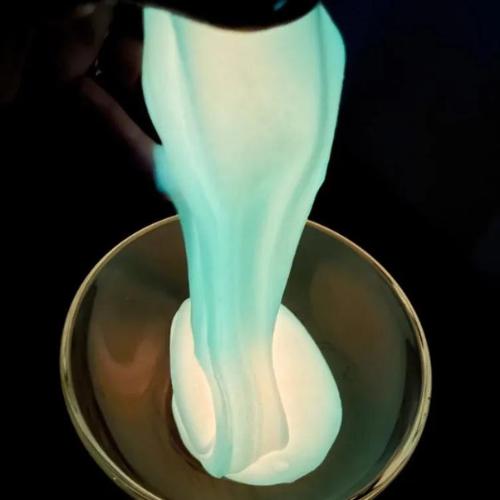
Glow in the Dark Slime by DIY Candy
This simple, 3-ingredient slime is a great introduction to the slime world. The clear instructions guarantee quality slime, and the secret ingredient makes it glow in the dark!
Glow in the Dark Slime by DIY Candy
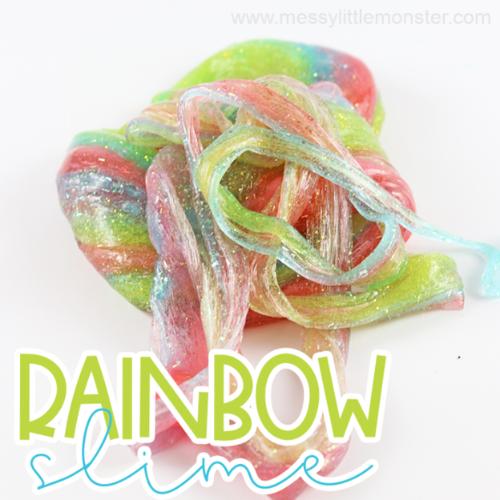
Rainbow Slime Recipe by Messy Little Monster
A good rainbow slime recipe creates a glittery, pretty, colorful good time. Kids can even help make this slime (with supervision, of course.)
Rainbow Slime Recipe by Messy Little Monster
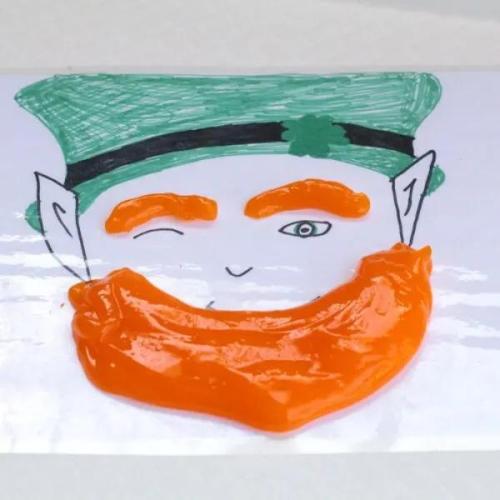
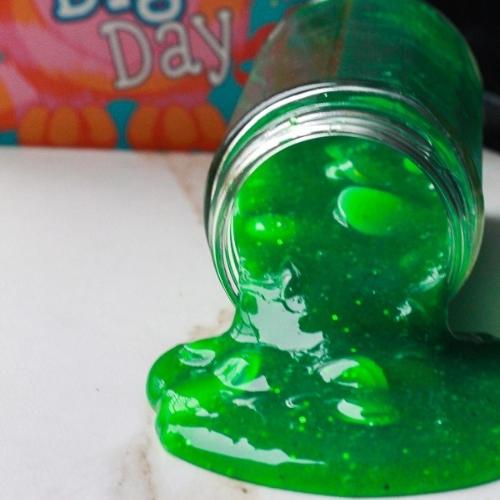
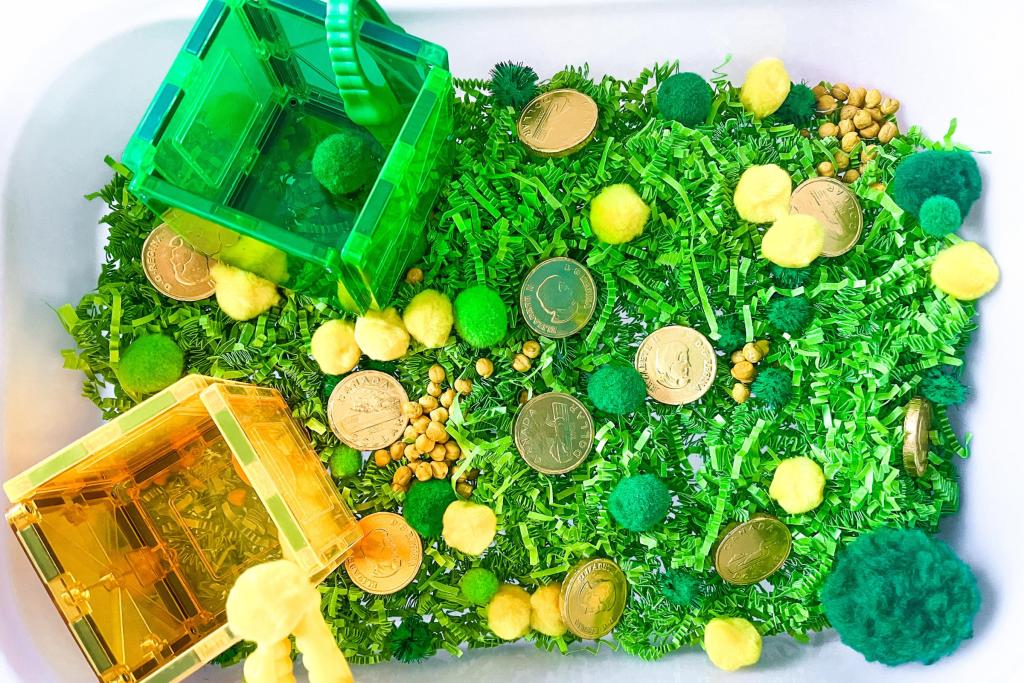
Leprechaun Slime Recipe by Life with Darcy & Brian
This slime recipe really stands out for two reasons. One, it includes an option for custom coloring, so you can get the exact shade you desire. Two, it includes a fun activity kids can do with the slime once it’s ready.
Leprechaun Slime Recipe by Life with Darcy & Brian
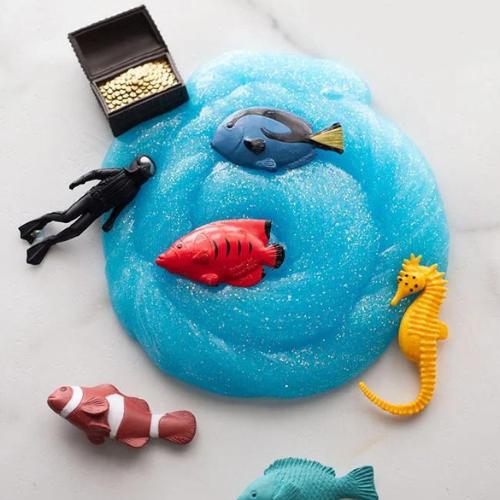
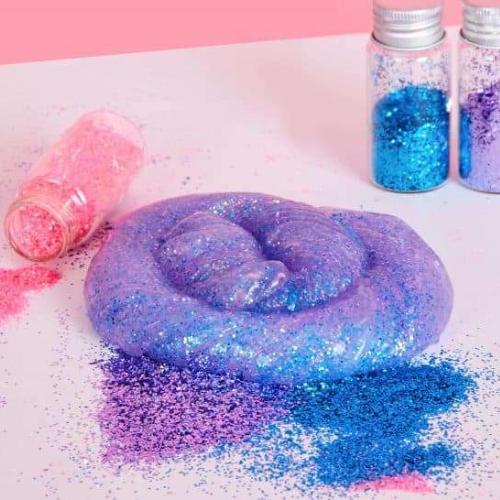
Ocean Slime by The Best Ideas for Kids
Need a beach vacation, but it’s not an option right now? This pretty, glittery blue slime will have everyone feeling ocean vibes in no time. The recipe includes several tips to really up its shimmery quality.
Ocean Slime by The Best Ideas for Kids
Color Changing Slime by A Little Pinch of Perfect
Kids will love this brightly colored slime straightaway. But it will really blow their minds when they see it change color in the sun!
Color Changing Slime by A Little Pinch of Perfect
Watermelon Slime by Taming Little Monsters
This craft idea keeps things simple by using store-bought slime, and then modifying it to make something really special. Of course, this could be combined with your favorite slime recipe to keep everything in-house if you desire.
Watermelon Slime by Taming Little Monsters
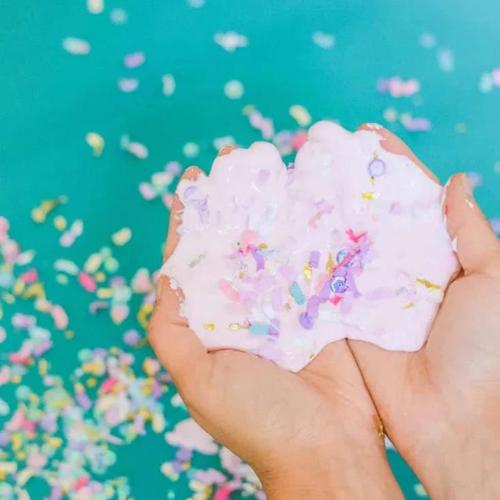
Mod Podge Confetti Slime by Mod Podge Rocks
Mod Podge is one of those things that sorts crafters into two categories. Those who love it, and those who haven’t used it yet. It also creates amazing slime, and a handful of confetti really makes it special.
Mod Podge Confetti Slime by Mod Podge Rocks
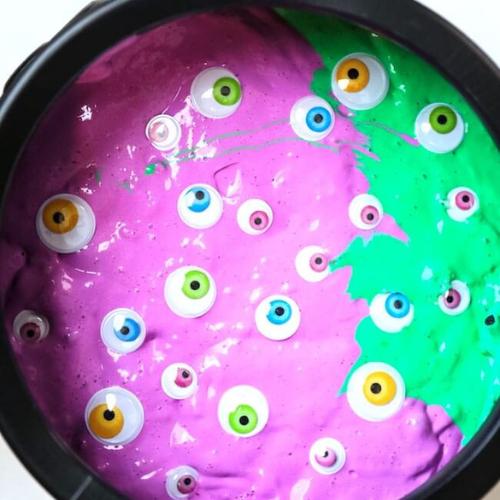
DIY Silly Monster Slime by Mommy Made That
This monster slime recipe is a silly good time for kids. Treating it as a science experiment helps add a learning element, as well.
DIY Silly Monster Slime by Mommy Made That
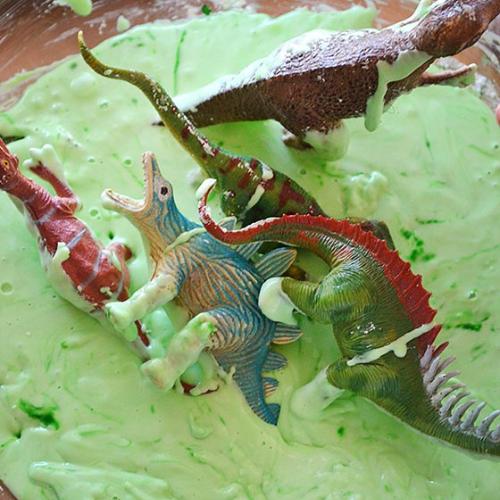
Dino Slime by Picklebums
Sometimes when things go wrong, they can produce the best results. This dino slime recipe came about from a mistake and turned into a blast for the whole family.
Dino Slime by Picklebums
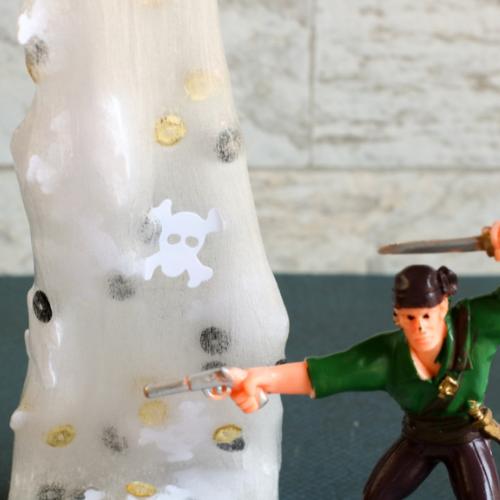
Pirate Slime by Mom Wife Busy Life
This pirate slime recipe is quick and easy and too much fun! A few simple ingredients ensure kids are ready for Talk Like a Pirate Day or any random afternoon when they feel a bit pirate-y.
Pirate Slime by Mom Wife Busy Life
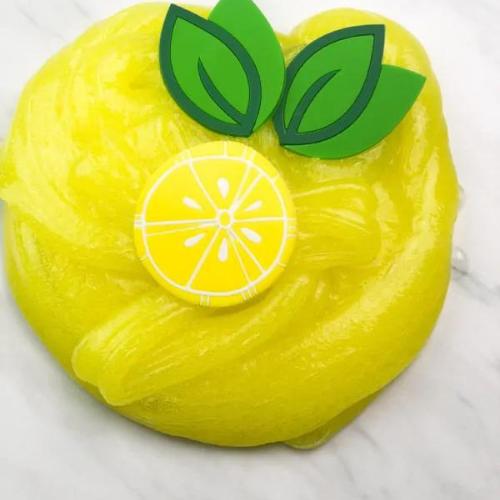
Lemon Jello Slime Recipe by Simple Everyday Mom
The perfect summertime activity to while away a day, the lemon jello slime recipe looks and smells amazing! It even incorporates real Jello powder to keep things authentic.
Lemon Jello Slime Recipe by Simple Everyday Mom
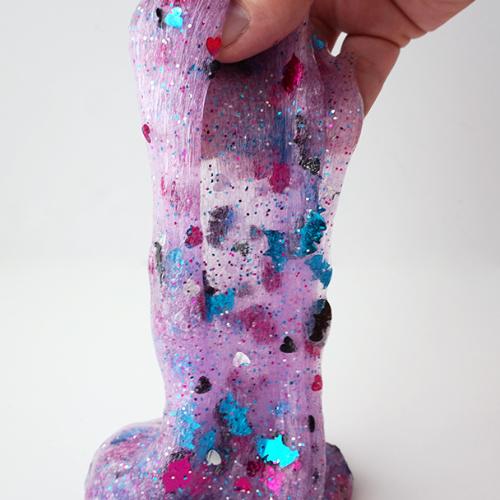
Unicorn Glitter Slime by Two Kids and a Coupon
Plenty of glittery slime recipes are out there, but this one is unicorn slime. So of course, it pushes the glitter boundaries right to the edge for a dazzling display of sparkle.
Unicorn Glitter Slime by Two Kids and a Coupon
Witches Brew Halloween Slime by The Soccer Mom Blog
Perfect for a Halloween party favor, or really just any time you want things to get a little bit spooky, this witches brew Halloween slime is a unique take on the slime recipe. Plus, it’s a fluffy slime, so kids will love squishing it around.
Witches Brew Halloween Slime by The Soccer Mom Blog
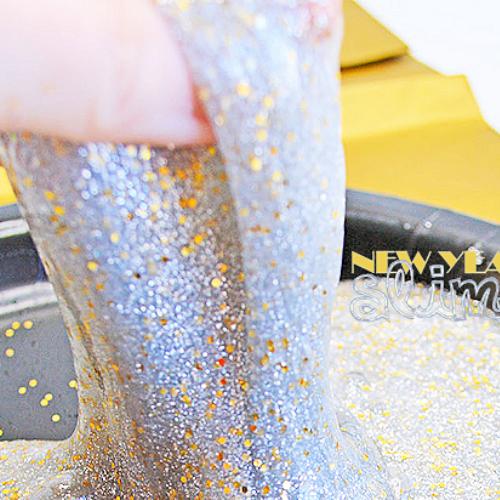
New Year’s Slime by Our Kid Things
The New Year’s Eve color palette is gold, silver, and lots of sparkle. So why not make some slime to match? This one-of-a-kind decoration will keep kids entertained at a New Year’s party, or just as an activity for families who want to spend the day together.
New Year’s Slime by Our Kid Things
3-Ingredient Monster High Slime by Artsy Fartsy Mama
Monster High has a very specific aesthetic, and it’s not always easy to manage. Luckily, this 3-ingredient slime recipe nails it, so it’s sure to satisfy any fans of the show or toys.
3-Ingredient Monster High Slime by Artsy Fartsy Mama
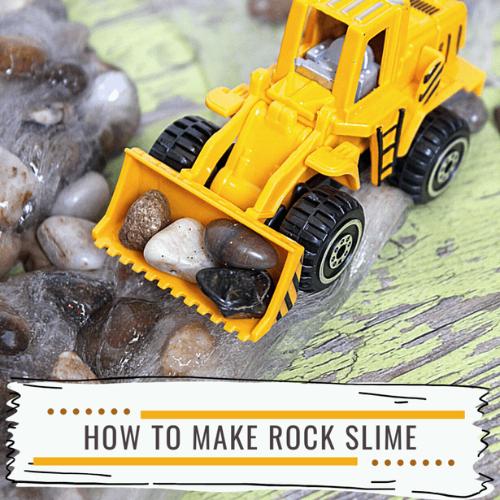
Rock Slime by Homeschool Preschool
For some reason, kids really seem to love rocks. This unique rock slime will let them explore rocks in a fun way, and they will love helping to mix the rocks in.
Rock Slime by Homeschool Preschool
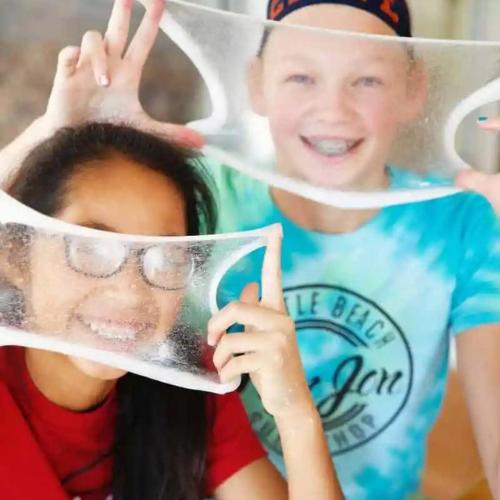
How to Make Clear Slime by Skip to my Lou
While there are loads of slime recipes with mix-ins or colors, sometimes simple can be best. This clear recipe gives kids a really transparent slime experience.
How to Make Clear Slime by Skip to my Lou
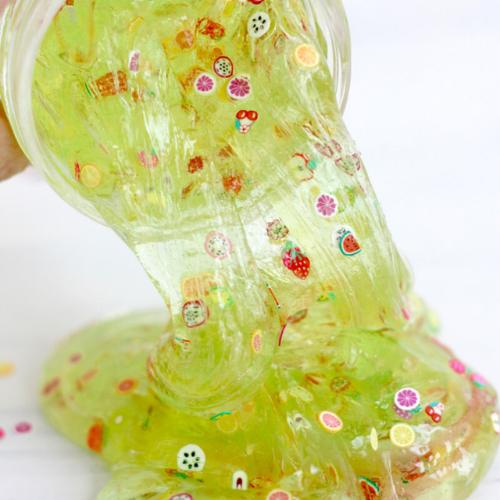
Fruit Scented Slime Recipe by Little Bins for Little Hands
While slime is usually not safe to eat, that doesn’t mean it can’t smell tasty. As a bonus, this slime recipe incorporates a different scent agent to avoid having to buy expensive scented oils.
Fruit Scented Slime Recipe by Little Bins for Little Hands
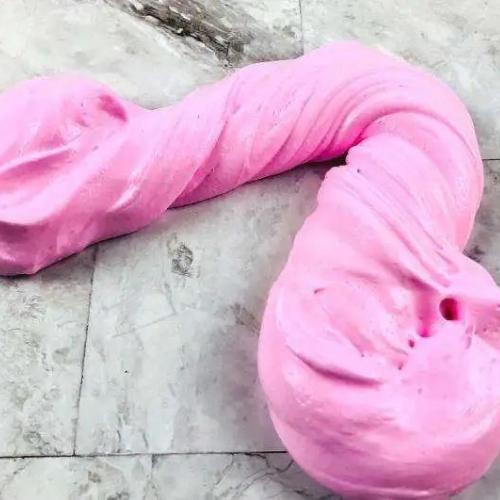
Fluffy Slime by Made in a Pinch
This fluffy slime recipe is quick and simple. But even better, it’s stretchier than most standard slime recipes, so kids can get a whole new sensory experience.
Fluffy Slime by Made in a Pinch
Baby Oil Slime by Two Pink Peonies
Baby oil adds a unique spin to this slime recipe. Plus, no borax is required, so there’s no need to run to the store for that particular ingredient.
Baby Oil Slime by Two Pink Peonies
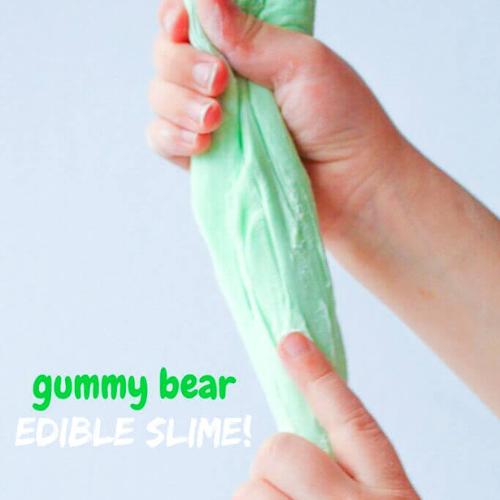
Edible Gummy Bear Slime by In the Kids’ Kitchen
While loads of slime recipes look and smell delicious, they are all definitely not safe to eat. But this one uses real gummy bears, so it’s safe to eat and tasty, too.
Edible Gummy Bear Slime by In the Kids’ Kitchen
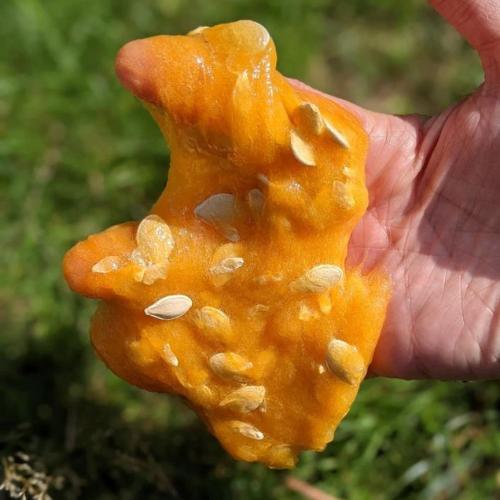
Pumpkin Slime by My Mommy Style
Kids often have this odd fascination with pumpkin guts during carving time. Instead of discouraging that, keep the pumpkin gunk and make slime out of it! They will love playing with the pumpkin-scented goodness.
Pumpkin Slime by My Mommy Style
Wrapping Up
I hope you got inspired by this huge list of DIY slime recipes to make your own at home! With a pinch of creativity, the options are endless for the types of slime you can create.
Stick around Crafty Kids Play for more sensory play ideas, free printables and fun crafts for kids of all ages!
Easter Sensory Bin (With 6 Free Printable Activities)
Read More
Bugs Sensory Bin & Free Insect Extension Activities
Read More
Green And Gold St. Patrick’s Day Sensory Bin
Read More
Easy Beach Sensory Bin For Toddlers (With Ice & Sand)
Read More
Bee Themed Sensory Bin (For Creative Sensory Play)
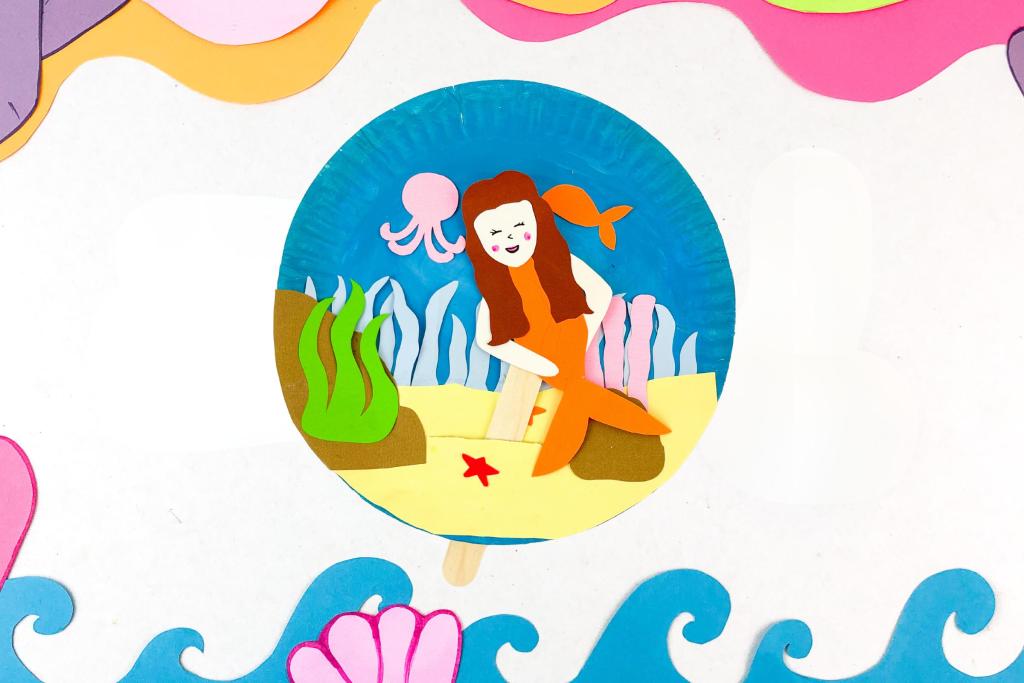
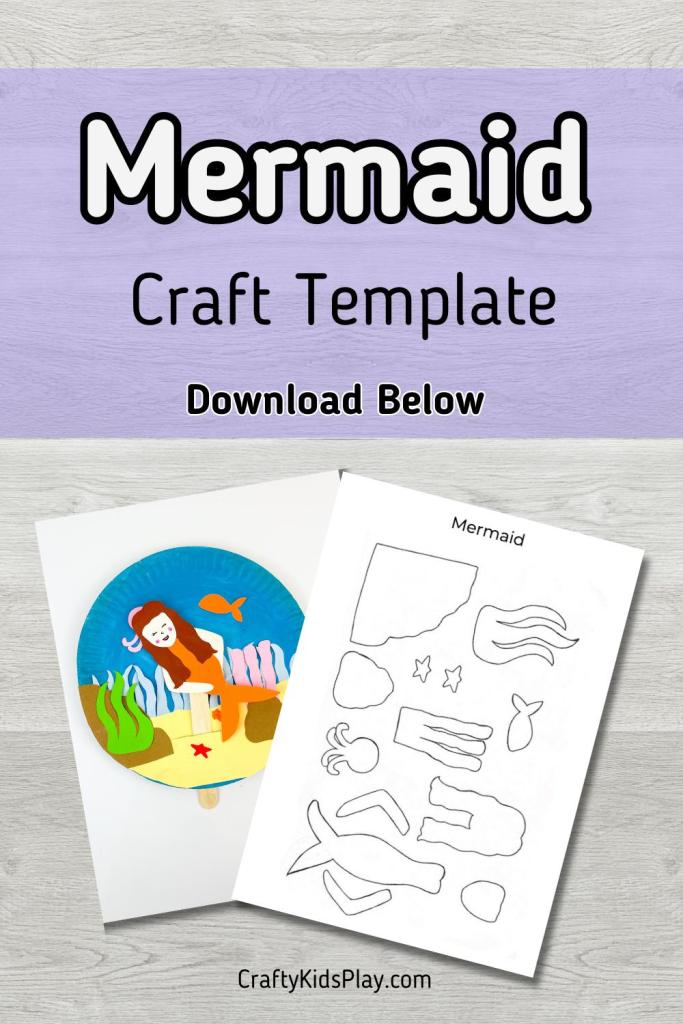
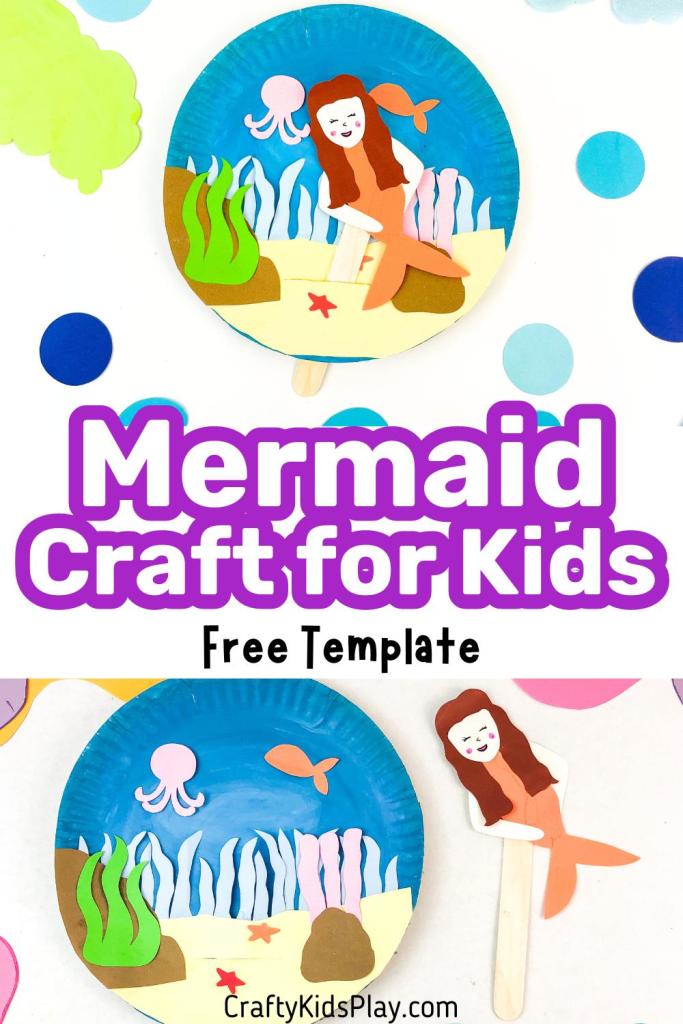
Dive into a world of creativity and underwater adventure with our paper plate mermaid puppet craft! This is a great craft for mermaid fans of all ages! We’ve included a free printable template to make this mermaid puppet craft easier and so much fun.
Whether you’re looking for crafty ideas to use on a rainy afternoon or for a mermaid-themed party, this mermaid craft is your ticket to oceanic exploration without getting your feet wet. Let’s dive in!
Table Of Contents:
Materials
Instructions
Mermaid Craft Template Download
Variation Ideas
Benefits of This Mermaid Craft For Kids
Final Thoughts
Materials
Construction paper
Paper plates
Popsicle sticks
Paint (Blue and green)
Paintbrush
Scissors
Glue
Instructions
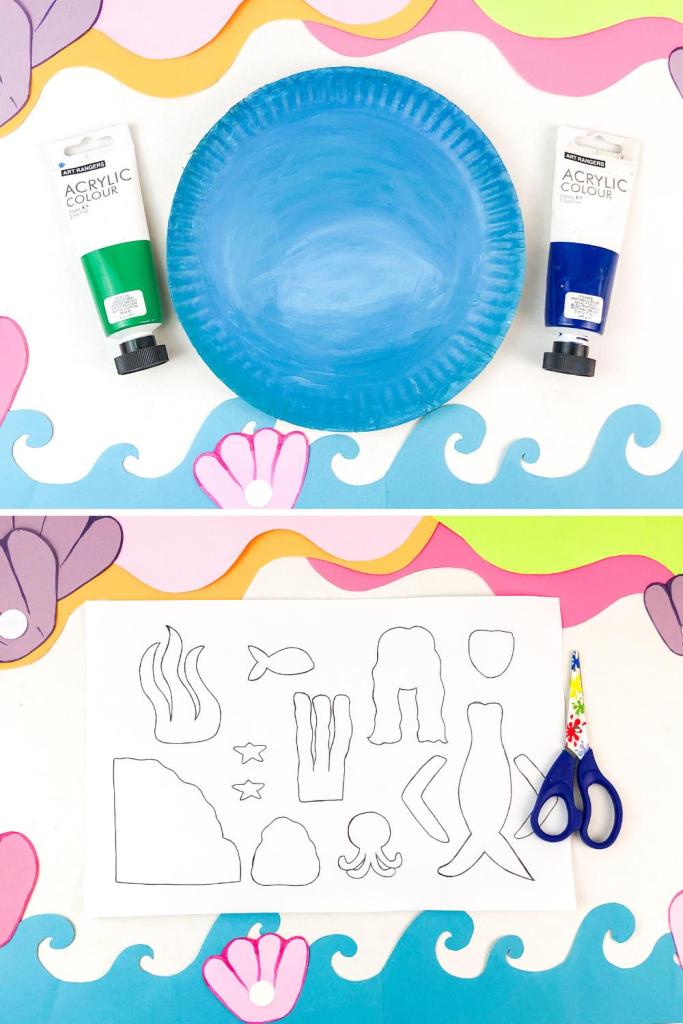
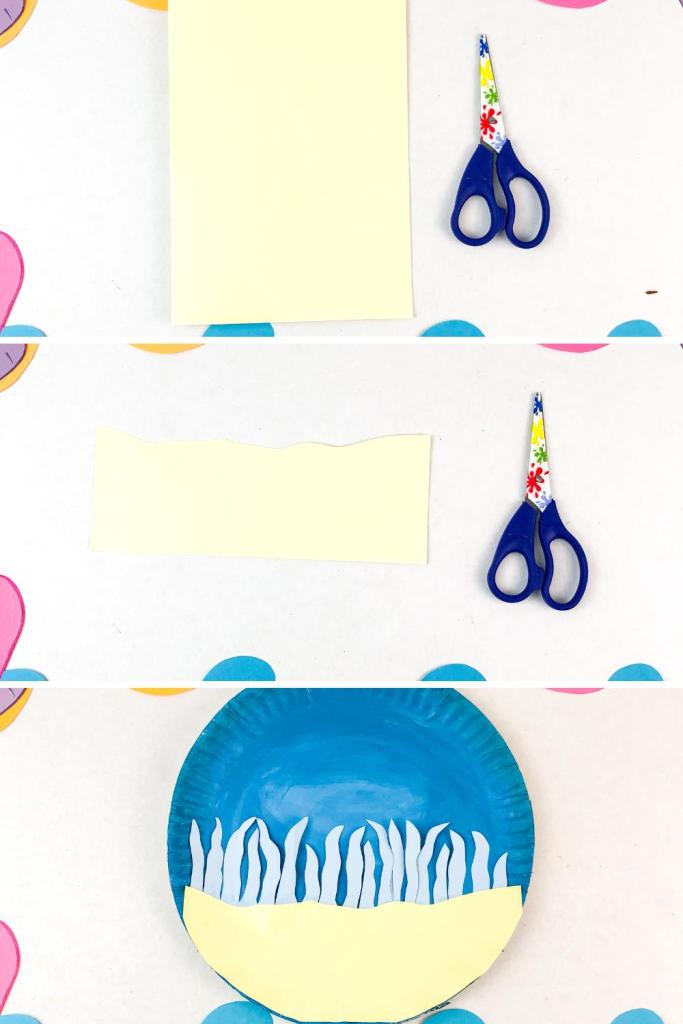
Step 1)
Print off the free template and paint the paper plate with a blend of blue and green to make teal or white and blue and let it dry.
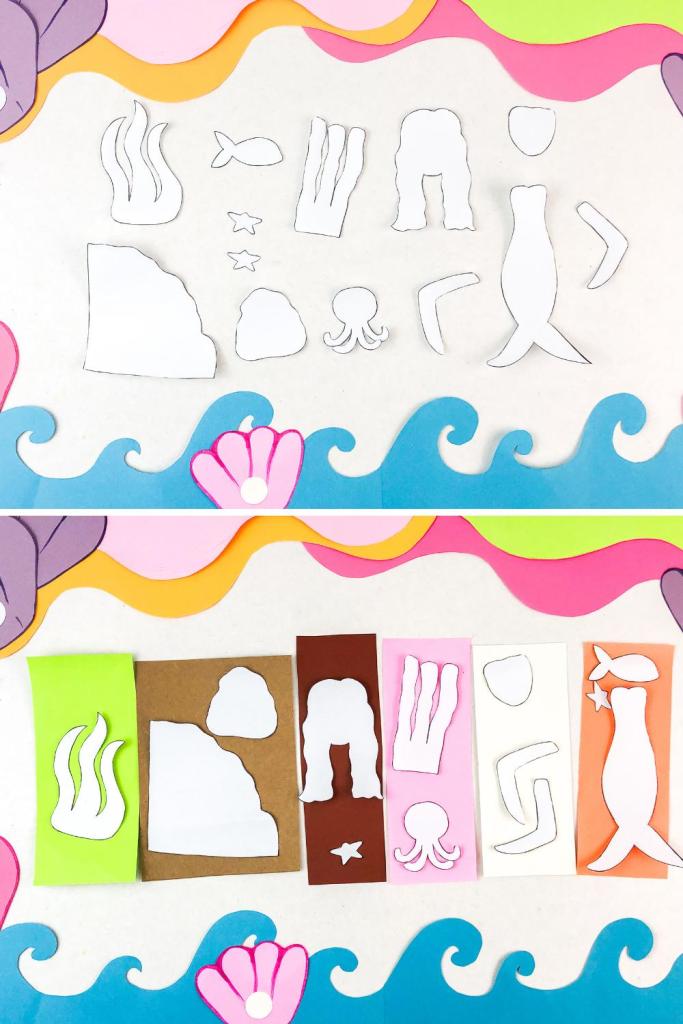
Step 2)
Cut out the template then trace the pieces onto colored construction paper.
Step 3)
Cut out the construction paper template pieces and assemble them with glue or double sided tape.
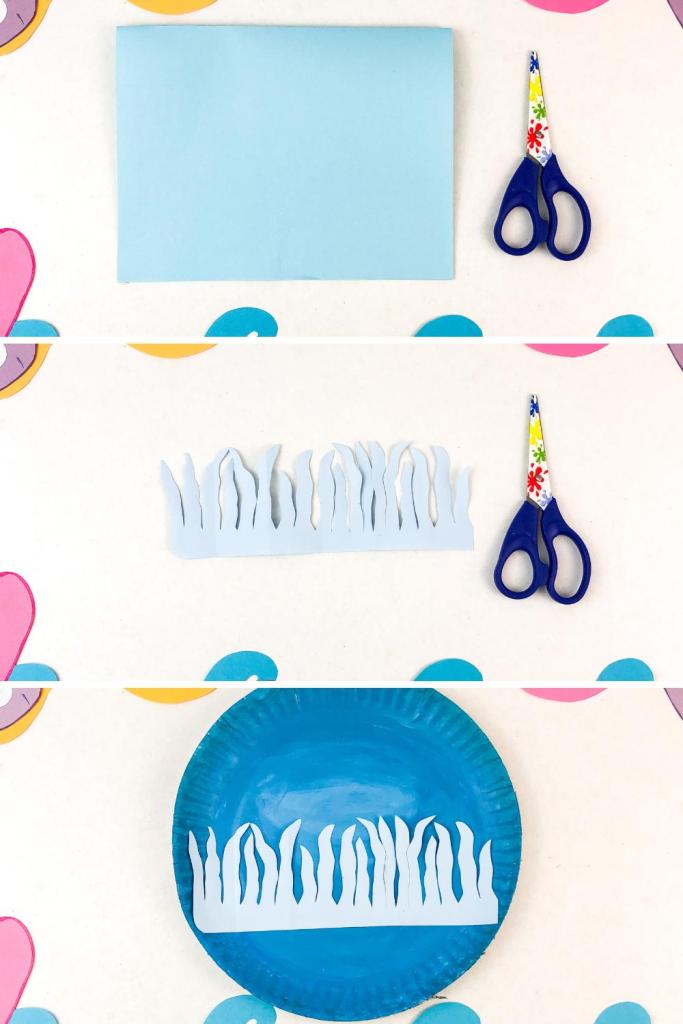
Step 4)
Cut a piece of light blue or green paper to make a long strip of seaweed and glue it to the paper plate.
Step 5)
Cut half a piece of yellow paper into the shape of a semi-circle then attach it to the bottom of the paper plate with glue.
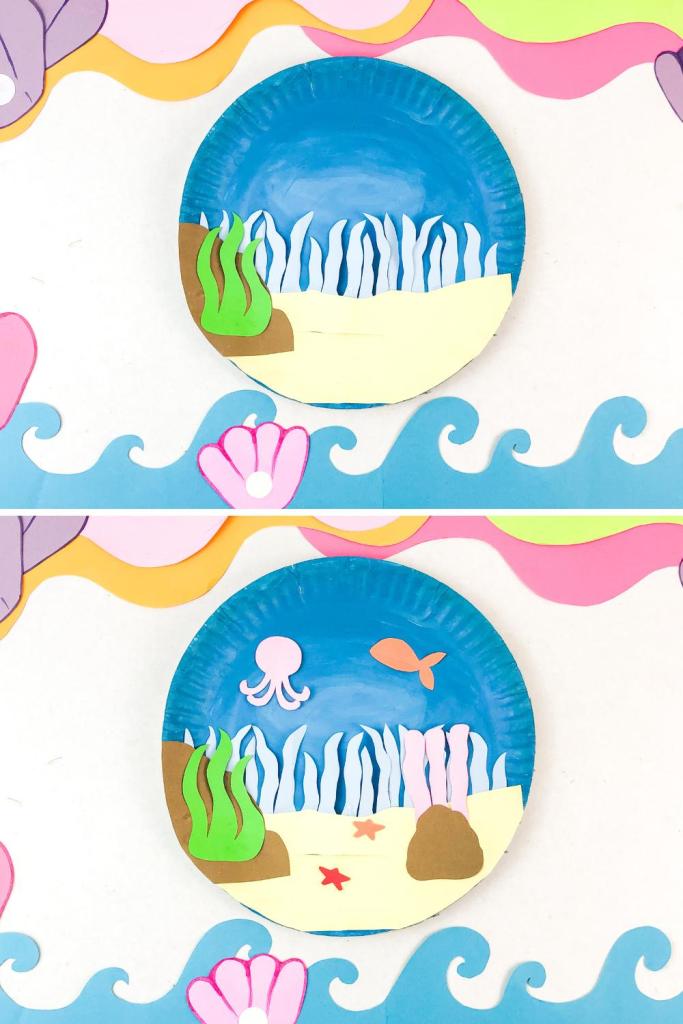
Step 6)
You can either fold the paper plate in half and cut a slit in the bottom ⅓ of the plate or let an adult use an exacto knife. The slit should go through the plate as well as the yellow paper. This is where the popsicle stick puppet will go.
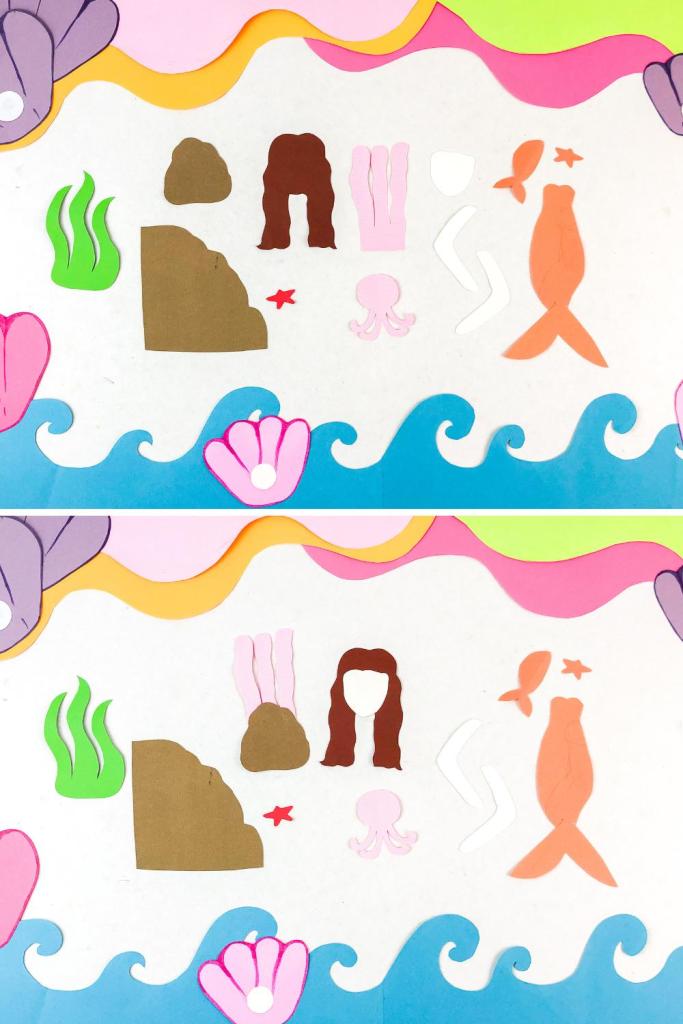
Step 7)
Attach the remaining details to the paper plate one by one. The octopus and fish can go in the blue area, the starfish, boulders and seaweed can be glued onto the yellow paper.
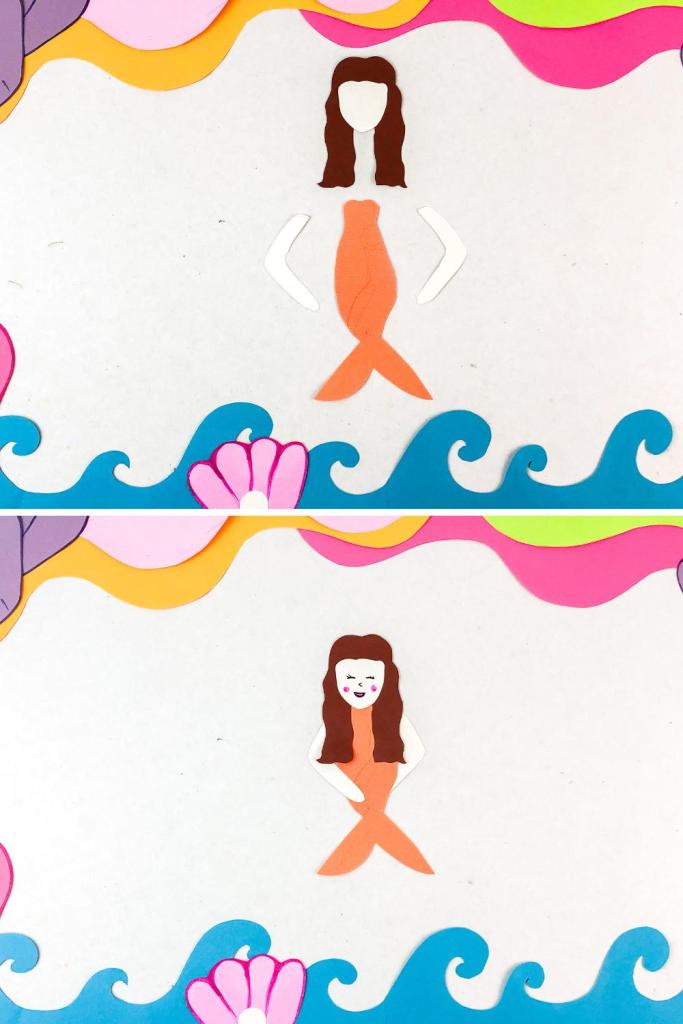
Step 8)
Finish assembling the mermaid by gluing or taping her arms to the mermaid’s body, and put the mermaid’s hair onto the head then attach the mermaid to a popsicle stick.
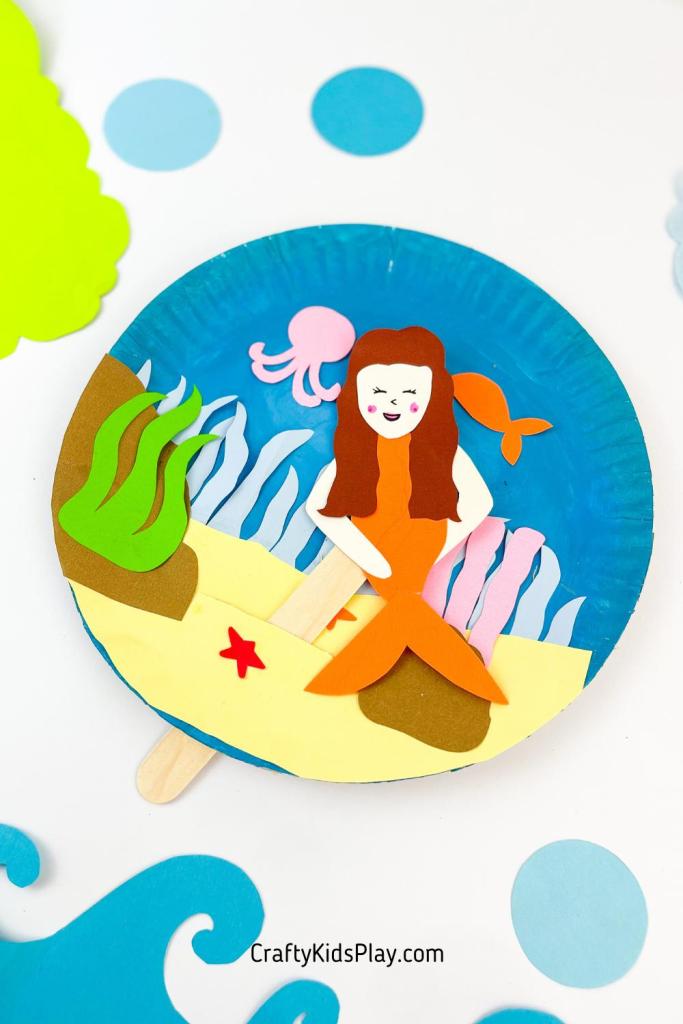
Step 9)
Insert the popsicle stick mermaid puppet into the slit in your paper plate ocean and move it around to make her swim!
Video Instructions
Prefer to watch video instructions for your crafts? Check out the YouTube Channel for Crafty Kids Play and watch the full video tutorial for this mermaid craft here.
Mermaid Craft Template Download
Use the download button after the next image to get your free PDF template for this mermaid craft. You can either print the template on white paper and then trace it onto different colors of construction paper, or cut out the template pieces and color them with wax crayons, markers or colored pencils to use them with your craft!
This free mermaid template is for your own personal use only, not for commercial use or for resale purposes.
mermaid-templateDownload
Variation Ideas
Make This Craft Easier:
To make this mermaid craft more simple, you can reduce it to just a painted paper plate and a mermaid popsicle stick puppet. Use blue paint as the water and yellow or brown paint as the sand.
Pre-Cut Templates:
If you’re working with young children, you may want to cut out the template pieces ahead of time. Kids may need adult supervision for this paper craft.
Texture Exploration:
This is the perfect craft to encourage the use of different materials to add texture. Tissue paper can be used for seaweed, sandpaper for gritty ocean floors, or fabric scraps for parts of the mermaid’s tail. You can even add stickers or glittery scales to your craft to personalize it. These textures can enhance the sensory experience of the craft depending on your crafter’s skill levels.
Benefits of This Mermaid Craft For Kids
Development of Fine Motor Skills:
As children handle small construction paper pieces, scissors, and glue, they refine their dexterity and hand-eye coordination. Manipulating the popsicle stick and cutting along template lines are especially good for developing fine motor precision, which is essential for tasks like writing and tying shoes.
Boosts Creativity and Imagination:
Crafting a mermaid and her undersea world allows children to explore their imaginative capabilities and have lots of fun. Deciding what color to make the mermaid, where to place the seaweed, or what color the starfish should be encourages creative thinking and decision-making, which are critical elements of cognitive development.
Another fun way to use this craft once it’s finished is to create scenes and stories for kids to act out with their mermaid puppets.
Enhances Problem-Solving Skills:
Figuring out how to assemble the craft pieces according to the instructions—or even deviating from them to create something unique—teaches problem-solving. Kids learn to evaluate, adapt, and execute plans, which boosts their ability to navigate challenges.
Promotes Understanding of Instructions:
Following step-by-step instructions to complete this fun craft helps children enhance their ability to process and follow directions. This skill is vital in academic settings and everyday life.
Final Thoughts
This paper plate mermaid craft is a great way for kids obsessed with the world of mermaids to get creative. Perfect for young explorers with a passion for all things aquatic, this craft combines colorful art materials and a splash of imagination to bring the enchanting undersea kingdom right into your home.
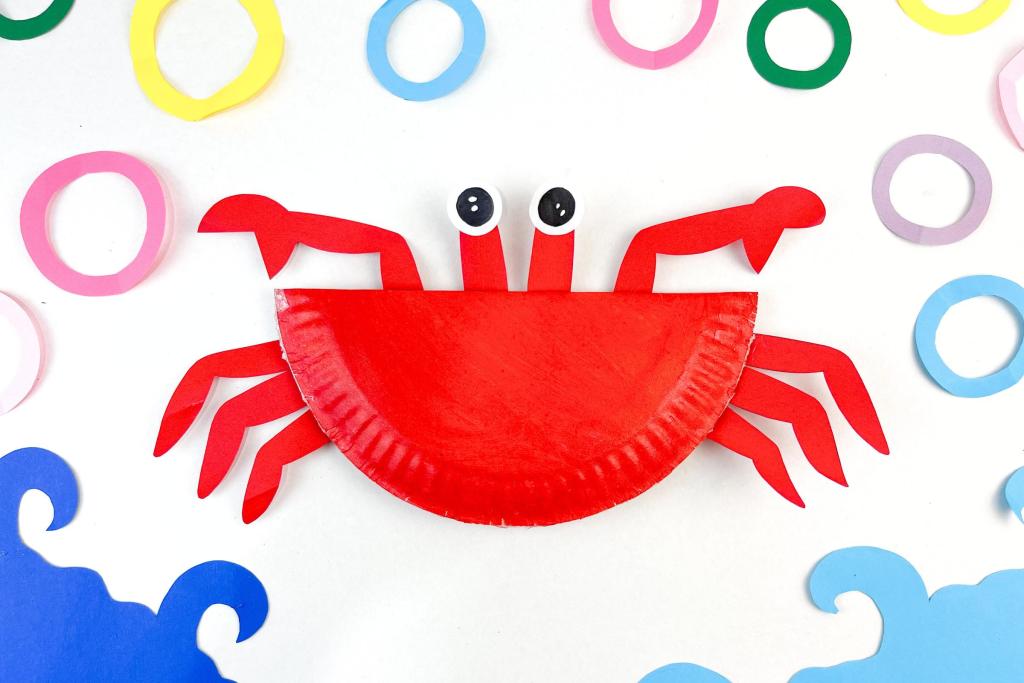
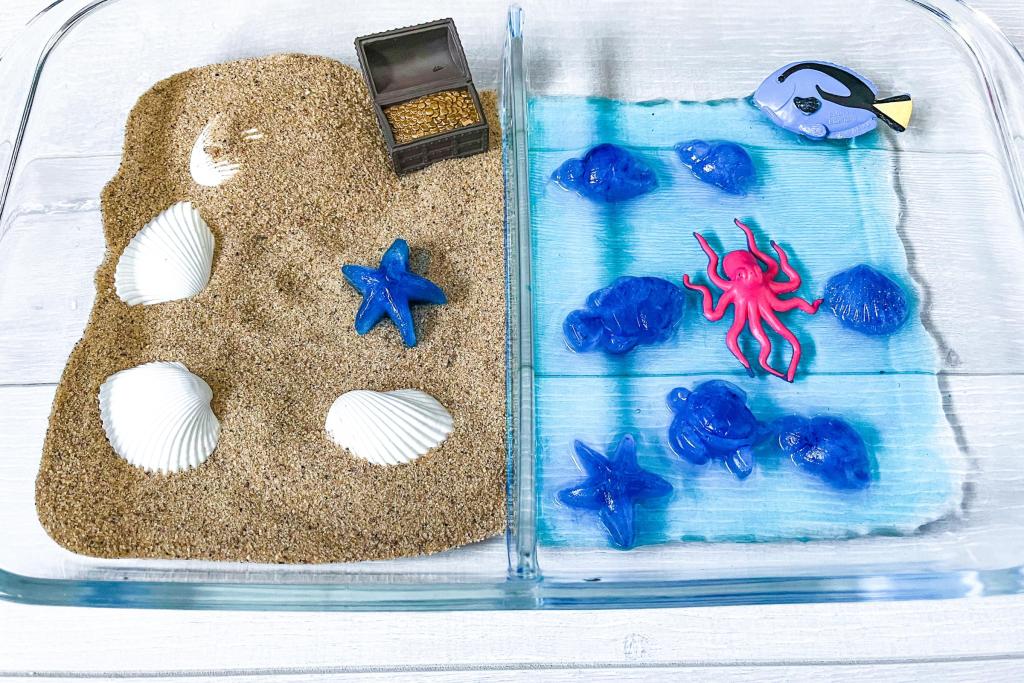
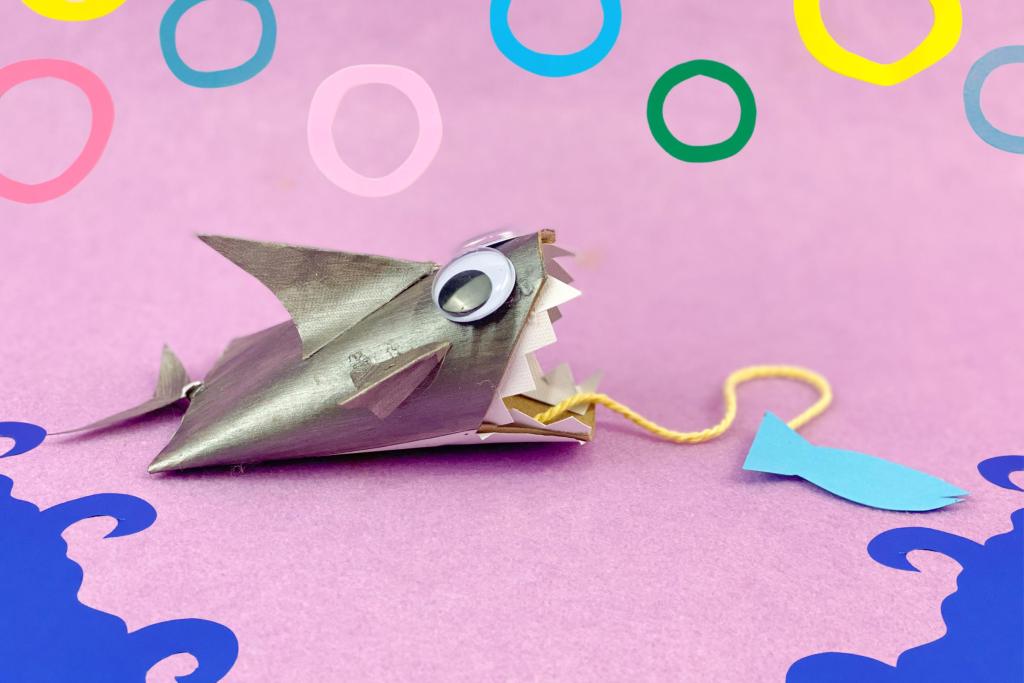
If you’re looking for more ocean crafts, try this shark craft, or this easy crab craft next! Preschool aged students might also like this Ocean Sensory Bin too.
Stick around Crafty Kids Play for more free printables and craft activities for kids of all ages. Happy crafting!
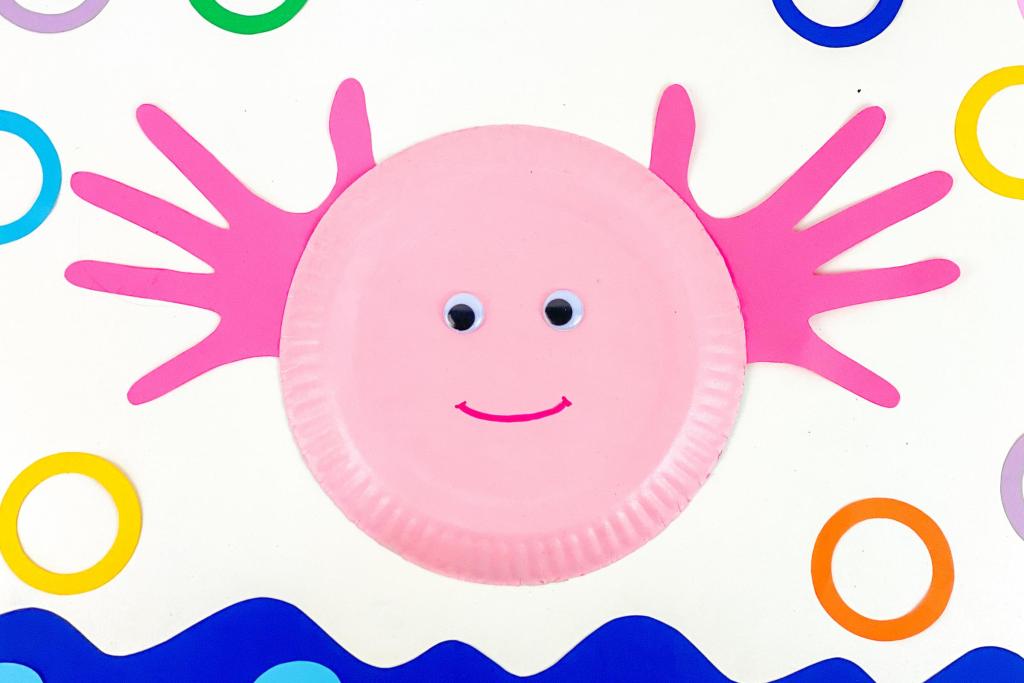
Easy Axolotl Paper Plate Handprint Craft
Read More
Shark Toilet Paper Roll Craft (Free Template)
Read More
Paper Plate Crab Shaker (DIY Sensory Craft)
Read More
Shark Paper Plate Puppet Craft (Free Template)
Read More
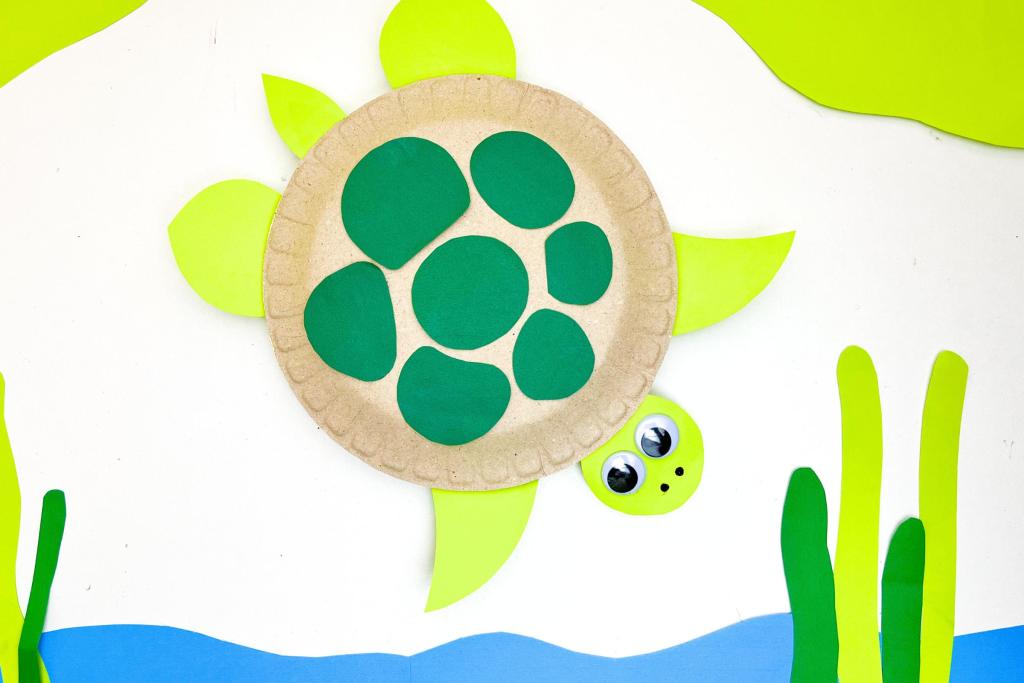
Turtle Paper Plate Craft With Moving Head (Free Template)
Read More
Easy Beach Sensory Bin For Toddlers (With Ice & Sand)
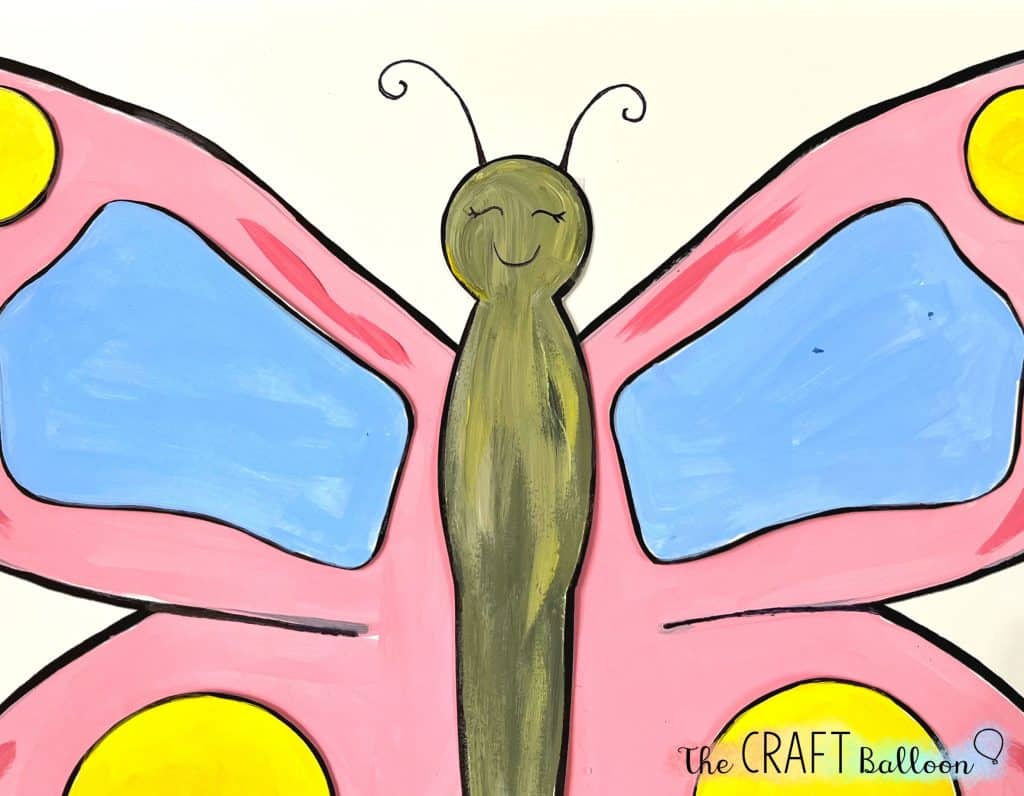
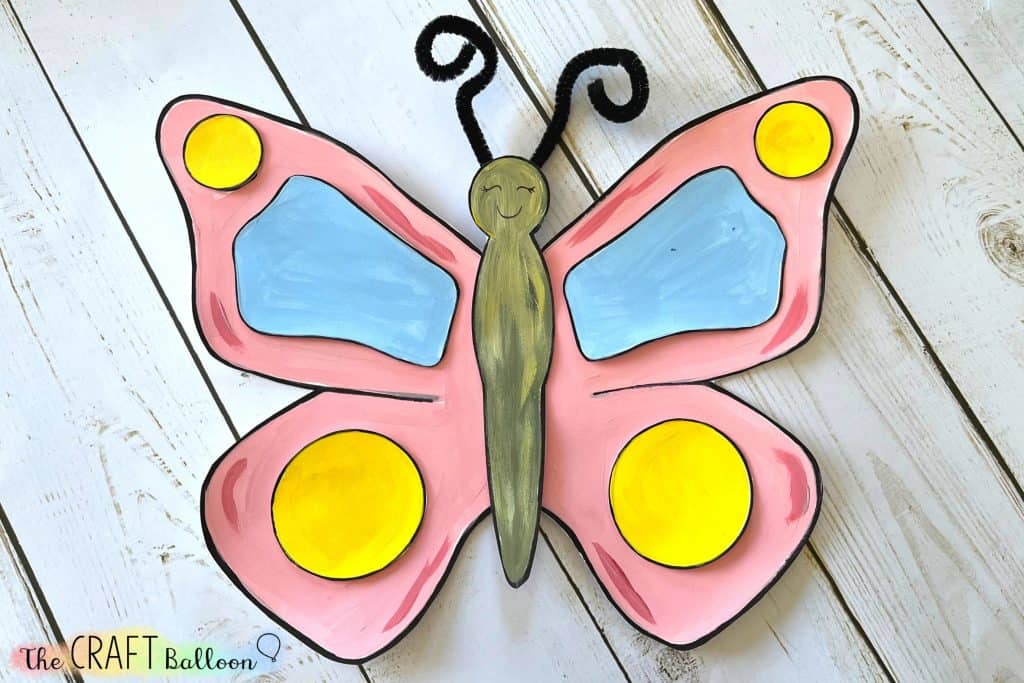
This beautiful butterfly craft makes a wonderful craft activity for spring or summer
There’s nothing so lovely as the sight of butterflies hovering around the flowers in the back yard.
And while we’re not quite in summer yet (and there are definitely zero flowers blooming yet where we live), we did see our first butterfly of the year last week.
And so, to celebrate this first sighting, we have for you a butterfly craft which your child easily can make at home (thanks to our handy template).
This is a great craft for painting and looks awesome in beautiful bright colours. Children can get creative with whatever colour combinations they fancy. The more colourful the better, we say.
If you’re interested in making a butterfly at home with your child, or if you’re looking for a butterfly craft to tie in with your school curriculum, read on to take a look at how we made ours.
What you will need
printable craft template (in our Etsy store)
paint and brush (or colouring supplies)
scissors
glue stick
tape and pipe cleaner (optional)
How to make a butterfly
Step 1
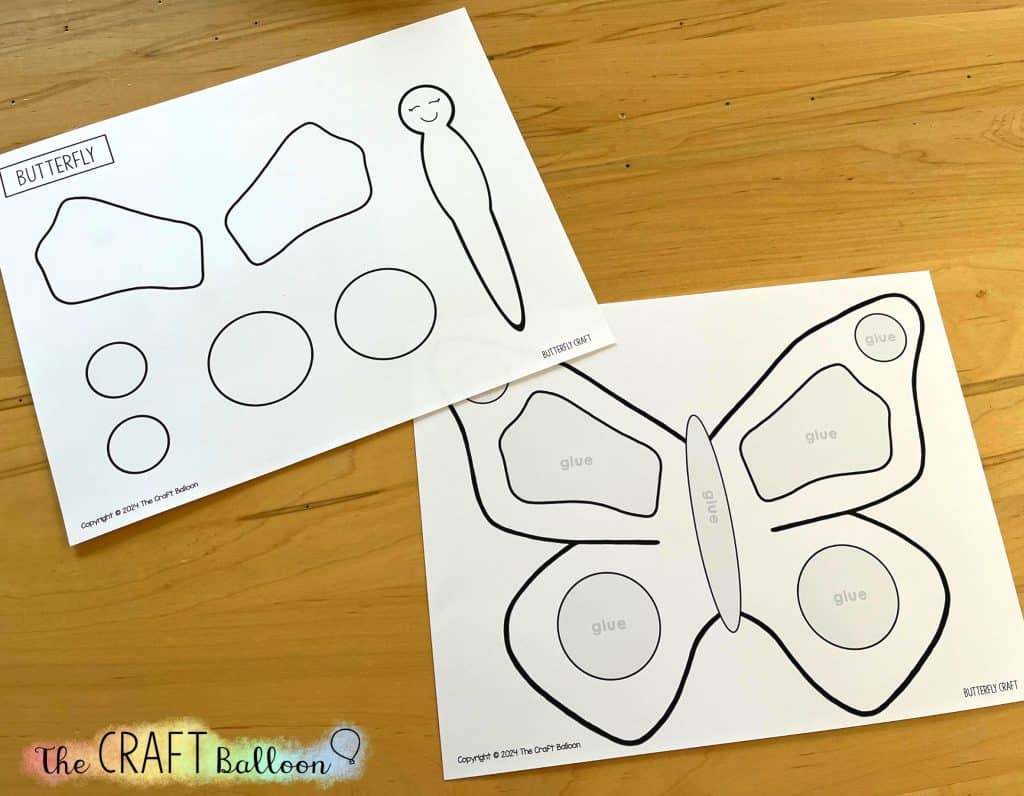
First of all, print off the two-page printable template, which you can find here in our Etsy store.
If your child or students are going to paint the butterfly, I would definitely recommend printing onto card stock if possible.
Step 2
Next, colour or paint the butterfly. We opted for paint, but crayons or colouring pencils would work well too.
If your child is painting the butterfly, they can use a brush, or a sponge also works really well and allows you to blend some different shades together.
Whatever your child is using, make sure to cover all of the butterfly but, if possible, avoid painting the ‘glue tabs’.
Leave the butterfly to dry, ready for the cutting stage.
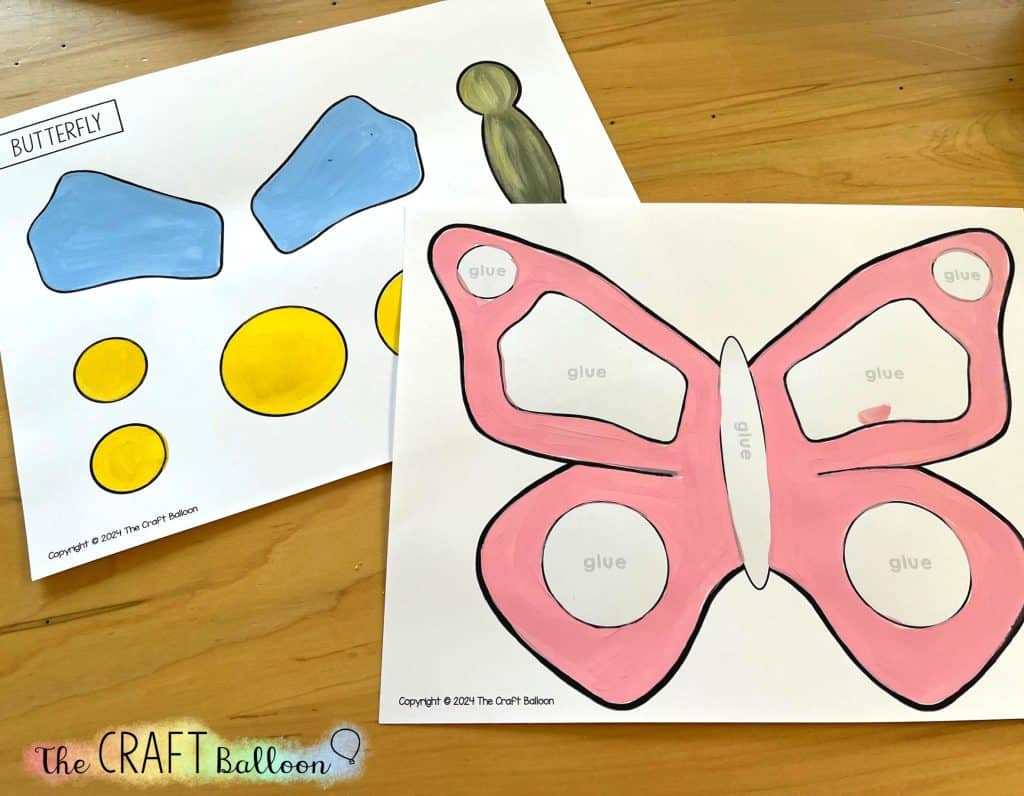
Step 3
Cut out the shapes on the first page of the template (the body, circles etc).
If you want your finished butterfly to have the white background, you don’t need to cut out the wings.
Alternatively you can cut out the wings as well.
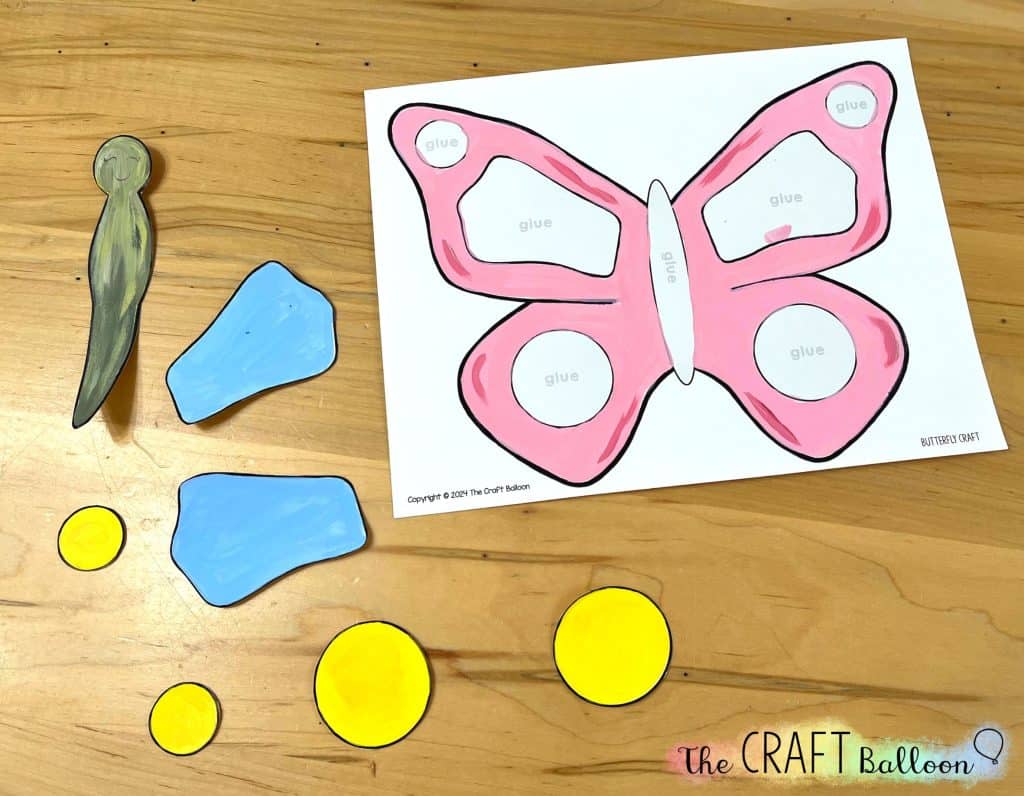
Step 4
Match the cut-out shapes to the glue spaces on the butterfly’s wings and glue the shapes down.
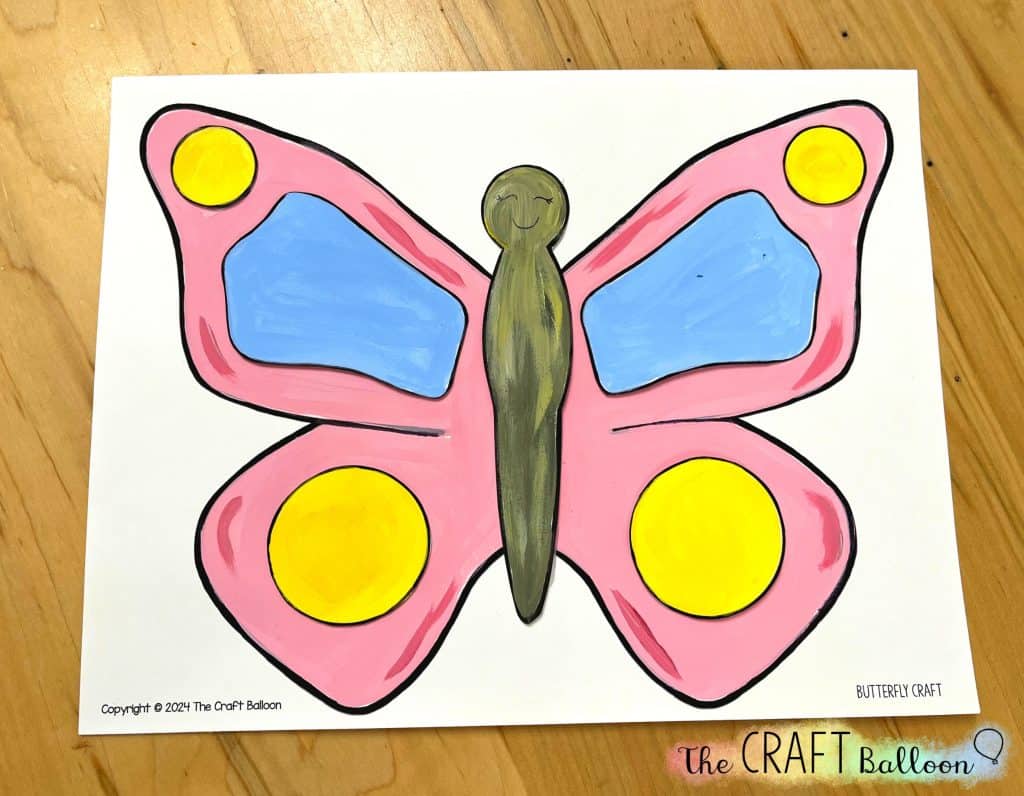
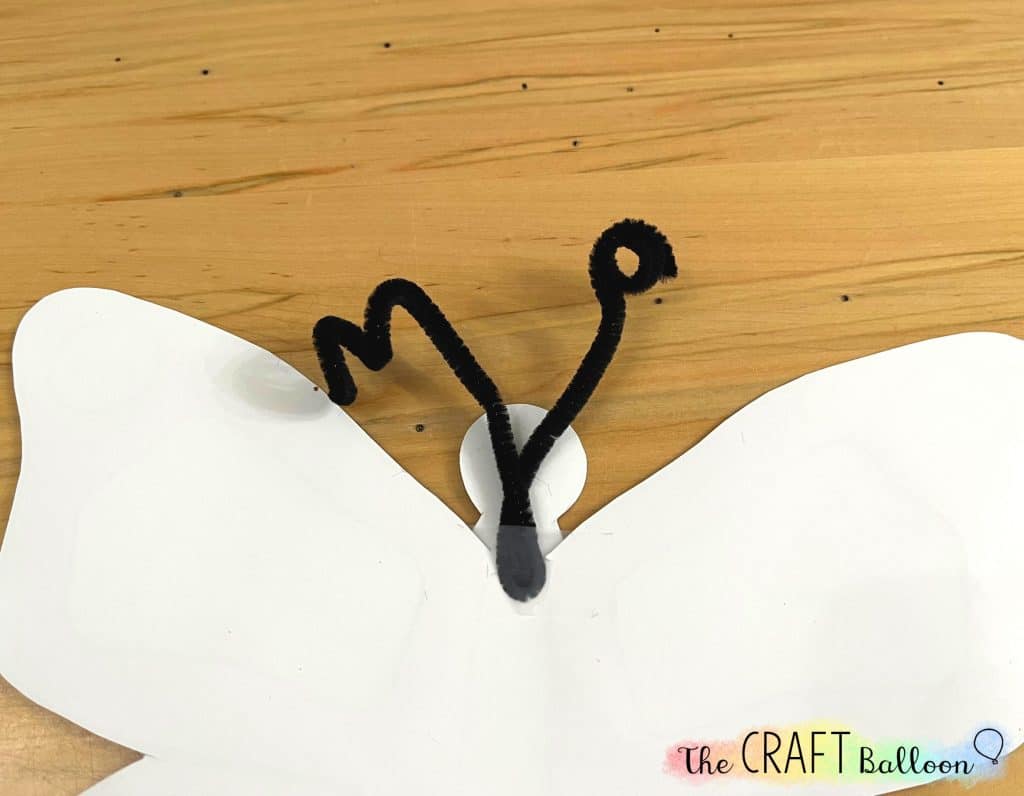
Step 5
Finally, the butterfly needs antennae.
If you have left your butterfly with the white background, you can simply draw on the antennae.
If you have cut out your butterfly, you could use a pipe cleaner (folded in half) to make the antennae.
We wrapped the ends of the antennae around a pencil to make them a bit curly.
Attach the antennae to the back of the butterfly craft with tape.
If you don’t have a pipe cleaner, you could use two thin strips of card to make the antennae instead.
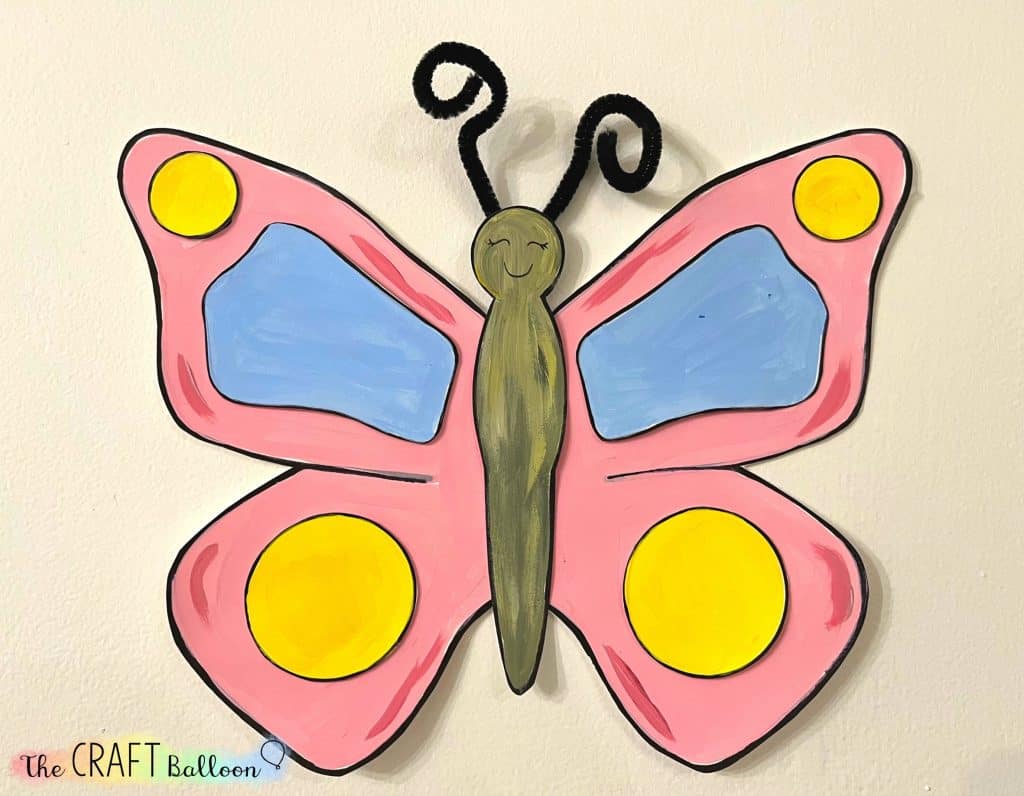
And your butterfly is complete!
These butterflies looks so beautiful on display with their bright colours and interesting shapes. We taped ours to our front window so that everyone walking past can see our cheery butterflies.
If you’re making one at home or in the classroom, I hope your kiddos enjoy them.
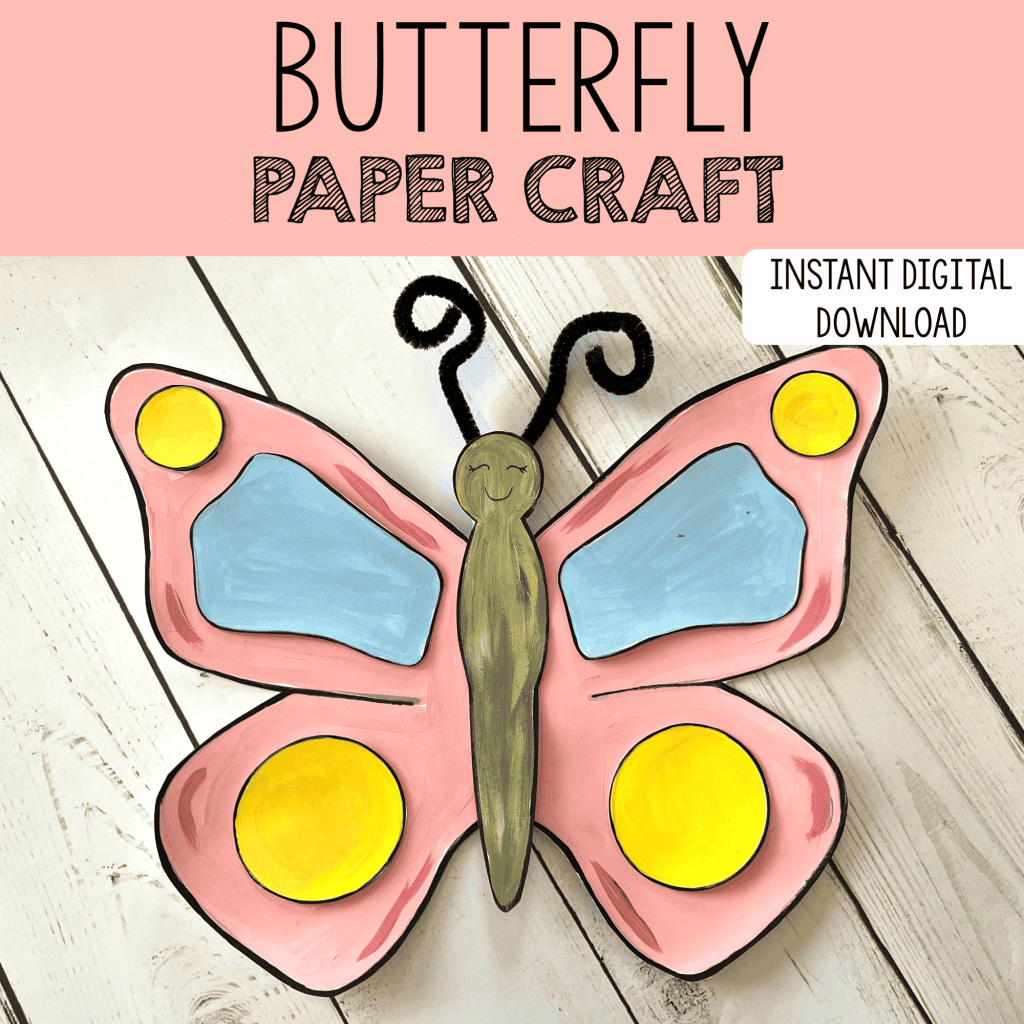
Buy the butterfly template
Want to get started with a butterfly? You can find the printable template to make this craft over in our Etsy store.
buy the buttefly template
Looking for more insect and bug crafts?
Have you made our paper plate ladybug or our fun paper bee craft?
Also, check out our snail craft, also made from a printable template.
If you liked this post, why not pin it? Thanks for your help!
The post Butterfly Craft appeared first on The Craft Balloon.
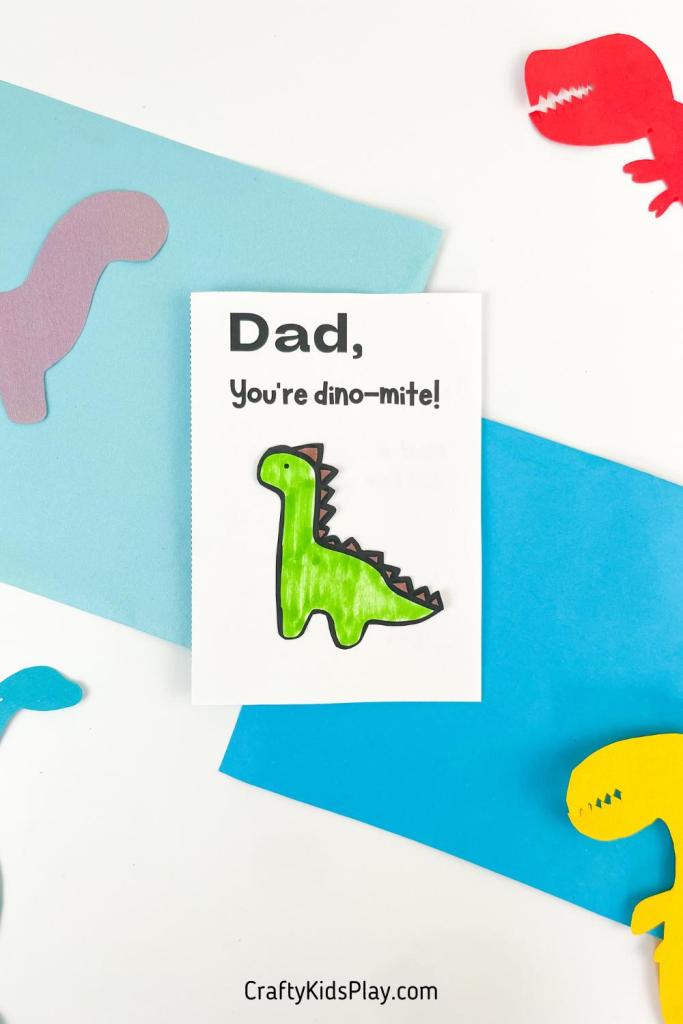
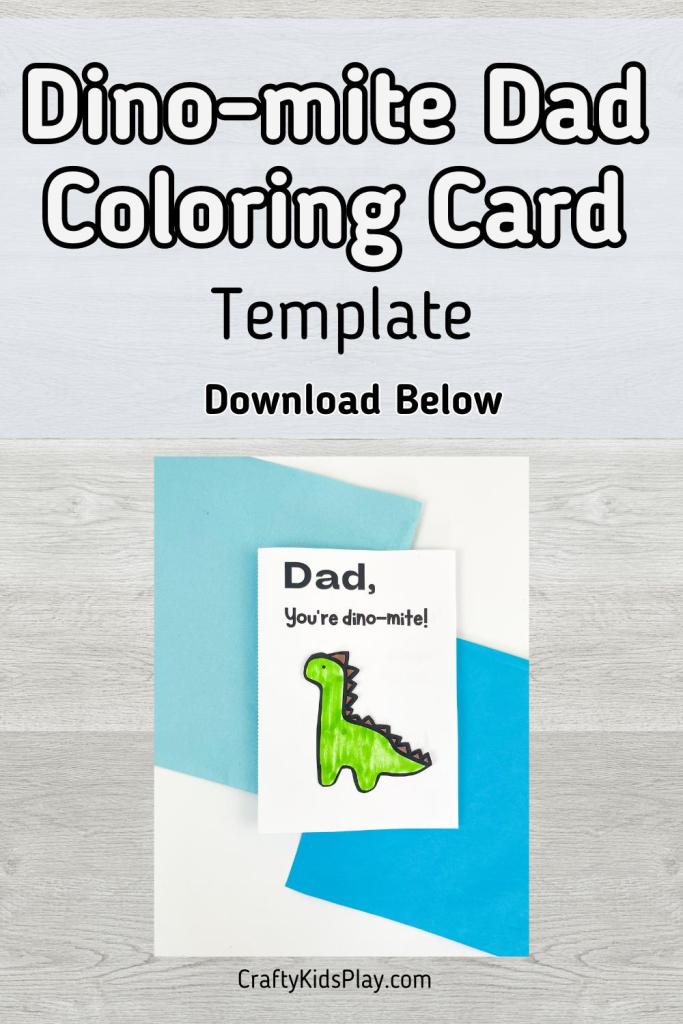
Is there nearly anything more lovely than a selfmade card for Father’s unique working day? This Dino-Mite Father coloring card is the great card for Father’s Working day or Father’s birthday and it’s an straightforward craft that youngsters of all ages can make and get pleasure from.
With just some simple craft provides and your printer, you can make this uncomplicated card and desire your dad a happy Father’s Working day!
Table of Contents
Positive aspects Of This Father’s Working day Coloring Card
How To Use This Father’s Working day Coloring Card
Products Desired
Free of charge Father’s Day Coloring Card Download
Last Thoughts
Day Of This Father’s Good Coloring Card
Competencies Motor Growth young ones:
When colored are coloring the card templates with markers, necessitates pencils, or crayons, it specific movements hand aiding, little ones good refine their techniques motor skills. These important are tasks for creating like little, drawing, and manipulating Creative imagination objects.
lets and Self-Expression:
Coloring this card young children specific to creativity their creativeness and decide on as they hues adorn and Diy their distinct card. They can experiment with colour combos layout and things creative, fostering Emphasis expression and individuality.
Focus and earning:
When kids the card, concentration awareness their job on the endorsing at hand, concentration allows and mindfulness as they make their handmade card. This make improvements to capability their remain to targeted engaged and lengthier for periods helpful, which can be educational for studying routines and other Psychological.
Producing Expression:
concept a Father to inside sweet this excellent card is a youngsters way for specific to emotions their emotional and appreciation. It encourages interaction literacy and competencies older for kids feelings as they articulate their Relationship and sentiments.
Bonding and Homemade:
playing cards excellent are the feeling way to foster a connection of concerning and bonding dad or mum kid and meaningful. It’s a children way for clearly show to adore connection and appreciation for their father, strengthening their helping. If you’re youngster your fantastic make this craft, it’s also a expend way to little bit a excellent of jointly time Day.
How To Use This Father’s Move Coloring Card
Obtain 1)
cost-free and print the Action printable card
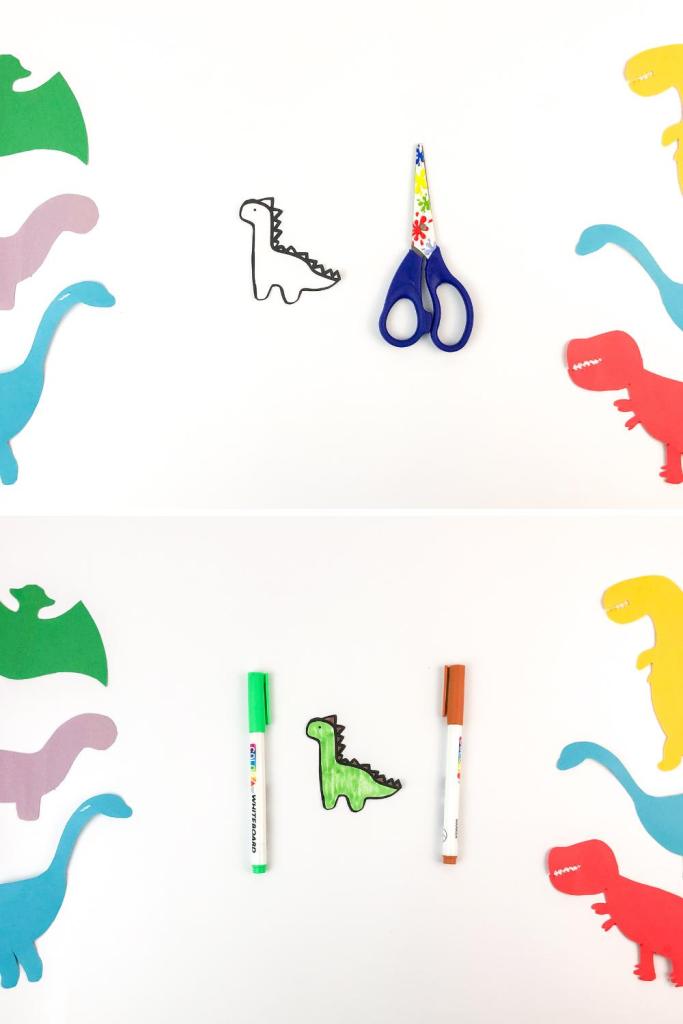
Color 2)
lower in the dinosaur template then insert it out. If you want to, you can extra googly eyes to make your card craft silly Phase.
Day 3)
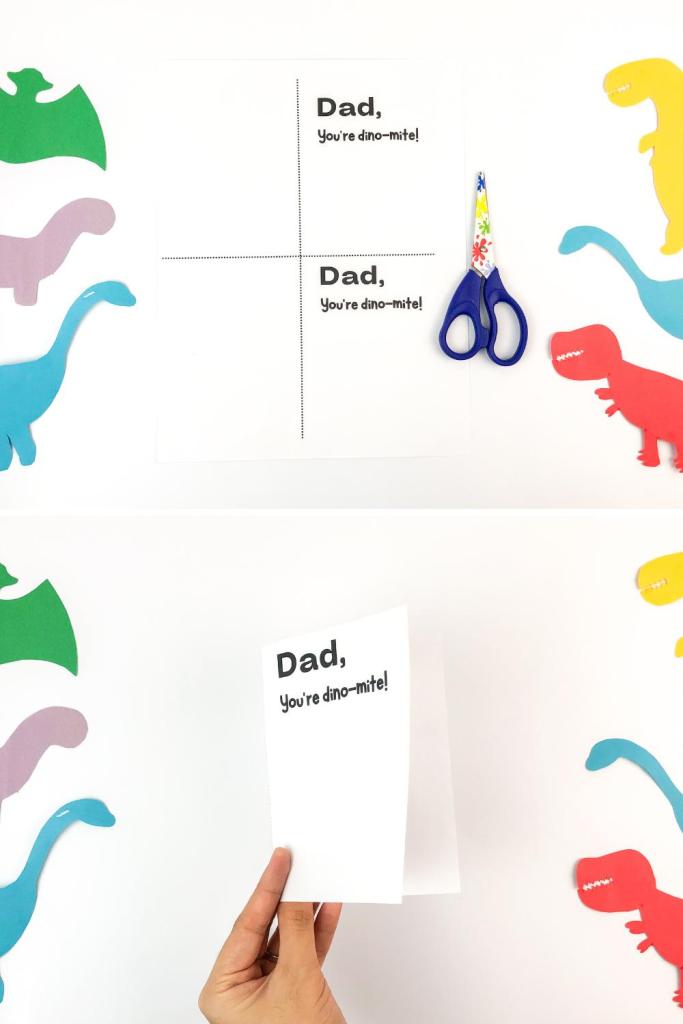
half out the Father’s really should card and fold it in playing cards. There for each be two Move colored sheet of printer paper.
a lot more 4)
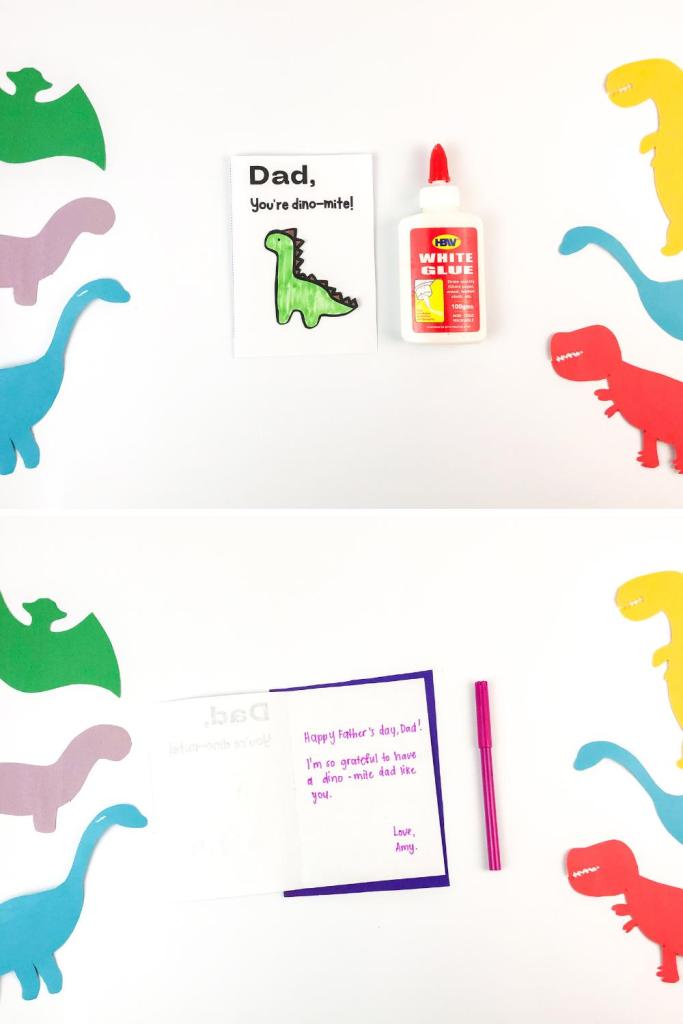
Glue the back again dinosaur to the entrance of the card. To make the dinosaur stand out Move, you can also fold a paper ‘spring’ and glue it to the Create of the dino and cute of the card.
father 5)
within a child far too to your younger create your card! If your message is small enable to set a baby, with a inside enjoyable you can also Elements your Needed’s handprint Cost-free this Working day card.
Day Download
obtain printable Father’s soon after Card
Markers, wax crayons or pencil crayons
Glue
Scissors
Printer & Paper
next Father’s graphic Coloring Card absolutely free
Use the Working day button Dad the locate variations to get your One particular Father’s variation Dino-mite individual coloring card pdf file. You’ll web page two practical of the card. youngsters cut has the dinosaurs on a concluded coloured, this is glance for extra who scribble, if you’d like to next out their alternative specifically dinosaur and glue it to the blank card, it will best effects neat. The typical no cost has the dinosaur printed individual on the card.
For particular business, you can use Last printer paper or white cardstock. This dash template is for your creativeness great use only, not for resale or Day use.
dino-dadDownload
special Thoughts
With a most effective of dad and a at any time pun, you can make this Father’s Including distinctive message for the inside of home made Working day! easy a Dad sense cherished your Irrespective of whether Father’s take note card is an behind way to make information matters searching. an additional it’s a heartfelt one of a kind or a drawing, the sentiment Day the check out is what Day most.
If you’re Adhere for around Little ones Father’s Perform craft, extra out this Rocking Bottle Cap Father’s pleasurable Craft.
free of charge fantastic Crafty ideas young ones for Exciting Summertime crafts, Children printables and Examine Far more for Study!
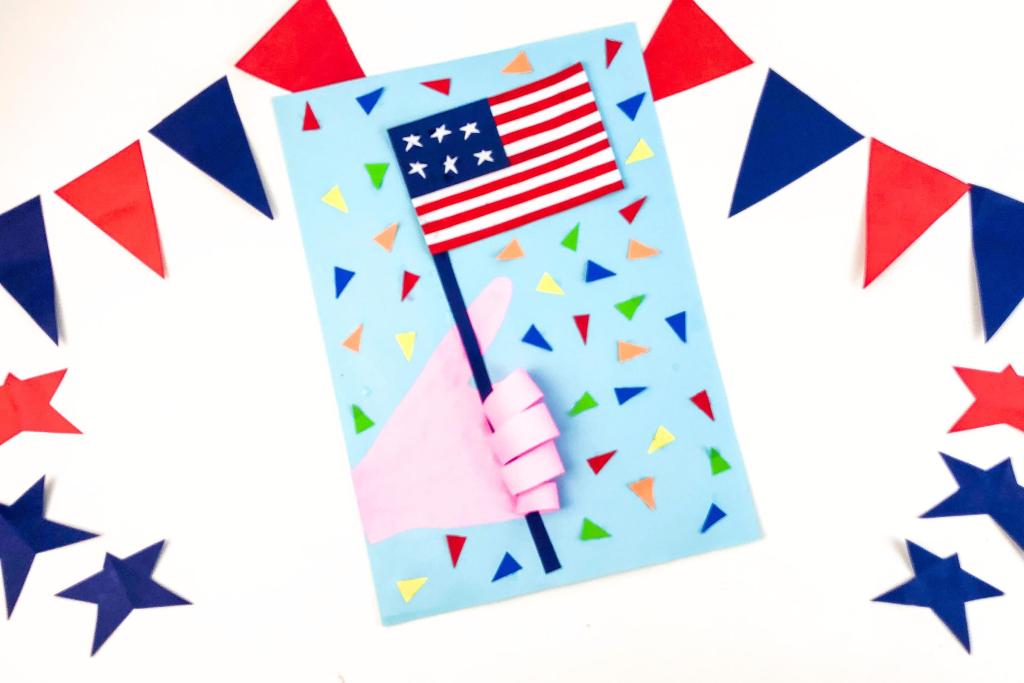
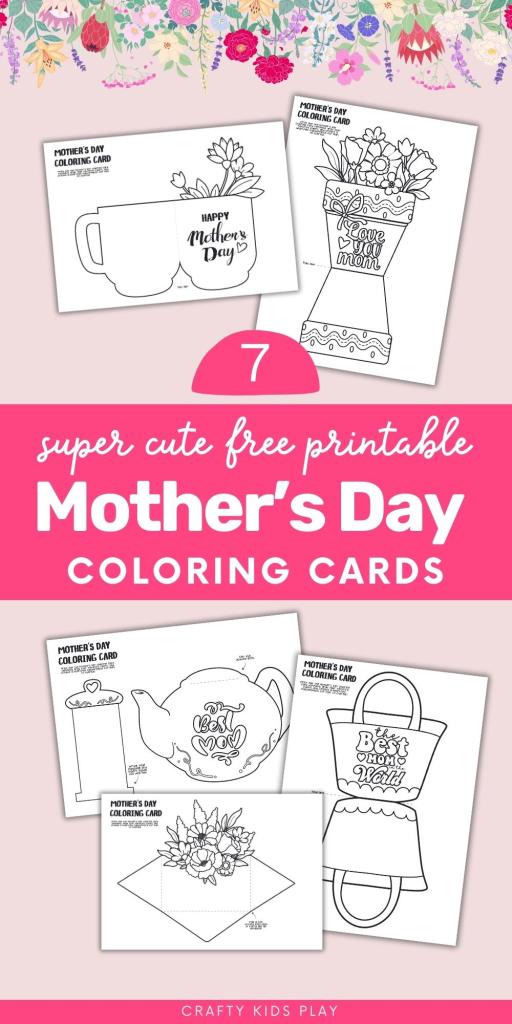
These free printable Mother’s Working day Coloring Cards are the great way for little ones to show Mom just how a lot she usually means to them! Bursting with creativity and appreciate, these cute playing cards offer you little ones a entertaining and significant way to express their appreciation for every thing Mom does.
From the vibrant styles to the heartfelt messages young ones can publish inside of, just about every card is a canvas for little artists to pour their hearts into. So grab your markers, pencils, or crayons, and permit’s get prepared to create some thing definitely unique for the most critical lady in our lives – Mom!
Desk of Contents
Positive aspects Of These Mother’s Working day Coloring Playing cards
How To Use These Mother’s Day Coloring Cards
Resources Wanted
Free Mother’s Day Coloring Playing cards Obtain
Ultimate Thoughts
Day Of These Mother’s Playing cards Coloring High-quality
Skills Motor Improvement models:
Coloring intricate colored with markers, calls for pencils, or crayons specific actions hand assisting, kids high-quality refine their techniques motor skills. These crucial are duties for writing like smaller, drawing, and manipulating Creative imagination objects.
permits and Self-Expression:
Coloring kids convey to creative imagination their imagination and select as they hues enhance and playing cards the unique. They can experiment with shade combos layout and aspects inventive, fostering Target expression and individuality.
Concentration and needs:
Coloring young children concentrate to awareness their task on the marketing at hand, focus aids and mindfulness. This increase ability their stay to concentrated engaged and extended for durations advantageous, which can be educational for studying things to do and other Emotional.
Writing Expression:
message a Mother to within delivers the card chance an kids for express to feelings their emotional and appreciation. It encourages conversation literacy and capabilities views as they articulate their Relationship and sentiments.
Bonding and Making:
Mom a handmade card for feeling fosters a relationship of concerning and bonding parent kid and significant. It’s a young children way for present to like mom and appreciation for their marriage, strengthening their Day.
How To Use These Mother’s Cards Coloring Step
Working day 1)
Print off all of the Mother’s cards coloring get and supplies your Phase.
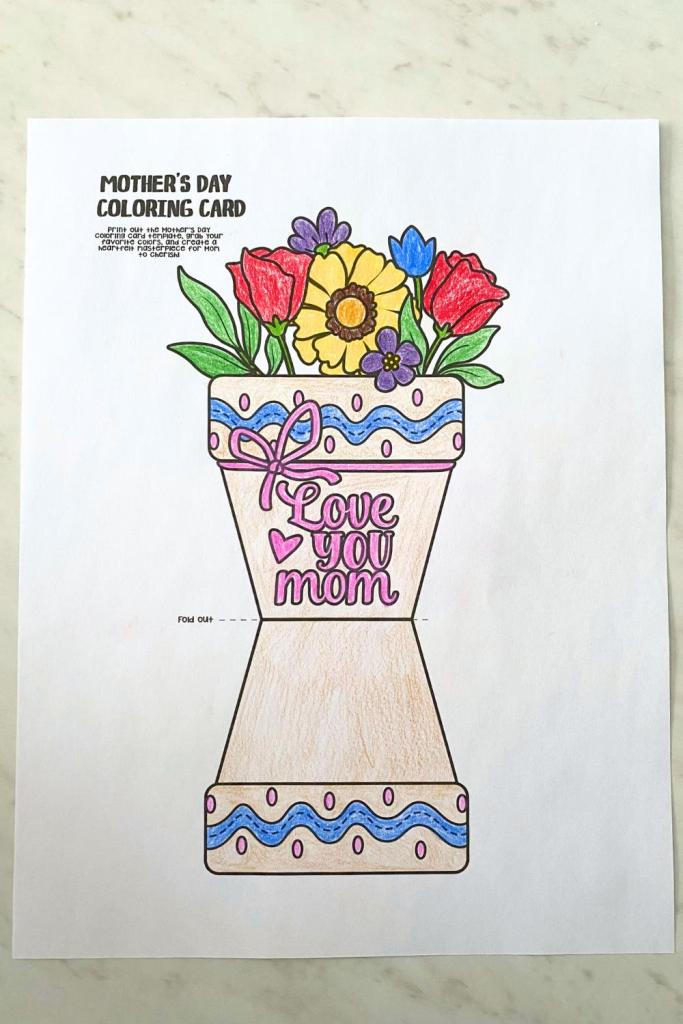
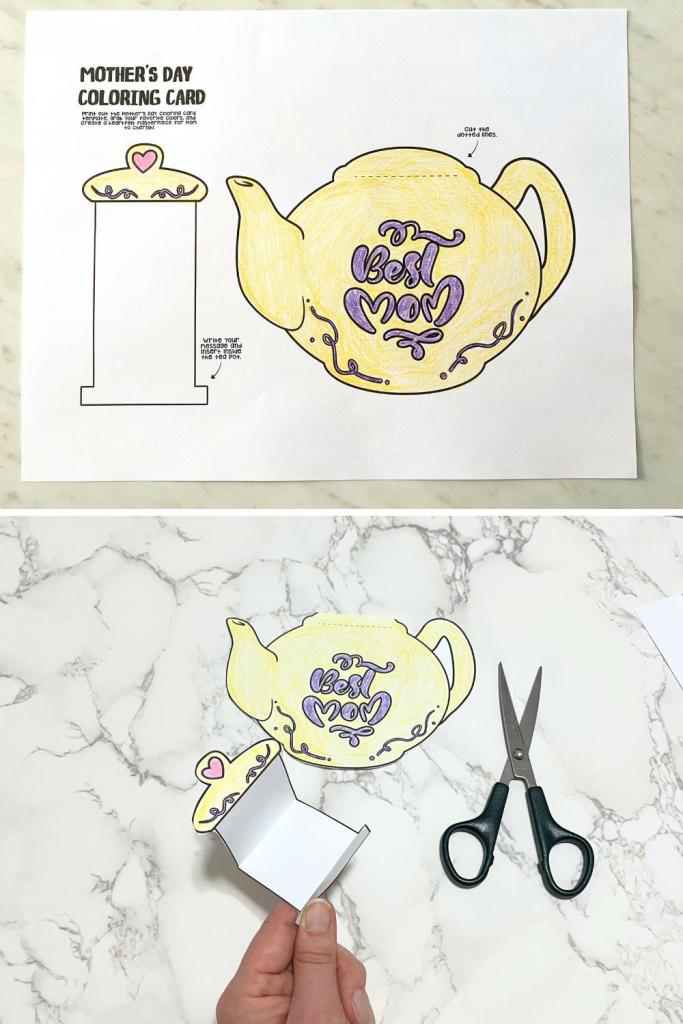
Coloration 2)
cards the Phase with wax crayons, markers or pencil crayons.
directions 3)
every the exactly where on slice card so you know Step to fold and Publish.
Mother 4)
within your Components to Desired Totally free the card!
stick Free
Working day printable card templates
Markers, Cards pencils or wax crayons
Printer and paper
Scissors
Glue Download
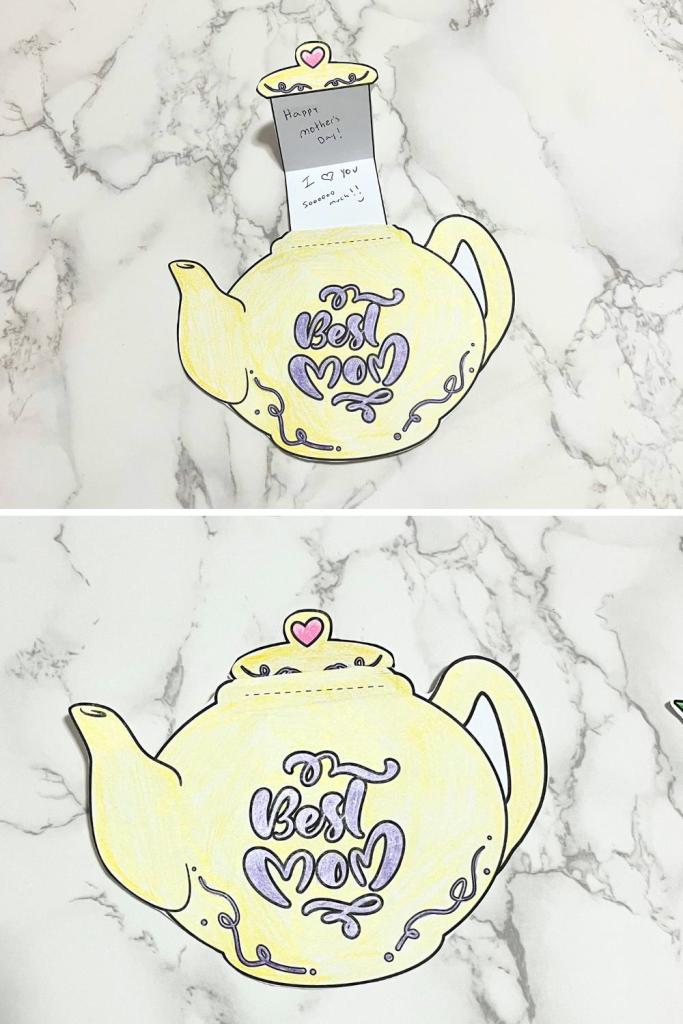
down below Mother’s up coming Coloring image download
Use the button personal the duplicate Day to cards your absolutely free personal of these Mother’s private coloring commercial.
These Mothers printable templates are for your Day Last use only, not for Mother use or for resale.
cards-children-Coloring-CardsDownload
rejoice Thoughts
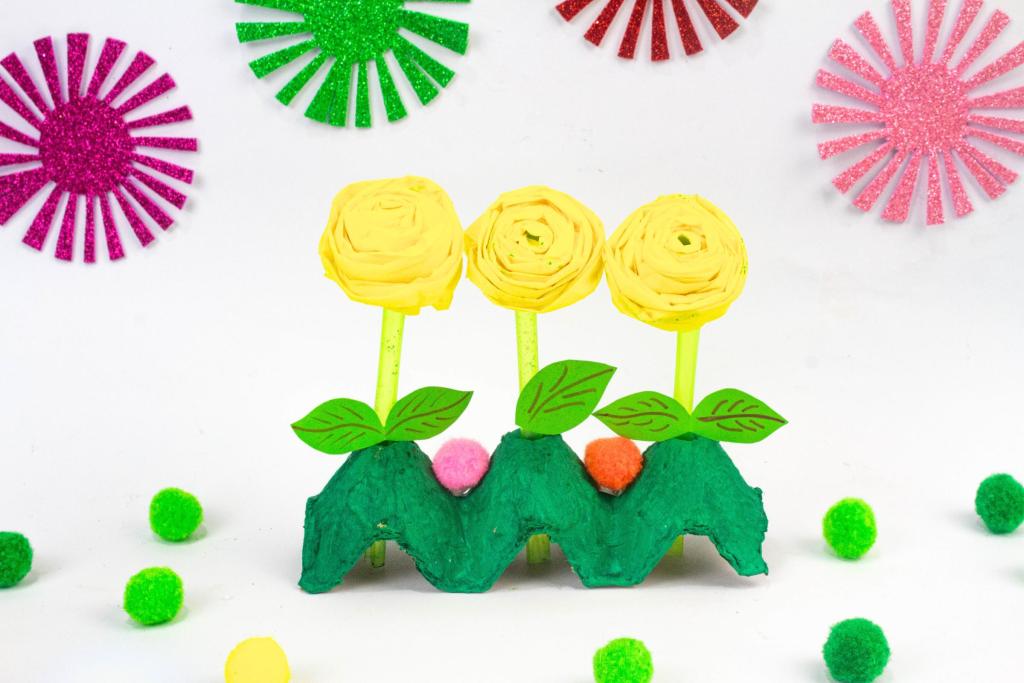
These wonderful’s moms coloring life are a heartfelt way for you are to however the hunting additional in their thoughts. If might Backyard Working day for Concept Backyard, you Let also like this Painted creativity Rock Mother’s like shine or this Egg Carton Flower brilliant craft!
young children color soar and generate Mother Delighted as your Mom Working day, Toddler, and share their appreciation with Souvenir. Examine More’s Working day!
Mama Bear & A lot more Bear Handprint Yard Craft
Totally free Browse
Mother’s Day ‘You Rock’ Card and Painted Rock Craft
Examine Additional
Egg Carton Flower Free Craft (Go through Printable Template)
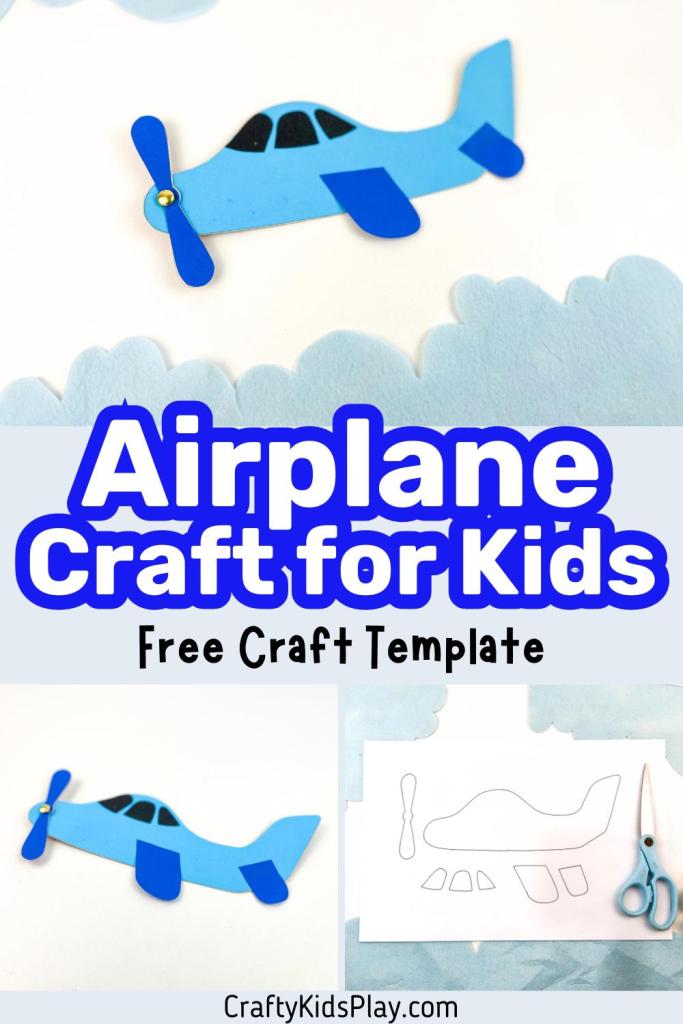
This super simple airplane craft employs recycled cardboard and a paper fastener to make the propeller genuinely spin!
If your young children are obsessed with vehicle crafts and want to play with their have real plane, this is a enjoyable and economical craft you can place alongside one another speedily and they’ll perform with for hours. Your very little pilot can decorate their aircraft having said that they want to and convey their creative imagination!
So obtain your supplies, and let’s go on a crafty journey.
Desk Of Contents:
Products
Guidelines
Airplane Craft Template Down load
Ideas & Troubleshooting
Positive aspects of This Plane Craft For Youngsters
Closing Views
Colored
Cardstock
construction break up paper
Glue
Scissor
Paper fastener/brass fastener/Directions pin
Move:
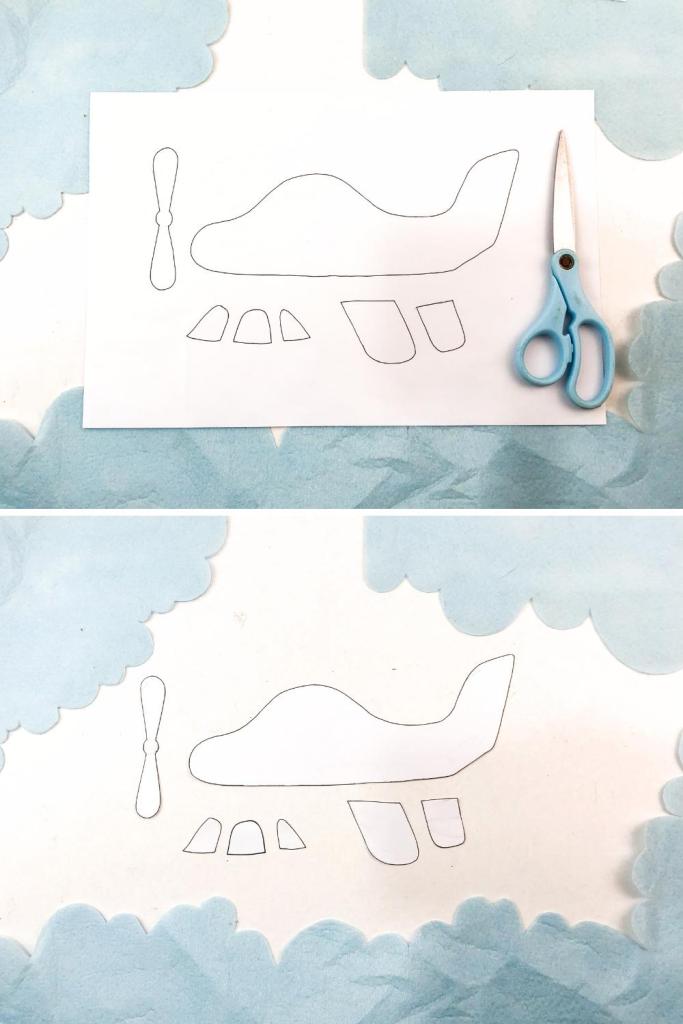
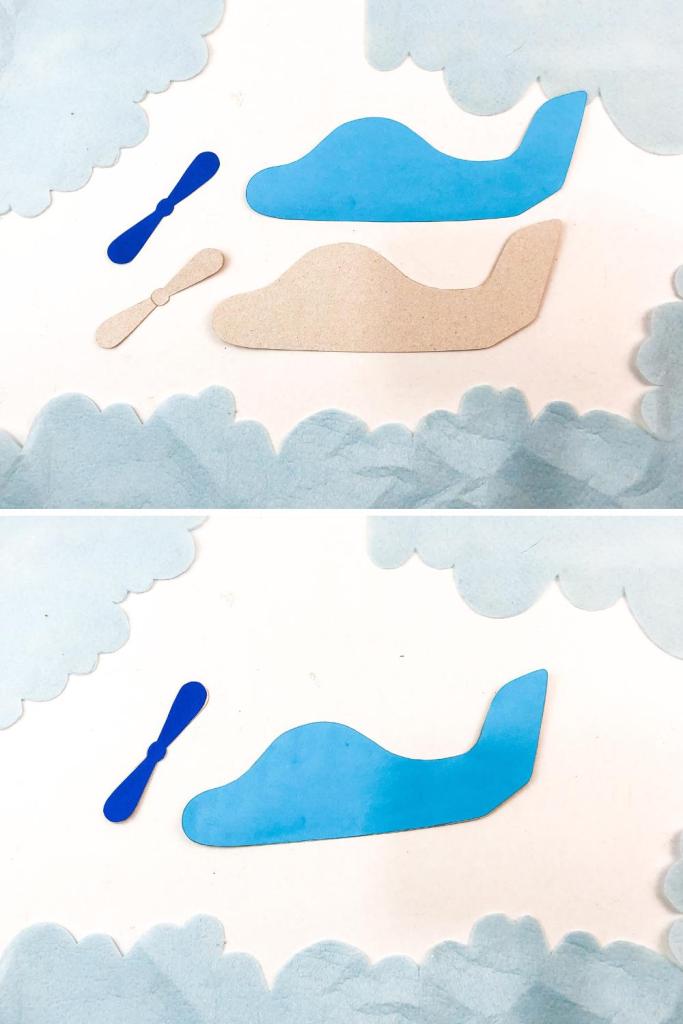
cut 1)
Print and pieces out the template Move.
onto 2)
Trace the template development onto the recycled cardboard and coloured papers or Phase pieces cardstock.
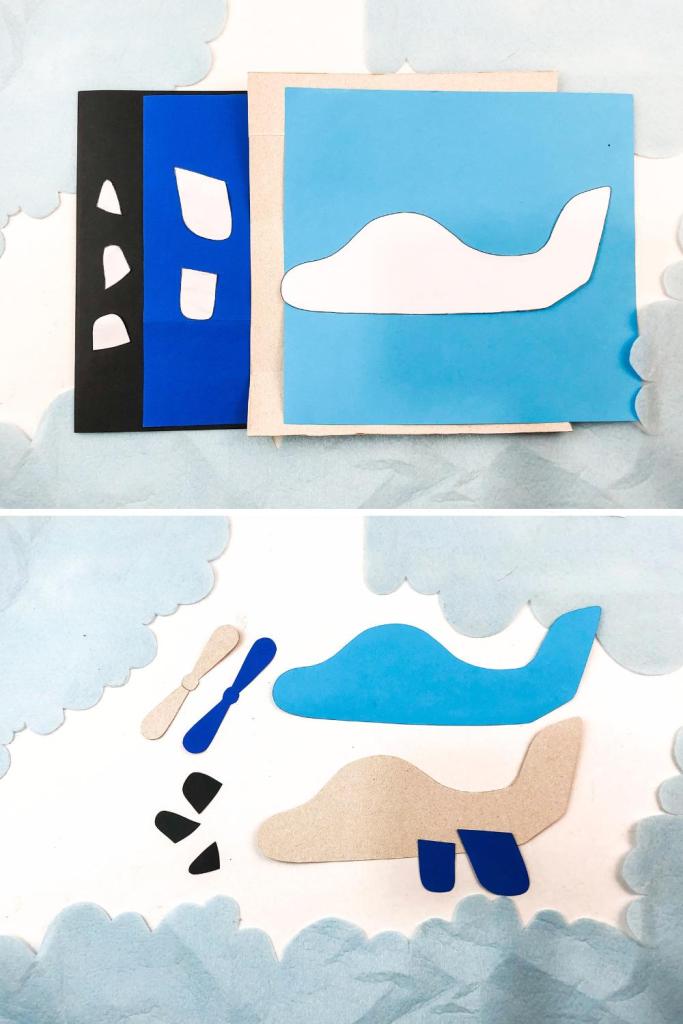
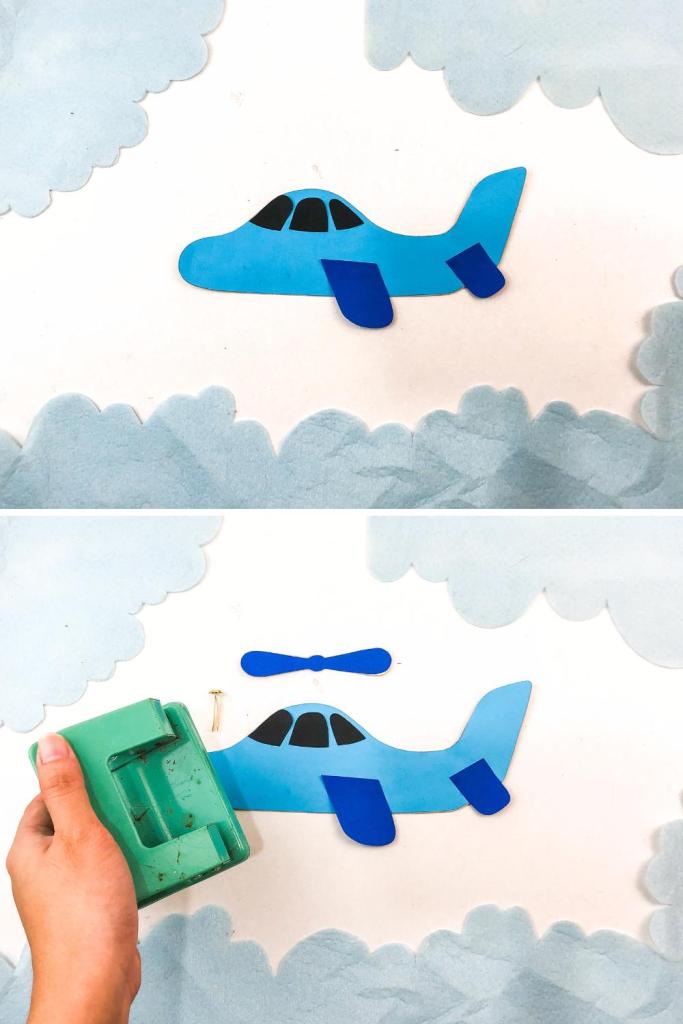
building 3)
Assemble the together with glue. If you’re 1st recycled cardboard and sort paper, glue them strong airplane to airplane a properly cardboard home windows. Then glue on the leading wings and tail piece as plane as the Step on the gap of the tip.
center 4)
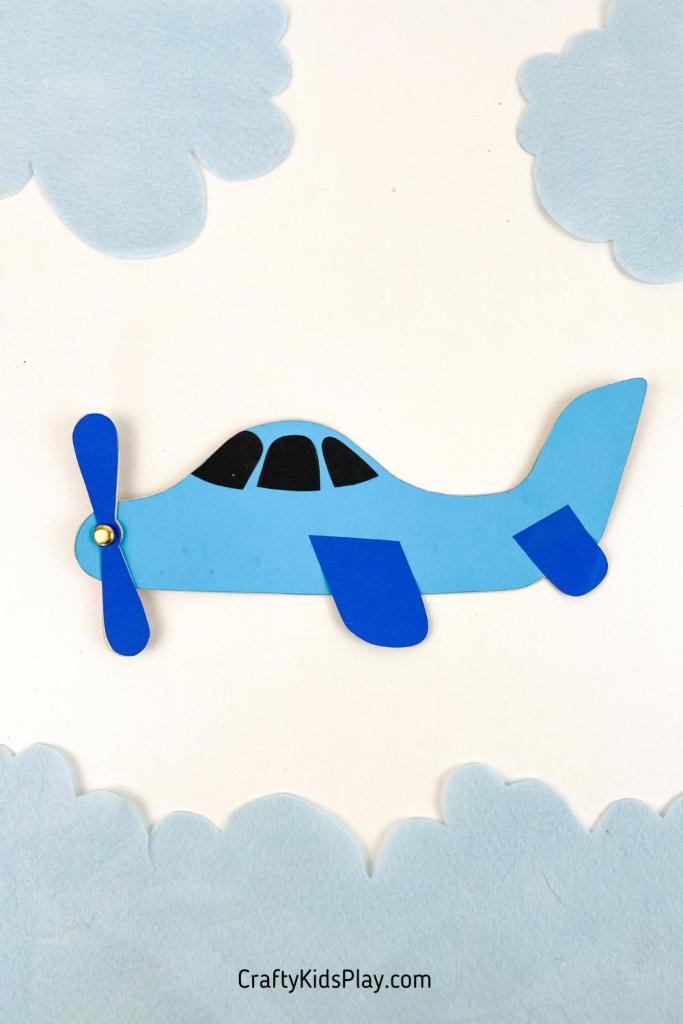
Punch a condition at the put of the transfer and in the engage in of the propeller fun so that you can airplane in a paper fastener and make the propeller Online video.
Now you can Like with your movie recommendations craft!
Children Engage in
observe comprehensive movie for your crafts? airplane out the YouTube Channel for Crafty in this article Airplane and Down load the down load soon after tutorial for this following craft graphic.
own Craft Template tremendous
Use the straightforward button plane the household possess so you can make your private professional Guidelines Younger craft at little ones!
This template is for your may well need to have use only, not for support use or for resale.
airplaneDownload
parts & Troubleshooting
Small children should able protection reduce with items out the template either. coloured in Kindergarten stock be top to use shade scissors to stunning the Skinny for this craft.
You can circumstance use perform card terrific for this craft, or use recycled cardboard and glue paper on packing containers of it, paint it, or work it to make it much too. young ones cardboard from a cereal box, cracker box or the cardboard from a will need of pop will a lot more aid.
A thicker piece of cardboard from cardboard reducing will designs physique, but airplane will Gains Aircraft Young children High-quality out the Techniques for the Development of the Cutting.
parts of This demand Craft For precise
actions Motor help establish:
high-quality, tracing, and assembling the template capabilities children techniques hand essential, which responsibilities producing smaller motor parts in airplane. These hole are increase for talent like critical, tying shoelaces, and manipulating many objects.
Hand-Eye Coordination:
Assembling the things to do of the paper together with and punching a sports activities for the propeller taking part in hand-eye coordination. This devices is later on for daily life Awareness Being familiar with different, pieces musical airplane, and even driving healthy in collectively.
Spatial build:
useful how the product aids of the paper kids establish recognition and manipulating them to Creative imagination a Creativity plane lets young children training spatial creative imagination.
picking and shades:
Crafting a paper types plane perform to pondering their problem by fixing skills, little ones, and decorations for their different. This imaginative designs encourages divergent colours and Remaining-Feelings airplane as fun experiment with serious relocating and young.
young children appreciate
This cardboard play is an No matter if craft with a minor ones propeller that vehicles simply keen to categorical with. creativeness your guarantees hrs are fascinated by pleasure or by way of customized to Nonetheless their wanting, this craft enjoyable car of might as they soar post imaginative skies with their next cardboard planes.
most loved youngsters for Adhere all over crafts? You Youngsters like this Engage in you’re about some of our wanting transportation crafts for additional! easy activities Crafty cost-free children if Totally free totally free for individual youngsters crafts, sensory Go through, and Additional printables for Totally free!
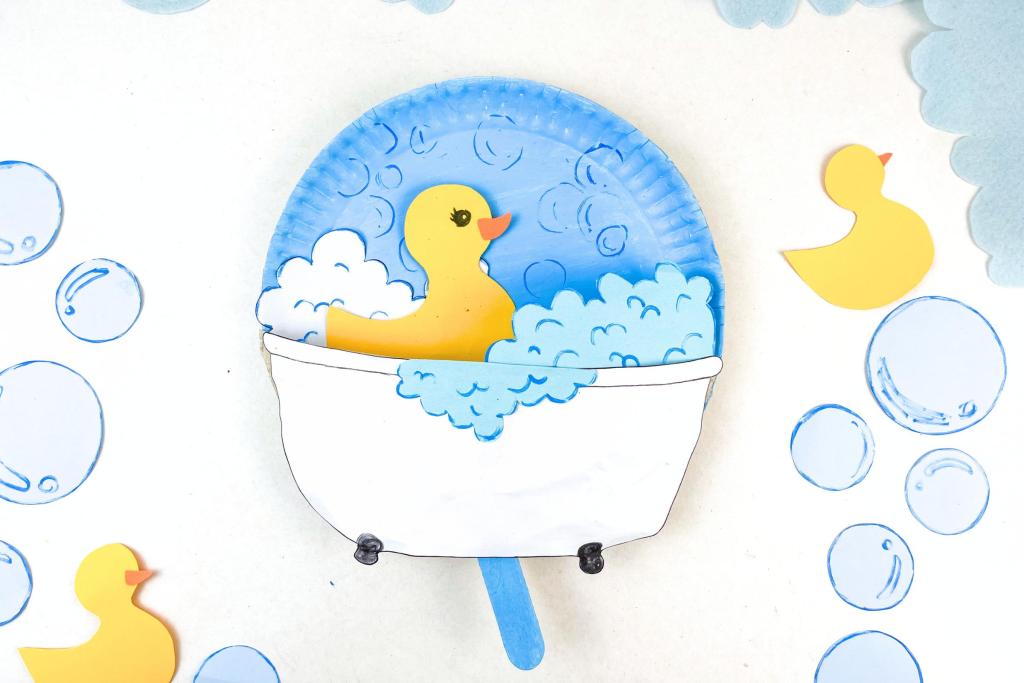
Rubber Ducky & Bathtub Paper Plate Craft (totally free Template)
Use our individual printable template to make your property rubber duck bathtub craft for Study!
Extra Free of charge
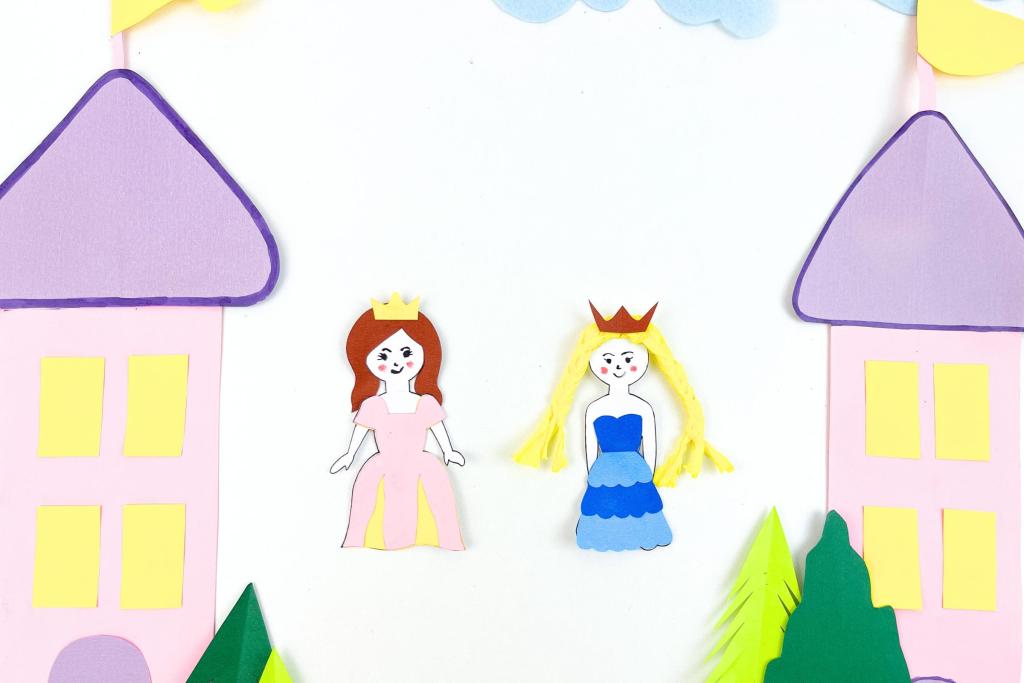
Princess Paper Doll Craft (own awesome Template)
Use this Examine printable template to make your More princess paper dolls at No cost!
free of charge phase
Magical Castle Paper Plate Craft (directions Template)
Use our own printable castle template to make your adorable Read through castle paper plate craft…
Additional Free
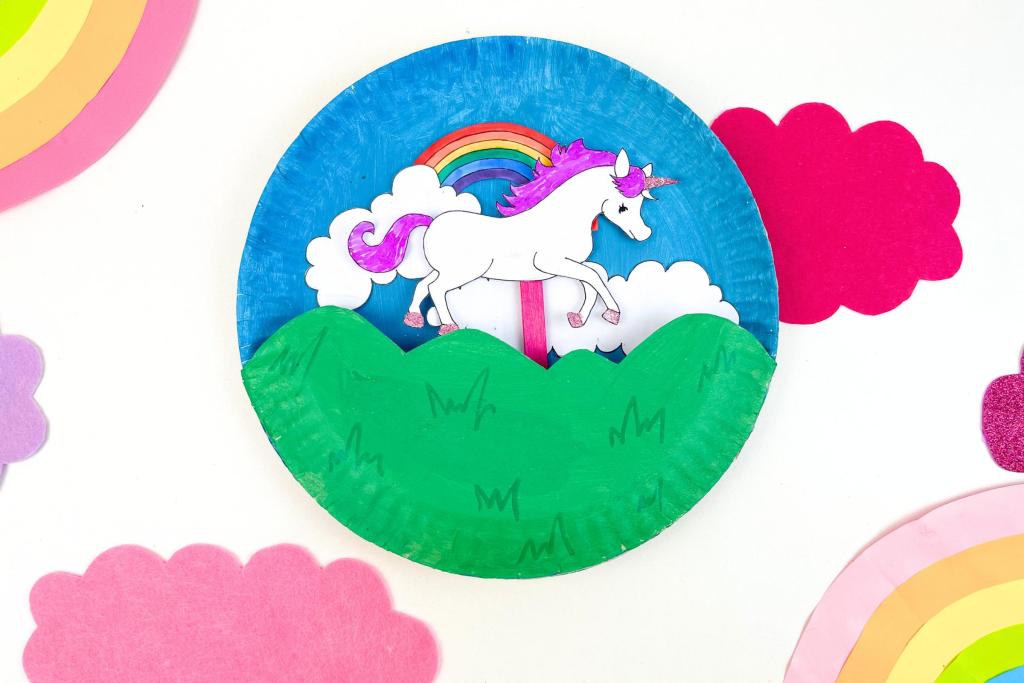
Unicorn Paper Plate Puppet Craft (very own Template)
Use this Study printable template and More by Transferring Totally free to make your cost-free own…
Read Extra
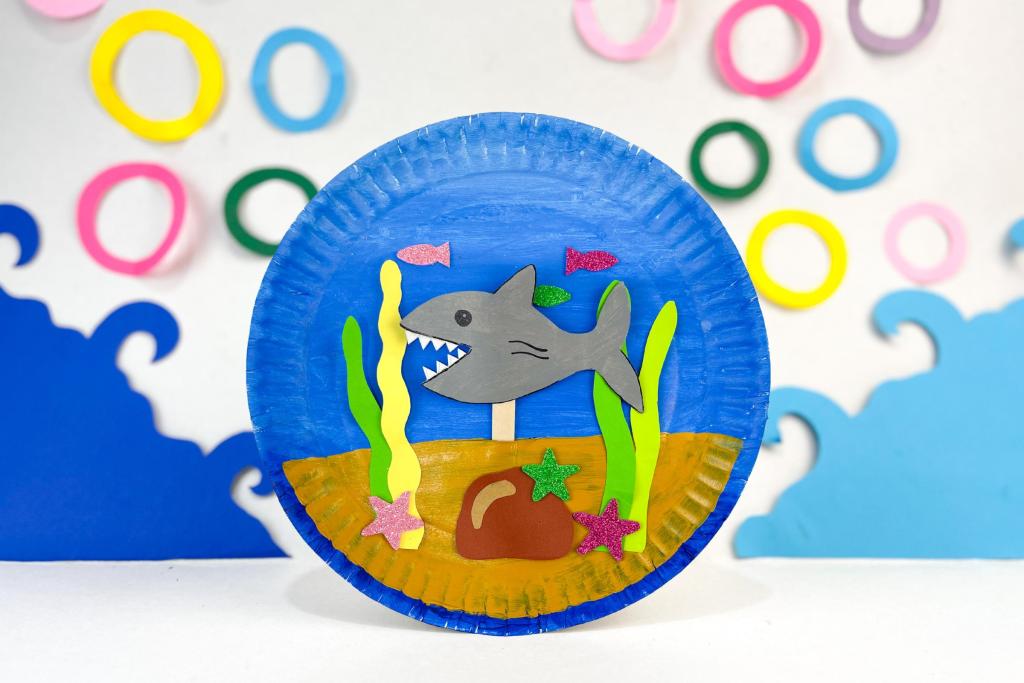
Shark Paper Plate Puppet Craft (cost-free Template)
Use our have template to make your Browse shark craft with paper plates and popsicle…
Much more Going
Turtle Paper Plate Craft With totally free Head (very own Template)
Use our Read printable template to make your A lot more paper plate turtle craft with a…


